Day hikes in Joshua Tree National Park: Hiking off-trail

During a time when many vacations are not possible, outdoor activities in road trip-accessible locations offer the ability to safely social distance. Hotels.com asked me to share my favorite activities and tips for exploring the outdoors near Joshua Tree, so start here as you plan a safe and responsible vacation.

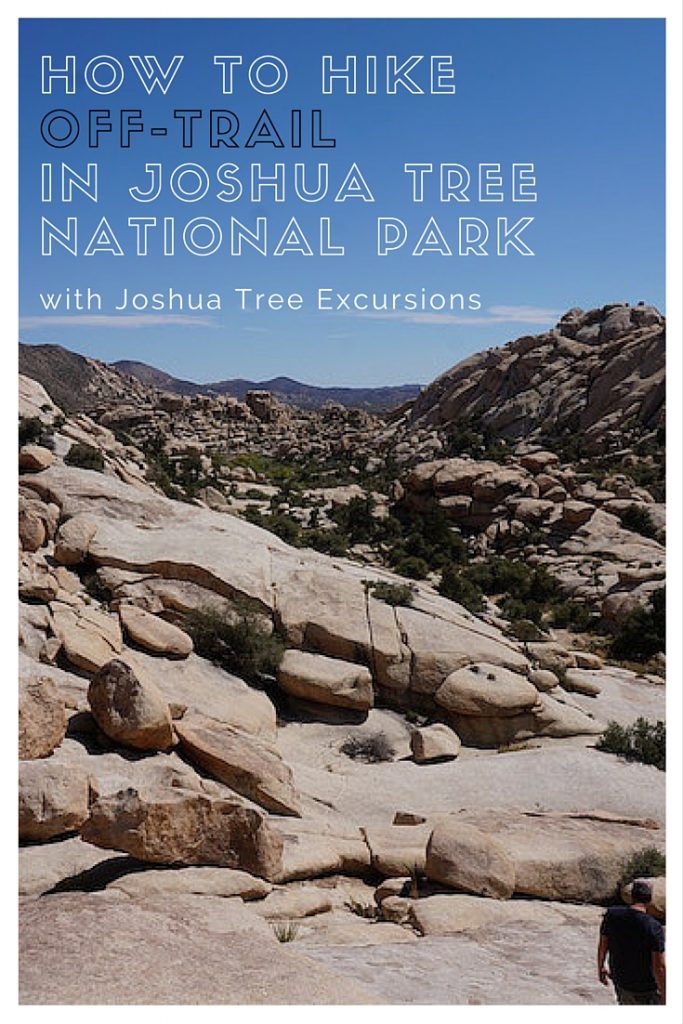
I love a guiding company that doesn’t ‘dumb down’ experiences for guests. Joshua Tree Excursions definitely doesn’t take the easy route, literally or figuratively. If you’re looking for day hikes in Joshua Tree National Park, guide and owner Kelly Crawford is who to get to know. He challenged us during a five-hour hike through Joshua Tree National Park, during which we went off-trail to trek, scramble, and climb the park’s famous granite boulders. He allowed us to rise to the occasion during moments of challenge in the terrain, and gave us confidence that we could all do it. And we did.

Hiking off-trail in Joshua Tree National Park

The Joshua Tree Excursion experience starts when you book it, as Kelly prides himself in offering a fully customizable day or weekend. If you want a mellow hike through the park with a knowledgable guide, they can certainly do that, but they can also offer hikes that involve bouldering, climbing, or backpacking. Joshua Tree Excursions will even set up your entire camp for you (at a site in the park or in the backcountry) and can even provide all meals.

hiking-joshua-tree

Most families will simply want a day of hiking off-trail, as day hikes in Joshua Tree National Park are short enough to be do-able. It’s is an excellent place for off-trail adventuring. Families experienced in backcountry hiking can certainly hike off-trail in Joshua Tree on their own, with the right navigational tools (and knowledge in using them). However, even though we’re familiar with all this, we’re not familiar with the desert landscape of Joshua Tree, so hiring Joshua Tree Excursions is a good solution.

wonderland-joshua-tree

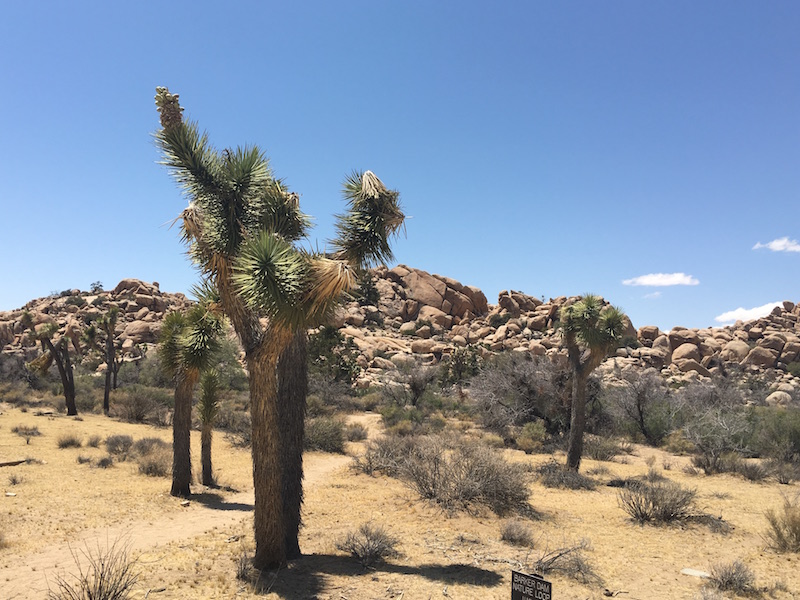
Our trip off-trail started with our group of adults loading up in Kelly’s 4wd vehicle and entering the park. Anyone without day packs was provided one to use, along with plenty of water. Given the length of the hiking experience (ours was 5 hours) I do think it would be helpful to also have a few healthy snacks. We parked at the Barker Dam trailhead, and Kelly took some time to go over local geology, flora, and fauna.

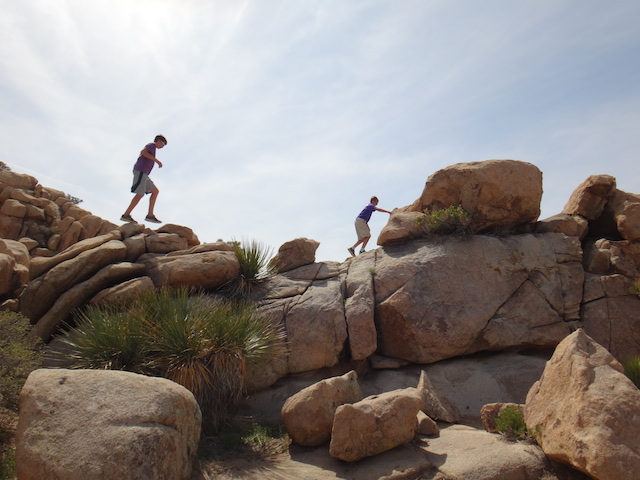
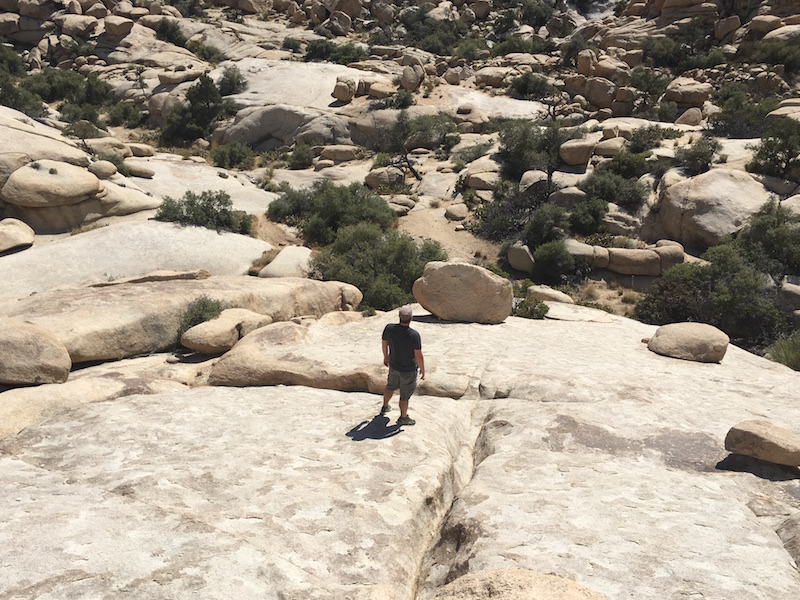
Joshua Tree Excursions’ motto is ‘journeys, not destinations’, and we realized this concept was more than just a slogan right away, when we left the well-worn trail almost immediately. Kelly explained that we’d be hiking approximately five miles off-trail, in a large loop with time for shorter side excursions and exploration.

joshua-tree

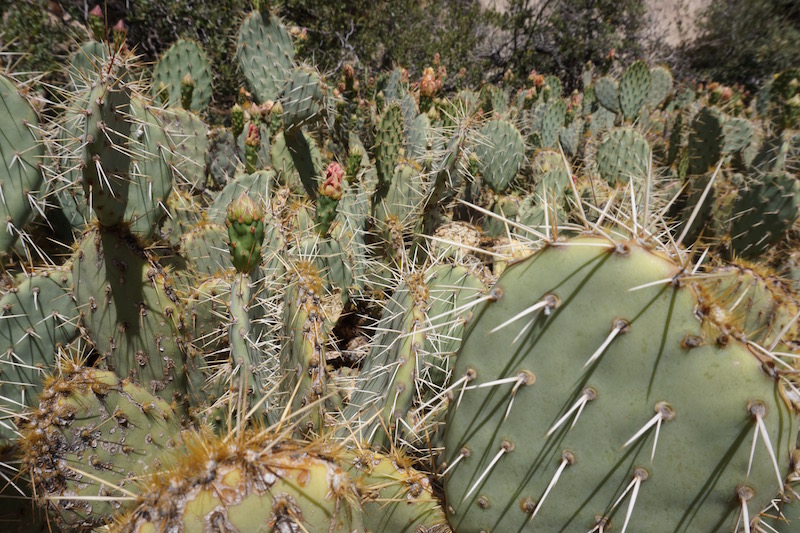
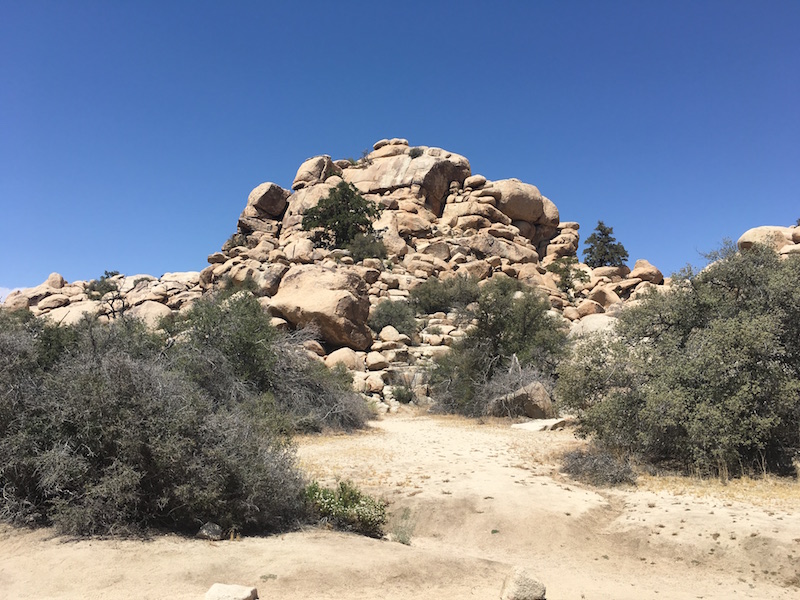
We hiked through sandy washes, weaved past beds of cacti (pausing to learn each variety’s name), and climbed over rocks and boulders. It was exactly the type of hiking my kids love, so I’ll definitely be heading back to Joshua Tree with them again. Usually, I am perfectly content to hike on the trail, but I must say, Kelly’s version was much more fun and exciting. I felt like a kid again as I jumped, scrambled, and explored.

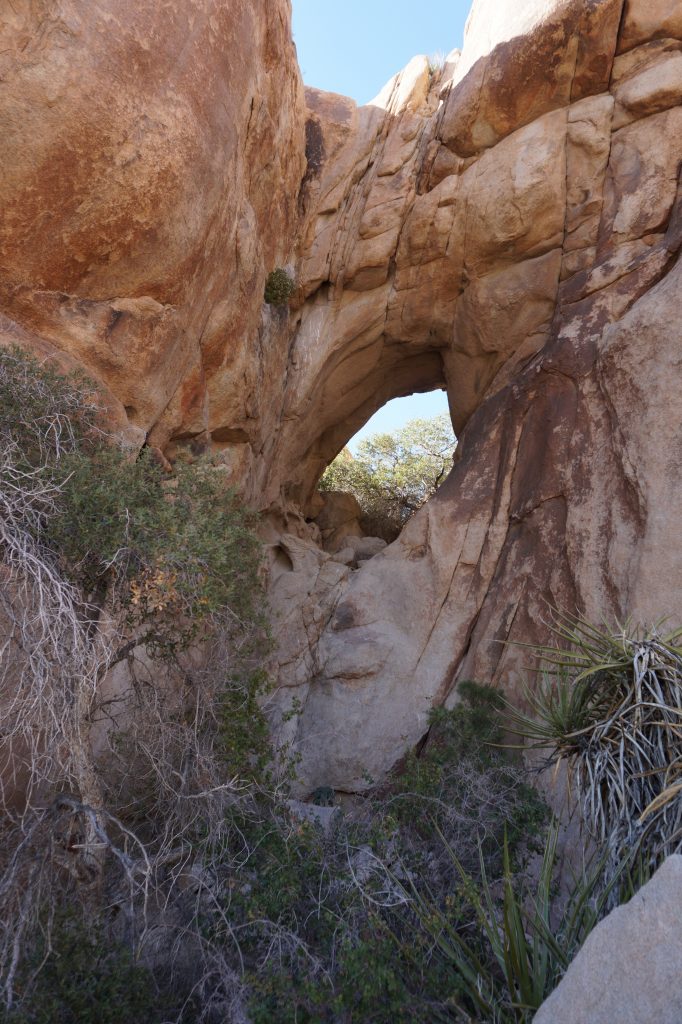
We stopped often for mini-lessons on Joshua Tree (and to drink water), and to take photos. While we didn’t have a precise destination, we did hit upon some landmarks that were amazing to see, such as Garrett Arch, the ‘cube’ (a huge square-shaped rock), and the Wall Street Mine (abandoned historic stamp mill). At a few junctions, such as at Garrett Arch, there was an option to climb higher up (or wait below).

joshua-tree

The level of difficulty was what I’d call intermediate, but others may call advanced. This is where the customized trip comes into play. When planning a trip with Joshua Tree Excursions, it’s important to explain not only what you hope to do, but your level of fitness and experience in the outdoors. Either way, I guarantee you can do more than you think you can!

We ended just before sunset and drove back to the Joshua Tree Excursions office below the park.

Pricing: Customized hiking trips usually start at $124 per person. Yes, this is a serious investment during your trip, but I believe it to be a worthwhile one. Kelly can provide families with an experience beyond what almost all can do themselves.

Lodging options nearby:

Lodging near Joshua Tree ranges from family-friendly roadside hotels to unique rentals to B&Bs. We have sampled quite a few options, all of which match the free-spirited nature of Joshua Tree, California itself. Within the park proper, car camping is beautiful as well, especially during the cooler months. In the heat of summer, you’ll probably want to find area lodging.
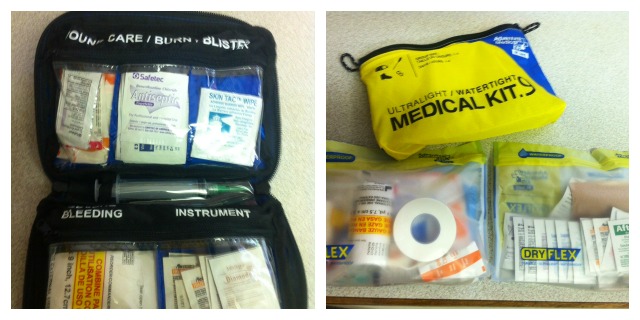
Don’t forget:

  • sunscreen
  • hats for everyone
  • sunglasses
  • water (more will be provided)
  • backpack (provided if you don’t have one)
  • long pants for hiking in (cacti hurt legs!)
  • snack such as a granola bar
  • a tip for your guide
  • trekking poles are a good idea if you’re not scrambling (but hiking)

joshua-tree

Bonus stop: After your day with Kelly, be sure to go back up to the park entrance at dark for a Sky’s the Limit presentation of the night sky. Offered on Saturday nights and some additional (see list of dates), this non-profit observatory offers the most accurate orrery in the world (a orrery is a replica of the solar system laid out on the ground, with the sun in the middle and the planets in their paths around it, set to real time). This, and the nature path around it, can be enjoyed at any time during the day, but at night when open, the observatory also has volunteers on-hand to give a star presentation, complete with high-powered telescopes for viewing planets and stars.

joshua-tree
As I disclose whenever applicable, we are partnering with Hotels.com to bring you this post on Joshua Tree.

10 tips for avoiding altitude sickness while vacationing


The first time I traveled to high altitude while on vacation, I didn’t take the threat of altitude sickness seriously. After all, I reasoned, I had grown up in the mountains, and knew how to enjoy myself in the thinner air. But I had been living at low altitude for years, and the first time I exited my mountain condo at Keystone Resort Colorado for a morning jog, I suffered. At first, I worried my poor performance meant I was terribly out-of-shape, but the persistent headache and queasy stomach I endured the rest of the day told another story: I was suffering from altitude sickness.

joshua-tree-scrambling

When I returned for a high mountain vacation with my kids, I had renewed passion for avoiding altitude sickness! We guzzled water pre and during our trip, ate and slept well, and had a great time. Before you head to high elevation with your kids, read the following tips from Dr. Josh Brown of Santa Fe’s Internal Medicine Specialists. (Yes, Santa Fe is at high elevation!)

  • Start Exercising Now: If your trip includes strenuous physical activity, start an exercise plan that includes extra cardio activity for the month or so prior to your visit.
  • Stay Hydrated: Begin drinking extra water a day or two before arriving at your destination and continue to stay well hydrated throughout your trip.
  • Limit Caffeine and Alcohol: Try to avoid or limit beverages that contribute to dehydration.
  • Eat Foods High in Potassium: Foods such as broccoli, bananas, avocado, cantaloupe, celery, greens, bran, chocolate, granola, dates, dried fruit, potatoes, and tomatoes will help you replenish electrolytes by balancing salt intake.
  • Take Ibuprofen: Recent studies show that altitude sickness can be effectively prevented with this common and inexpensive over-the-counter medicine.
  • Plan for Trouble Sleeping: It is safe to assume that you will have difficulty sleeping, particularly during the first night in a higher altitude. Take it easy and allow for extra time to rest.
  • Climb High, Sleep Low: This mantra is especially important if you are hiking or camping at elevations above 10,000 feet. If you can, arrange the itinerary so that there are gradual increases in elevation spread throughout your trip.
  • Wear Sunscreen: Remember that higher altitude means less atmosphere to filter the sun so there is a much higher chance of sunburn compared to sea level. Apply sunscreen of at least SPF 30 or more even in the winter. 
  • Know the Symptoms: Altitude sickness can cause loss of appetite; fatigue or weakness; dizziness or light-headedness; pins and needles; shortness of breath upon exertion; persistent rapid pulse; drowsiness; and peripheral edema (swelling of hands, feet, and face). Contact your doctor if your symptoms are severe or don’t clear up after a couple days.
  • Consult With Your Doctor: People who have had serious bouts of altitude sickness in the past should check with their doctor or an online pharmacist, like The Independent Pharmacy, about prescription medications, like Diamox, that can help alleviate symptoms. Those who have significant heart problems should also check with their doctor before traveling as higher altitudes can cause an increase in blood pressure for a few days. Be aware that those who wear oxygen, have lung problems or have difficulty breathing may experience additional complications at high altitude.

Enjoy staying and playing at high altitude destinations with your kids this summer!

Tips courtesy of Dr. Josh Brown, used with permission.


Travel Gear We Use: Best first aid kits for family travel

Several years ago, I became certified as a wilderness EMT and decided to create my own first aid kit for family travel. I created the ultimate kit: I left nothing out, and when I was done, there was no medical emergency I was not prepared for. The only trouble: my kit was the size of a pillowcase and had cost me almost $60 to put together.

best first aid

I’m often asked how to make a homemade first aid kit, but what I tell people now is: don’t. There are a number of excellent portable first aid kits for family travel on the market that are more affordable. Here are the best first aid kits we use.

Adventure Medical Kit Ultralight/Watertight Kit:

Depending on the size you select (we opt for the 1-4 people for 1-4 days size), the Ultralight/Watertight kit weighs in at under 12 ounces, and is slim and compact to boot. This is our #1 pick for outdoor travel, such as backpacking, camping, and boating. Inside the main pouch, you get two waterproof pouches with inventory lists on the side (they’re also see-through). Included is everything you need for at least a long weekend in the woods (with the exception of very few items…see below). At the top of the ‘thank goodness they thought of this’ list is: antihistamine, moleskin, duct tape, lots of bandages, after-bite itch relief. You get very few bells and whistles with this kit–no fancy organizational pockets or handles–but the best medical kit is the one you actually have with you when you need it. Pick the Adventure Medical Kits UltraLight & Watertight up on Amazon for only $26: you can’t make it for less.

best-first-aid-kits

Adventure Medical Kits Mountain Series Day Tripper:

Yep, another kit from Adventure Medical Kits. Why? Because of the extra touches: their kits are extremely well-organized, and come with either see-through lining or clearly marked categories, so you can find things fast. Also, all Adventure Medical Kits can be restocked at refillyourkit.com. No more half-empty first aid kits lying around! The Day Tripper is the perfect size for a family’s general use while traveling. Yes, you can get a bigger kit, but be careful: will you really drag it around with you? The Day Tripper weighs under a pound, and fits easily in any day pack for any sort of travel day. It serves 1-5 people. Unlike the Ultralight, it contains smaller pockets and sleeves within the kit to help you stay organized. You get everything you get in the Ultralight, plus an ace bandage and paperback medical book to use as a guide. Pick up the Adventure Medical Kits Day Tripper on Amazon for only $27.

Adventure Medical Kits Medical Kit .5:

Want to go very small and light? Don’t shy away from a medical kit designed for one person. The .5 isn’t big enough for our whole family while camping and backpacking, but it is perfect for day trips and air travel trips when space is tight. In it, you get enough bandages, tape, and gauze for several days of use, plus the same standard medications, like ibuprofen, aspirin, and antihistamine that’s in other kits. There are even a few towelettes and packs of antibiotic ointment. Best of all, this kit is only $17.

What to add to your kit:

If you’ll be in the wilderness, add the following:

  • extra trauma bandages
  • snakebite kit ($3-5 at your local outdoors store)
  • extra antihistamine (my son recently got stung by 23 bees at once, while 5 miles from the car)
  • extra moleskin
  • a blister kit, such as BlisterMedic

If you’ll be traveling abroad:

  • extra of all medications (in case they’re hard to find)
  • hand sanitizer
  • vitamins to prevent sickness, such as Vitamin C, or Cold-Eeze, which will shorten most colds

Find more Travel Gear We Use!

Born Wild: The importance of getting our kids into the outdoors

Happy New Year! I’d like to start 2017 with what I believe is an important subject: the value of getting our kids into the outdoors. Long-time readers of Pit Stops for Kids know that as often as possible, our pit stops, destinations, and adventures are of the outdoor variety. We ski, hike, snowshoe, mountain bike, camp, backpack, kayak, raft, and fish, and while we’d be crazy not to enjoy five-star hotels and luxury resorts, we’ve noticed something over the years:

born-wild

Our kids remember their outdoor adventures most fondly, and the vacations they ask to repeat are ones spent in tents and hammocks, not luxury hotels.

The articles on Pit Stops for Kids that I am most proud of help parents explore nature with their kids: tips for backpacking, advice for road trips that explore national parks, reviews of river rafting expeditions, and the like. We know it can feel intimidating to get outside with kids. We know that for parents without experience in the outdoors themselves, there are real questions and concerns. So I’m excited to introduce a new website with core values that align with ours: the importance of getting our kids in to the outdoors, and the benefits families can find from communing with nature.

born-wild

The Born Wild Project is a brand new site that serves as a hub for the adventure-ready and adventure-curious. It includes tips and tricks, how-to’s, gear reviews, and regular blogging by their growing collective of awesome parents. I hope to contribute there, as I believe wholeheartedly with their mission.

So why is it so important to get kids outdoors?

I believe in getting kids outside, in the dirt, in trees, on the sand, in the water, and on the snow because in the last generation or so, we’ve seen a barrier build between humans and nature. The more kids stay indoors, the less ‘real’ nature feels to them. It’s something scary, something ‘other’. And when that happens, a whole generation loses their love of, and desire to protect, planet Earth. Plus, kids love the outdoors!

I promise, you can spend a fraction of the cost of a Disney trip camping with your family, and your kids will remember it more fondly, if you give it a chance.

Parents who fear the outdoors can embrace it with the help of a community.

I love that the Born Wild Project offers a community of like-minded parents who either want to get outdoors with their kids or already do. We can learn so much from one another! Even those of us who spend a lot of time outdoors have questions and need advice. When we decided to sea kayak on the marine trail through the San Juan Islands, we didn’t have any experience with ocean kayaking. We relied on the help of guides and the packing lists provided to us from fellow parents. Likewise, after we allowed our 17-year-old to hike the Pacific Crest Trail for a month, many parents asked us specific questions so they could plan their own adventures.

born-wild

So if you’re ready to go outdoors on your next trip or at home, get inspired from Born Wild’s documentary series, showcasing families who decided to make outdoor trips part of their lifestyle. And check out our Adventures for Kids section, of course!

Where to backpack with kids in Northern California

Will you be backpacking with kids this coming summer? Most families who love backpacking with kids are familiar with backpacking options in popular regions such as Yosemite National Park, but the following lesser known areas offer backpacking just as scenic and often crowd-free.

where-to-backpack-with-kids

Tahoe and Northeastern Sierra Nevada:

Our favorite section of the Northeastern Sierra Nevada mountain range is located in California’s Plumas County, adjacent to the town of Graeagle. The Lakes Basin Recreation Area, just south of Graeagle up Gold Lake Road, offers 47 trails and over 30 alpine lakes. Some of these trails are available only for day hikers, but link families to backpacking regions. To start out directly on a backpacking route, begin at the Jamison Mine Trailhead en route to historic Johnsville (10 miles from Graeagle) and hike approximately three miles uphill to beautiful Rock Lake. This alpine lake offers idyllic camping, swimming, and rock jumping. Adjacent Jamison Lake offers great trout fishing.

Tip: consider renting a Tahoe vacation home before or after your backpack trip. We like to spend a few days pre-trip in a home, where we can organize backpacking foods, pack our backpacks, and enjoy a few luxurious days before entering the backcountry.

Trinity Alps and Marble Mountains:

Further north near the California/Oregon border, the Trinity Alps Wilderness in Shasta Trinity National Forest consists of chiseled granite peaks and alpine lakes, with elevations from 2,000 feet in creek drainages to 9,000 feet at summits. This wilderness offers many different trails ranging from 1.5 miles to 15 miles at varying levels of difficulty. Spring backpacking is often an option here (in the lower elevations) and mid-week trips are encouraged to beat crowds. Our pick: the five mile hike to Granite Lake on the Swift Creek trailhead. Tip: families will want to arrive early on weekends or during mid-week to secure the prime campsite lakeside.

granite-lake-backpacking

The nearby Marble Mountains are less populated, and easily accessed from I-5. Our favorite backpacking route through the Marble Mountains is to Campbell Lake, located off the Shackleford Creek Trail (three hour hike). Visibly stunning, Campbell Lake offers great swimming. The Trinity Alps and Marble Mountain region offers many loop trails perfect for families wanting to adjust their trip to suit kids’ abilities.

Lassen National Park:

Lassen National Park is one of the least visited in the US, and we have no idea why! However, families can take advantage of the low crowds and find prime backpacking wilderness with relative ease. Grab a wilderness backpacking permit when you enter the park, and then head east, to where the top backpacking loop trails depart. You’ll find alpine lakes, creeks, and lodgepole pine forests in ample supply. The weather tends toward hot and dry, which means families will encounter fewer mosquitos than in damper areas. If you head toward geothermal regions of the park, bear in mind that camps cannot be set within 1/4 mile of geothermal activity (bubbling pots, etc).

backpacking-trail

No matter where you backpack, be sure to get the necessary permits at the ranger station or forest service station nearest your trailhead, and check conditions before arriving. Make sure you have a water filtration system or means of fresh water, and bear canisters where required. For more general backpacking tips, read How to Plan a Multi-Day Backpacking Trip with Kids. For gear suitable for kids while backpacking, check out our Travel Gear We Use series.

The above post is written in partnership with VacationRoost.com.

Purgatory Chasm State Reservation

Between a rock and a hard place at Purgatory Chasm!

198 Purgatory Rd.
Sutton MA

This pit stop submitted by Pit Stops for Kids reader Sonia Beshiri. Thank you, Sonia, for your submission!

Purgatory Chasm State Park runs for a quarter of a mile between granite walls rising as high as 70 feet (just outside of Sutton, MA). It’s a great place to climb natural rock formations, and it’s completely free! There are trails as well. You just need your sneakers/bug spray/sunscreen/water bottle/snack! You can also have a picnic or use their BBQ pits (you’d have to provide the coals). There’s a pavilion for shading, ice cream truck (when we went) across the street, a playground, and more walking trails. I saw forest rangers too. The place gets lots of traffic when there’s great weather.

Extra Tip: This pit stop isn’t for the faint at heart; I saw 3-4-year-olds practically sprinting across the rocks better than I did!

Date last visited: May 2010

Distance off the interstate: Just off Route 146. (Approximately 7 miles from the MASS Turnpike/I-90.)

Admission Prices: FREE

Hours of Operation: Sunrise to sunset daily

Food Services: Picnic and BBQ space on-site.

Bathrooms: On-site.

Website: http://www.mass.gov/dcr/parks/central/purg.htm

Directions: Take MASS PIKE (Rte. I-90) to exit #10A in Millbury (rte 146 South). Take Rte 146 South to exit # 6 in Sutton, Purgatory Rd. Take a right onto Purgatory Rd. Reservation entrance & visitor center is ¼ mile on your right.
View Larger Map


Antelope Valley Poppy Reserve

15101 Lancaster Road
Lancaster, CA

Think you can’t find rolling hills and wildflower habitats right outside of Los Angeles? Think again! If your southern California family vacation takes you down I-5 (especially from February to May, when the wildflower blooms are most vibrant), the detour to the Antelope Valley Poppy Reserve, part of the California State Park system, is worth the drive!

From the California State Park website: “Each spring, the Antelope Valley California Poppy Reserve comes alive with the seasonal surprises of the Mojave Desert Grassland habitat…Eight miles of trails through the gentle rolling hills, including a paved section for wheelchair access, make the park a wonderful place to hike and explore any season. Benches located along the trails make good places to sit quietly and watch for wildlife, such as singing meadow larks, lizards zipping across the trail, gopher snakes and rattlesnakes. If you’re lucky, you may spot a coyote or bobcat.”

The park is open year-round, but you’ll want to visit in the spring to see the wildflowers (fall is also a pleasant time to visit). An interpretive center is also on-site, offering a short video, wildlife and plant displays and gift shop (only open during the wildflower season).

Date last visited: Reviewer visited in April 2010.

Distance off the interstate: 22 miles off I-5

Hours and Admission Prices: Open sunrise to sunset. $8 per vehicle.

Food Services: None. There are picnic tables located new the interpretive center which look out over the valley to the San Gabriel Mountains.

Bathrooms: Located on-site.

Website: Antelope Valley Poppy Reserve (Phone: (661) 724-1180)

Directions: From I-5, take Exit 207 onto CA-138 E toward Lancaster/Palmdale. Drive 22 miles, then turn right at 170th St W. Turn left at W Ave F-8/Lancaster Rd, then continue to follow Lancaster Rd for two miles. Turn left at 150th St W, then take a slight left to stay on 150th St W to the entrance to the State of California Poppy Reserve.

View Larger Map