Summer sandals for kids: shoes for summer travel

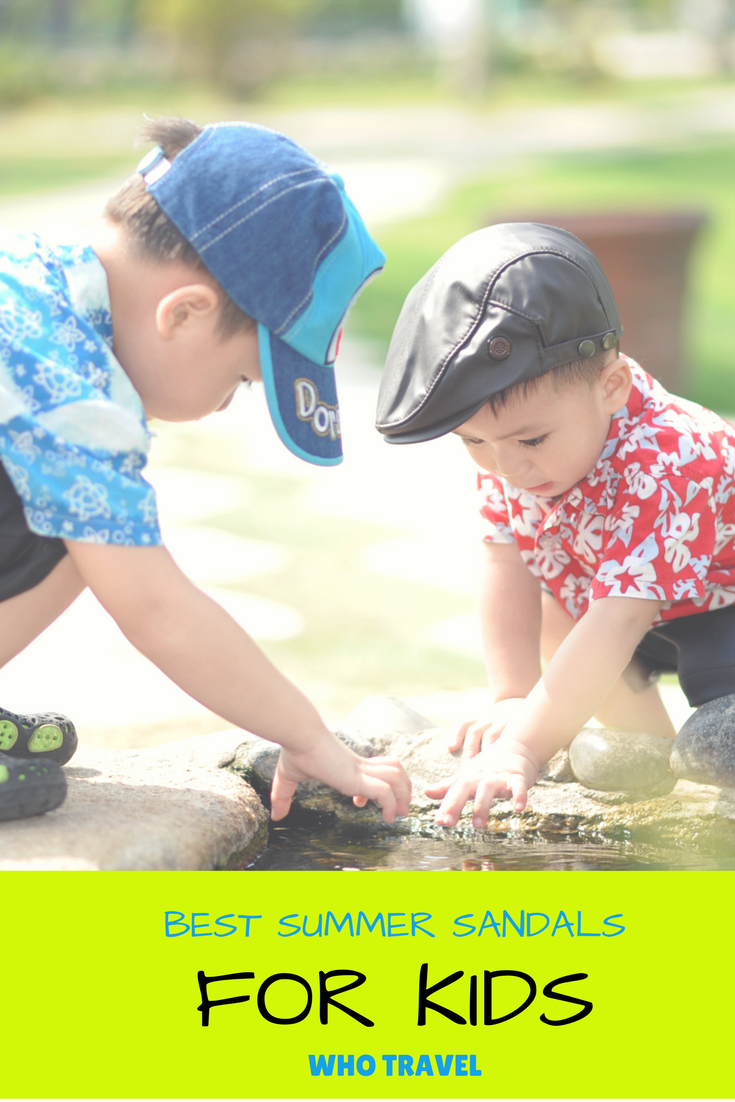
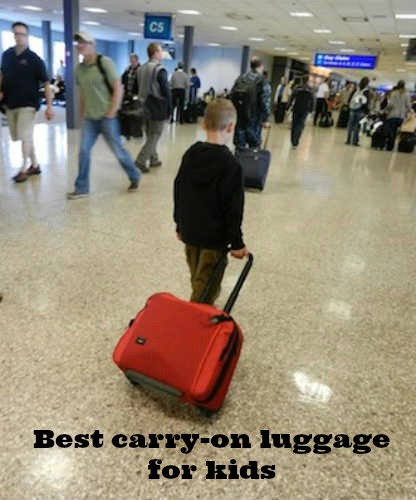
It’s that time of year…time to go through the closets, size kids’ feet, and buy shoes for spring and summer travel! We’re parents too, and we know it can be frustrating to buy summer sandals for kids only to have them discarded: maybe they’re too hot or too pinchy or too…something. Luckily, we review travel shoes all the time, taking the guess-work out of the process for you. When it comes to children’s sandals for travel, we put them through their paces, chat with brand reps, and pack the shoes in our own travel bags before deciding which shoes to recommend. Below are our top summer sandals for kids for this year:

best summer sandals

Keen Moxie Mary Jane:

This Mary Jane option is cute while remaining tough as nails, which is just how a girl’s shoe should be. You get the signature Keen rubber overlay around the toe, guaranteeing that extra protection while your kid explores, and while not waterproof, the Moxie does well in light rain or small puddles. Since this sandal is closed-toed, it’s game for just about anything; our East Coast editor’s daughter wore hers everywhere from the playground to a spring break beach trip. Pick up the Moxie Mary Jane in toddler through big kid size.

Keen Chandler and Newport:

The Chandler sneaker is made of breathable quick-dry mesh with a non-marking rubber sole and good, deep tread. No slipping in this shoe! There are no laces to tie—that was a big plus in the eyes of my six-year-old—but the hook-and-loop strap system still allows for a snug, secure fit, which makes Mom happy. This sneaker is available from toddler sizes ($50) up through big kids’ size 7 ($55). Find it for significantly less on Amazon.

Note: Last year, we recommended the Chandler CNX, which we still love. If you need a shoe that’s more rugged, check it out.

My nine-year-old wanted to try an outdoor sandal rather than a sneaker, because he wanted to be able to splash in the water as well as hike. The Newport Neo fits the bill. Lightweight and very supportive, this sandal has the same fabulous tread to grip uneven surfaces. It’s constructed of materials that repel water and offer natural odor control (every #boymom knows how important that is!). Plus, it’s machine washable. Newport Neo is available for $55 from little kids’ size 8 up through big kids’ 7.

amzn_assoc_placement = “adunit0”;
amzn_assoc_search_bar = “true”;
amzn_assoc_tracking_id = “pitstoforkid-20”;
amzn_assoc_ad_mode = “manual”;
amzn_assoc_ad_type = “smart”;
amzn_assoc_marketplace = “amazon”;
amzn_assoc_region = “US”;
amzn_assoc_title = “My Amazon Picks”;
amzn_assoc_linkid = “d635169d55e89adc7bc8dd61d0469f06”;
amzn_assoc_asins = “B01H4X7LAW,B01A0M392I,B010TVS8H6,B01H76W9GC”;

Columbia Techsun:

This sandal is no frills, yet incredibly affordable. If you have kids who are going to outgrow their summer sandals before Independence Day, you’re welcome. At only $35, the Techsun is a strappy sandal that can easily be worn as a light walking shoe as needed, but performs best in the sand, on the river, at the lake, and near the waterpark. Pick it up for even less on Amazon.

Hi-Tec Cove:

This substantial sandal can easily be worn on light hikes, making it one of the best all-purpose shoes for your kids this summer. It’s not flashy like the Uneek, but some kids prefer the understated (I know I have one like that). It’s easy to get the Cove on and off, and the back has a heel strap, but not a full molded back, which makes it one of the more breathable shoes we tried. Pick up the Cove in toddler through big kid size.

Bonus: Crocs Cayman: I fought Crocs for a while, because I am not a huge fan of their looks, but darn it, these shoes are excellent summer travel shoes for young kids. Give in and buy a pair and enjoy having happy kids. Better yet, get the Mickey Mouse version.

See more sandal reviews for summer travel!

Disclosure: Pit Stops for Kids tested multiple sandals for this review. Post contains affiliate links.

Golf vacations with kids: tips for a great resort golf experience

Our kids like to golf, but they’re hardly miniature pros. They’re kids, and they want to have fun on the links. We want them to have fun, too, but also appreciate that other guests may want to enjoy the course without distractions or delays. It’s easy to get stressed when on golf vacations with kids, which is why we’ve compiled the following tips for a great golf resort experience:
pga-tour-kids

1. Pick a resort that’s youth golf-friendly.

When you step into a golf course pro shop and see only adult clubs and apparel, that’s a bad sign. A kid-friendly golf course will have kids’ clubs lining the walls, and even better yet: rentals. Think this is only the case at less luxurious nine-hole courses? Not so. Our favorite golf resort, Brasada Ranch, offers a course for the most sophisticated golfer, and yet staff members still smile when kids come in the door of the pro shop. It’s no surprise to me that Brasada Ranch is pro-youth golfer: this Preferred Hotel is a designated Preferred Family location, which means it offers kid-friendly perks on and off the links. We were able to play nine holes instead of 18 with our kids (not usually allowed for adults on the course), and the starter took extra care to time our start when no one would be crowding us.

Brasada Canyons golf

Likewise, the Coeur d’ Alene Resort in scenic Idaho appeals to kids because of its fun floating green on Lake Coeur d’ Alene, but parents will get more excited that kids golf free. Better yet: sign up for Preferred Hotel Group’s point-based reward program like we have, and Mom and Dad can golf with the kids this time around, and return later on points for a couples’ day on the links. This option extends further than Idaho: to find the best family friendly golf property that’s included in iPrefer, start at PreferredFamily.com/iPrefer. Win-win.

2. Opt for a twilight tee time.

Every golf resort has a least desirable time of day to be on the links; the key is to find out when that is, and book a tee time. Often, twilight tee times are least desirable, as the light gets bad, but depending on the resort location, the least desirable time could be mid-day or late afternoon. If you’re golfing in Palm Springs in summer, of instance, the courses are empty at 3 pm. Golfing at low-crowd periods ensures kids can golf at their own pace, and parents don’t need to worry about backing up pairs behind them. Another perk: twilight tee times are often discounted.

3. Play every other hole with young kids and beginners.

If you’re golfing with a beginner, let the starter know. If you’re indeed at a kid-friendly course, he or she will be able to offer suggestions of holes to pass up. Skipping a hole or two is a good strategy to implement when parents start to notice groups waiting for them to finish each hole, or when kids begin to wilt. Our kids are now tweens, and they’ve yet to finish 18 holes at one time.

tigh na mara

4. Try a golf academy or kids’ camp.

If you have a serious golfer in your midst, consider finding a golf destination offering a PGA Tour Academy lesson.  We had an amazing experience in Central Oregon with the PGA Academy, where our golf swing was recorded on video and we were instructed by the best. If you’re not ready to go pro, look for a resort with a kids’ camp that includes golf. We’ve enjoyed kids’ camp experiences that take kids to the driving range for a one-on-one lesson with the golf pro after-hours.

5. Play on the putting course or green.

Everyone knows to start at the driving range, but far more interesting to kids is the putting course. Many resorts now feature these ‘mini courses’, which offer nine or 18 holes complete with rolling hills and sand traps but require far shorter driving distances. In fact, your kids will need only a chipper and a putter. These courses can be completed in an hour, and cost a fraction of the price of the real deal. We tried our first putting course with the expectation that we’d graduate to the regular course right after: instead, we hit the pool, completely satisfied with our golf experience.
The most important step in experiencing a kid-friendly golf vacation is to start with a kid-friendly resort. What’s your favorite?
For more family travel tips, see Spas and Family Vacations: The Perfect Combination by Mother of All Trips.
Disclosure: This post is part of a series about Preferred Hotel Group’s Preferred Family and iPrefer programs.

Family Apres Ski at Whistler Village

After a full day of skiing or boarding, nothing is so satisfying as unbuckling your boots and shedding your coat to warm up amid the lively ambiance of fellow skiers and perhaps a live band. Add a cold brew or warm beverage, and you just might be in heaven. We’ve already told you where to eat on a budget at Whistler, but you don’t have to pass up the fun of apres ski drinks and appetizers, even if you do have a full kitchen at your Whistler home rental. Check out the following family-friendly apres ski at Whistler Village locations.

apres ski with kids

1. Mallard Lounge, Fairmont Chateau Whistler:

Located within the elegant lobby of the Fairmont (right off Blackcomb’s Wizard chair), the Mallard offers cozy couches fireside and a designated family seating area. In fact, the whole lounge is kid-friendly until 8 pm. On Friday nights until peak season, parents can order $5 drink specials while the kids sip gourmet hot chocolates and listen to nightly live entertainment.

2. Earl’s:

Earl’s is hard to miss coming down from any of Whistler’s main runs into the Village. Ski right to the front door, and grab a spot by the fire. The atmosphere here is very casual and fun; no one minds kids underfoot and the crowd is very family-oriented in the early evening after the lifts stop turning. Stay for dinner or depart after a drink or two (the burgers are great, but pricy).

3. Elements:

Located off the beaten path in Whistler Village North, Elements manages to be both casual and upscale, with inventive cocktails and appetizers that don’t break the bank. Kids will like the tapas that are disguised as finger foods. Unlike some of the noisier bars and pubs along the Village and Upper Village (think Wizard Bistro), Elements remains full without feeling crowded.

While you wait for drinks or while you’re still deciding where to go, let the kids play on one of the many snow hills piled up along the pedestrian streets of the Village Stroll. They’ll have a blast playing ‘king of the hill’ or sledding down them in their ski pants even after a full day on the slopes. (If only I had that sort of energy!)

Photo credit

10 tips for using ferries for Northwest travel with kids

If you travel extensively throughout the coastal northwest, your route will eventually necessitate using Washington State (WSDOT) ferries or BC Ferries. Both are well-run ferry transportation options, but can seem intimidating to the occasional Northwest traveler. My family and I learned the ropes (at least, most of them) the fun way on a 10 day trip throughout coastal BC and Washington islands. What we found families need to know before traveling by ferry with kids in the Pacific Northwest:

10 tips for using ferries:

tips for using ferries


1. Know which ferry passages can be reserved in advance.

Most BC Ferry routes can be reserved ahead of time (though not all…more on that below), whereas most Washington State ferries cannot. If you’re traveling during peak tourist season (summer), reservations are at very least helpful, and sometimes crucial. BC Ferry schedules are listed clearly, and travelers can create an account on the BC Ferry website to make reservations for most routes. Reserving ahead of time is helpful not only because it ensures your passage, but also because it allows you to use the website to receive email alerts for any schedule changes to your route. Smaller routes, such as the ‘most scenic short-cut in the Northwest’ from Mill Bay, BC to Brentwood Bay, BC, are not reservable, but the heavily traveled routes, such as Vancouver to Nanaimo, always are.

Schedule your ferry passages at the time you plan your travel itinerary.

Ferry passages (and their schedules) just might change your plans. For instance, I was surprised to find out that my preferred route of travel from the San Juan Islands straight to Seattle was not possible, despite being geographically close by, nautically-speaking. Neither was my plan to traverse from Victoria to Friday Harbor. No worries: once I’d seen where offered ferries do travel, I was happy to adjust my plans. After all, there’s really no bad place to be along the Pacific Northwest coast.

bc ferries

3. Be on time.

And by on time, I mean at least 1 hour early, if you’re driving a car onto the ferry. Yes, even if you have a reservation. And yes, even on the small ferry routes. This seems inconvenient, but on our recent trip throughout Vancouver Island, Washington, and Vancouver BC, we didn’t mind. Once you’ve queued, you’re free to turn off your engine and get out of your car. At every ferry terminal we encountered, restrooms were available at minimum. At maximum, we enjoyed restaurants, scenic views, gift shops, and more.

4. Consider purchasing a Waves2Go or Experience Card if you’ll be using ferries for an extended time (or numerous passages).

Waves2Go is WSDOT’s monthly pass, and the Experience Card is BC Ferries convenient swipe card that can be preloaded with fare (at a discount).

bc ferries

5. Budget in the cost of bringing your car along for the ride.

The most expensive passenger on any ferry ride is your car. On our BC Ferry passage from Horseshoe Bay (Vancouver) to Nanaimo, our car cost us $75, and our Washington ferry ride from Sidney BC to Friday Harbor, WA cost us $45 in car fare. (Passengers are typically around $15 on longer passages, and as low as $7.50 on shorter passages.

6. Consider your ferry passage as both transportation and a scenic tour.

Northwest ferry passages are downright beautiful, and often wildlife can be spotted. (We saw jelly fish swimming on our shorter passage, and harbor seals in the San Juans.) In poor weather, most viewing decks have covered areas; go outside rain or shine!

bc ferries

7. Get out of your car as soon as you’re given the go-ahead by ferry personnel.

We quickly learned that there’s precious real estate on every ferry: window seats. The sooner you’re up from the car decks, the better your chances of snagging some. A few seats do have outlets, so don’t forget to bring any devices that need charging from the car. The ‘get out of the car early’ rule goes double on large BC Ferries if you’re planning to purchase a meal (at mealtime) onboard. Lines at breakfast and lunch go long.

bc ferries

8. Entertainment on board a Northwest ferry varies.

On large BC Ferries, you can expect gift shops, child play spaces (similar to what you’d find in airports) and even small arcades. Inter-island and Anacortes ferries in Washington will have snack shops and viewing decks, but little else. Tip: look for partially completed jigsaw puzzles on random ferry tables…they’ve been left for the next passengers. See how many pieces you can contribute before disembarking.

9. Remember to convert your money before leaving BC for Washington, or vice versa.

Washington ferries no longer take Canadian currency for on-board purchases, and shops and restaurants on the Sidney, BC side will not take American as a rule.

10. Don’t forget your passports.

Crossing the border by sea requires the same documentation and immigration process as crossing by land. All adults will need a passport, and kids will need a passport or birth certificate. If you’re traveling without one custodial parent, a letter of consent is required. (We didn’t have one from my husband, who was not with us, and we were allowed to enter Canada anyway, but the officer let us know it is needed.)

Central Oregon activities: kayaking the Cascade Lakes with Wanderlust Tours

If you’re enjoying a Central Oregon vacation and wondering what to do with kids in Bend or the surrounding areas, Wanderlust Tours offers outdoor excursions that will introduce you to Oregon’s Cascade Lakes and other wilderness areas while everyone has fun. Located in Bend, Wanderlust offers a full range of outdoor excursions, including cave tours, kayaking Cascade Lakes, canoeing, volcano sightseeing, and brew bus excursions for adults. In winter, they also offer snowshoe trips.

Wanderlust tours Bend

We booked a kayaking tour of the Cascade Lakes during an autumn weekend stay at House of Metolius. Because our resort was located past Sisters, Oregon, we drove into Bend and met our Wanderlust guides in town. (If you’re staying at a Mt. Bachelor-area resort, they’ll pick you up at your door.) Our guides Courtney and Chris were friendly and eager to show us all the wilderness this area has to offer.

kayaking with Wanderlust Tours

After a short van ride up Century Drive and past Mt. Bachelor ski resort to the Cascade Lakes, we unloaded at Hosner Lake. (Wanderlust Tours is the only operator permitted in this region.) It was chilly and raining lightly, but we had come prepared for weather (Wanderlust Tours depart rain or shine!) and the enthusiasm of Courtney and Chris kept us optimistic. We were right not to fret the weather: the serene lake with its mist of cloud and rain was spectacular, and we had the water nearly to ourselves. It was quiet and peaceful, and our kayaks glided nearly effortlessly over the still lake. Courtney was a book of knowledge on local flora and fauna: we loved learning about the different uses of moss and lichen, and the differences between the trees surrounding us.

Wanderlust tours bend

She was great with the kids too. Toby, age 7, kayaked tandem with her, and even though he has a habit of talking guides ears off, she didn’t mind (or at least didn’t let on that she minded!). She sang songs with him, pointed out wildlife, and generally got everyone in our group enthused about what we were seeing and hearing out of the water. Our 11 and 13-year-olds were happy too, because they were allowed to kayak tandem together. We had only eight kayakers in our group in addition to the two guides, allowing everyone lots of attention and keeping us all safe.

We kayaked for over an hour (or until our hands were numb!) and Courtney assured us that Wanderlust Tours continues to operate their kayak tours as late into the season as possible, as long as there’s demand. While I’m sure a summer tour would have been enjoyable, I’d recommend an autumn excursion: we saw aspects of lake life that would have eluded us in a busier time of year.

We have been on many kayaking trips across the country, and my kids rated Wanderlust Tours as tops. Why? The fun they had with Courtney, and the uniqueness of seeing the lake in October. Courtney did an excellent job of showing us just how much life was out in the Cascade Lakes at this time of year, and her love of the outdoors was obvious.

If you’re coming from the Sisters area, you’ll want to allow for a full half-day for this tour, including driving time. If in the Bend area, it will take about four hours, from 9 am to 1 pm. Food is not included in the kayak tour, so bring a few snacks to store in the van…along with extra dry clothing or extra jackets. Note: kids generally need to be eight years old for this tour.

kayaking Central Oregon

Tour rates: The kayak tour at Cascade Lakes is $55 per person, and includes all transportation, gear, and instruction.

Directions: Call Wanderlust Tours to schedule your tour, and they’ll pick you up or send you a pick-up location. They’re always available at 1-800-962-2862.

As I disclose whenever applicable, we experienced kayaking in the Cascade Lakes as guests of Wanderlust Tours. This compensation came with no expectation of a positive review.

Tips for kids flying solo as unaccompanied minors (STEP BY STEP GUIDE)

Once upon a time, the whole family was enjoying a Laguna Beach vacation. The only thing missing: my son Calvin, age 11. We booked him a one-way flight on Alaska Airlines (escorted to the plane by his grandfather). And it was easy! If you’ve never booked an unaccompanied minor’s flight, we’ll walk you through the steps for kids flying solo.

flying tips

Step 1: book your minor’s flight

On Alaska Airlines, booking your unaccompanied minor’s flight is as easy as clicking ‘0’ in the ‘adults’ field when booking a ticket online. Once you’ve done so, you’ll be automatically directed to Alaska’s unaccompanied minor page, which will list restrictions and fees ($25 each way at the time of our flight) and provide the Guardian Contact Form you’ll need to fill out to ensure your child’s parent or guardian can pick him or her up on the other end.

Note: Children ages 5-17 can fly as unaccompanied minors. Kids 5-7 are restricted to only direct flights (recommended for all unaccompanied minors if possible).

Step 2: Fill out the Guardian Contact Form

Once you have your child’s flight number(s), fill out the Guardian Contact Form, keeping in mind that your child will only be released to a person listed on it (be sure to have at least two listed, just in case). Print the form using your child’s confirmation number, and bring it with you to the airport.

unaccompanied minorNote: What you’ll also need at the airport: your child’s e-ticket or confirmation number, and a debit card for your child to use if you’d like him or her able to purchase food on the plane. (We recommend simply feeding your child a meal or purchasing a meal prior to boarding instead, if possible.)

Step 3: Arrive at the airport 90 minutes prior to departure to accompany your child to the gate

An escort pass to accompany your child through security must be obtained prior to the standard check-in process, and can be obtained at the check-in counter. Be sure to have your ID handy, and make sure any purse or bag you’re carrying is security-ready. What else you’ll need at check-in: your child’s passport if flying internationally (no picture ID was needed for a minor’s domestic flight) and your Guardian Contact form.

Step 4: Arrive at the gate 30 minutes before departure:

Alert the gate attendant that your child is flying unaccompanied, and he or she will board first with an escort. Before he or she boards: make sure he or she has eaten (or has food with him or her) and has a carry-on that is manageable, in which his or her on-board entertainment is readily accessible. If your minor will be connecting with another flight, it can be useful to give him or her a cell phone. The gate attendant will ask you to wait until the flight has departed.

Step 5: Picking up your minor

The parent or guardian at the other end of the journey will need to arrive at the check-in counter of your airline in time to get through security before the plane lands (I recommend 1 hour prior, to be safe). At the counter, the guardian will identify him or herself, show ID, and be given a pass to allow your through security to the gate. (You should also be given gate information, including the time the plane is due to arrive.)

Once your child has deplaned, an escort will check the guardian’s ID against names listed on the Guardian Contact Form, and release your child.

Why Alaska Airlines? Alaska Airlines did not sponsor this post in any way. We used Alaska in this step-by-step guide because we it’s the airline we patronized when flying Calvin solo, and (to no surprise) found the process to be friendly, easy, and enjoyable. Alaska is a top family-friendly airline, and Pit Stops for Kids recommends it wholeheartedly for its efficiency and stellar service.

Tip! Have a teen flying solo? Read our tips for teen international travel…and what to do when things go wrong.

The Montage Laguna Beach: beach luxury for families

Laguna Beach is one of Pit Stops for Kids’ Best Beach Town picks, and one of our family’s favorite places to visit in California. Any family vacation to this sunny ocean-front artist colony will be well-spent, but if you want to take your Laguna Beach family trip over the top, stay at the Montage Laguna Beach.

Montage Laguna Beach

A Preferred Hotel with the Preferred Family seal of approval, the Montage Laguna Beach combines luxury hotel accommodations with family-friendly beach relaxation. Situated right on the Pacific at Treasure Cove, the Montage is steps away from public Aliso Creek beach and within walking or free shuttle distance of downtown Laguna Beach. Families can enjoy the outdoor Mosaic Pool, extensive gardens, tennis and basketball courts, and fitness center.

Activities and Programs:

The Montage Paintbox program is designed for kids ages 2-12, and takes kids outdoors as well as indoors for supervised play and programming. Available by the day or by the hour, kids don’t need to be potty-trained for Paintbox Petite (2-5) and will be served meals. The older kids have the opportunity to learn about the local ecosystems through Paintbox during thematically inspired days.

Montage Laguna Beach

The Montage Laguna Beach has a full spa with yoga classes, and the virtual concierge can arrange for day trips to Southern California attractions. If you’re like most guests, you won’t want to leave the property except to ride the free shuttle into Laguna Beach to check out the art studios, galleries, shopping, dining, and beach-vibe.

Aliso Creek beach:

Aliso Creek is steps from the Montage (guests enjoy an easy walkway with showers, foot baths, and towel stands) and offers a long stretch of sand to play on. At the far end, Aliso Creek has a concession stand and playground on the beach (as well as public parking), and Aliso Creek tide pools are among the best in Southern California. Note: Aliso Creek’s ocean floor drops off quickly, causing waves to break hard on the shore. Families with young kids who want to swim would do better to go into Laguna Beach and swim at Main Beach.

Montage Laguna Beach

Room rates and amenities:

Rooms at Montage Laguna Beach range from standard hotel rooms to suites, bungalows, and villas, with rates starting at $495. (Yes, really.) Their Family Fun Package includes overnight accommodations, daily breakfast credit (value to $50), half day at Paintbox, and a children’s welcome amenity at check in. You won’t find a bargain at Montage properties, but you will find value. If it can fit into your vacation budget, I recommend the experience.

Dining:

Dining is available on-site, including room service. For family-friendly meals, I recommend dining earlier in the evening, or taking the shuttle downtown for a fun, casual meal at Ruby’s Diner or Johnny Rockets. Of course, Laguna Beach is filled with authentic California cuisine; you really can’t go wrong.

Directions:

The Montage Laguna Beach is located directly on Highway 1 (the Pacific Coast Highway) in Laguna Beach. From I-5, take the Laguna Beach exit.

Photo Credit: Mel(issa) and Alex E. Proimos.

Travel Gear We Use: best carry on luggage for kids

Welcome back to our Travel Gear We Use series. Today, we’re recommending best carry-on size luggage for kids. When packing for a family trip, we are big fans of using carry-on luggage (here’s an article on flying carry-on only). Why? Flying carry-on only saves money, helps kids become more responsible for their belongings, and keeps ‘baggage’ at a minimum…literally. Our favorite carry-on luggage for kids include models that are high-quality, adaptable, and of manageable weight for kids.

flying carry-on

Eagle Creek Load Warrior:

The Load Warrior is a fully functioning wheeled rollie with the added bonus of super rugged construction. Our teen loves the Flip Switch because he can roll it through airports, then hold it by the oversized grip on the side when hefting into overhead bins. It comes in two sizes–22″ and 28″–and both feature quality ripstop nylon with two-way, lockable zippers and several organizational pockets.

Crumpler Spring Peeper:

The Spring Peeper (as well as the Crumpler Red Dry No 9 shown in photo) is one of the most sturdy, well-constructed rollie bags we’ve seen. It can, as they say, take a licking and keep on ticking. So by all means, hand it off to a kid who will roll it over curbs, hit it against pillars, and roll it over your foot. Inside, the Spring Peeper features multiple organizational panels and pockets, so kids can (hopefully) remember where they put things. The lightweight handle fully retracts, and side panels are perfectly sized for kids’ socks and underclothes The main compartment is roomy enough to store souvenirs on the way home. Best of all, the Spring Peeper is only $210.

amzn_assoc_placement = “adunit0”;
amzn_assoc_search_bar = “true”;
amzn_assoc_tracking_id = “pitstoforkid-20”;
amzn_assoc_ad_mode = “manual”;
amzn_assoc_ad_type = “smart”;
amzn_assoc_marketplace = “amazon”;
amzn_assoc_region = “US”;
amzn_assoc_title = “My Amazon Picks”;
amzn_assoc_linkid = “ff091f71741a3fbc1be67b0816ea564b”;
amzn_assoc_asins = “B011RY2X8E,B00XWCRCOK,B00E1O2Q9Y,B00M1P3EDM”;

L.L. Bean Adventure Duffle:

L.L. Bean classic adventure duffles have served us well for years (and none have needed to be replaced. We opted for the medium size when the kids were very small, and still use them for quick trips and adventure vacations to this day. Kids can pick their own color (and can have their name embroidered), and the padded shoulder strap makes minor commutes no problem for older kids (if you want kids to wheel their own, opt for the large size with wheels and handle). Best of all, the medium is under $50 and the large is under $100 at L.L. Bean.

Timbuk2 Co-Pilot:

Our teens love this rollie, which features skateboard wheels for a smooth, ultra cool glide over airport floors. I love the fact that it has multiple compartments inside: you can separate clean clothes from dirty, or shoes from clothing via two large mesh sections. Open half the bag without disturbing the other half! There are also two smaller compartments, which we use as built-in packing cubes. There’s even an outside pocket perfect for a TSA-friendly toiletry bag. Grab the Timbuk2 Copilot Luggage Roller for as low as $144.

More Travel Gear We Use:
Best Overnight Backpacks for Kids and Teens

Photo credit: Amy Whitley, via Go Green Travel Green

Whistler Blackcomb Ski Resort: what not to miss with kids

Twenty minutes before lifts stopped turning on a perfect Whistler ski trip, we were still finding fresh powder. Whistler Blackcomb is just that big. Everywhere we skied at Whistler Blackcomb, the kids discovered new routes, new glades, and new jumps. After spending two full ski days exploring the duel mountains, we could only say we’d had a ‘sampler’ of what this resort offers to families.

Whistler Blackcomb skiing with kids

Whether you have an ideal 3-4 ski days at Whistler Blackcomb, or just a short few like we did, Pit Stops for Kids is happy to share our top sections of the mountain for families, including runs, lifts, lodges, and dining.

Where to ski or snowboard on a Whistler ski trip:

The best thing about Whistler Blackcomb’s mountain layout is the fact that no matter where you are on either of the mountains, from peak to base, beginner (green), intermediate (blue), and advanced (black) runs are available. This means families can ride the lifts together even if they’re of different ability levels, and even young kids and novice skiers and riders can experience the whole resort. Our favorite sections of the two peaks for kids (of any level):

Blackcomb skiing

1. Jersey Cream area of Blackcomb: This area is accessed by the Solar Express lift (from Wizard Express at the base), and provides expert to beginner runs situated high enough on the mountain to be challenging but just below the tree-line (to keep out of the wind). We spent the majority of our time here, alternating between the double-black-diamond Jersey Cream Bowl and its many side runs (most of which are intermediate). The Green Line (beginner) offers a fun alternative to those not so sure about moguls and steeps. For those wanting to go higher up, the Glacier Express loads adjacent to Jersey Cream.

Family Zone at Whistler Blackcomb

2. Whistler Family Zone: Located on Whistler Peak directly across from Blackcomb after off-loading from the Peak 2 Peak Gondola (or off the Whistler Village Gondola), this Family Zone is a relaxing place to try out new skills without fear of fast skiers or riders nearby. Marked by bright green flags, the Family Zone offers groomed slopes and is placed next to one of Whistler Blackcomb’s many Nintendo Terrain Parks. It’s easy for kids to dip in and out of the terrain park (every feature is clearly marked as S (small), M (medium) or L (large) and still meet up with non-jumping family members. If your kids like easy glided skiing or riding, look for the large wooden arch marking the entrance to a not-so-steep tree glade filled with powder and trails (when snow levels permit).

3. Blackcomb lower mountain: Younger kids will like the numerous intermediate runs off the Wizard Express (and parents will like that the Blackcomb lower mountain gets less traffic than the Whistler lower mountain). When they’re ready, take intermediate and beginner kids up Solar Express for new terrain, including another Nintendo Terrain Park. (Look for the magic ‘castle’ play area nearby…though we had trouble finding it in deep snow, even with signage!)

Tip: If you’re new to the mountain, a great way to orient yourself is to ride to the top of Blackcomb and take the Green Line (beginner) all the way down. This cat-track trail, marked ‘Easiest Way Down’, traverses the entirety of Blackcomb while winding slowly down. Parents can get a feel for the mountain while kids get their ‘feet wet’. Plus, we clocked it: it’s a 30 minute run!

Rendezvous Lodge, Blackcomb

Where to eat and rest:

Whistler Blackcomb is very big, which means that traversing to your favorite pit stop could take a while, depending upon where you are on the mountain. Families will waste time getting from Point A to Point B if they’re not careful. The good news is, there are dining options on both mountains, of course. Our best advice: no matter where you eat, try to avoid the two largest lodges, Roundhouse and Rendezvous, during peak lunch hours (12-1pm).

1. Glacier Lodge: Located at the base of Jersey Cream and Glacier lifts, this smaller lodge is just enough off the beaten path to be an ideal lunch spot for families. (Also recommended is Crystal Lodge, but it’s so far off the main lifts it may take too much time to get to.)

2. Rendezvous Lodge: As long as you avoid the peak lunch hour, Rendezvous is a good bet (and easy to get to from either Whistler–take the Peak 2 Peak–or Blackcomb). Even during the busy holiday season, we didn’t have trouble finding a table or getting through the cafeteria-style dining area. Tip: even adults can order kid meals, which are a great value at $8.99 and include an entree, two snacks (all healthy options), a piece of fruit, and a drink. If the kids finish eating before you do, let them go downstairs to the Nintendo gaming area, where they can play the latest Wii and Nintendo DS 3D games for free!

Nintendo play area Whistler

3. Try to avoid Whistler Village at lunch, as this congested area will delay your return to the slopes. The exception: if you’re staying at a ski-in-ski-out hotel. During our stay at the Fairmont Chateau, we were able to ski down to the hotel, eat a healthy meal in our room, and be back on the hill within 45 minutes. It was worth returning to the base to skip the lunchtime crowds (and hassle).

Riding the Peak 2 Peak:

At some point, you’ll want to cross between Whistler Peak and Blackcomb Peak, and while you can return to the Whistler Village and ride the Excalibur Gondola to the Blackcomb side, you’ll have far more fun riding the Peak 2 Peak. Located between the Rendezvous and Roundhouse lodges, the Peak 2 Peak takes about 20 minutes to ride. This is a great time to adjust clothing and gloves, eat a snack, or simply warm up! The views are jaw-dropping (as is the height!). Your lift ticket includes the Peak 2 Peak, so take advantage of it!

Peak 2 Peak

Don’t be surprised if you experience less than 30 percent of Whistler Blackcomb in one day, and don’t be afraid to ride lifts all the way to the peaks (when open). There will be an easy way down option every time!

As I disclose whenever applicable, my family and I experienced Whistler Blackcomb as guests of the resort. While we appreciated this opportunity to share tips and advice with other traveling families, it not come with the expectation of a positive review.


Travel Gear We Use: best overnight backpack brands for kids and youth

As an editor at Practical Travel Gear and a gear reviewer for OutdoorsNW, I test a lot of travel products and outdoor gear. Some of this gear we keep and continue to use as a family, and some of it gets pushed to the wayside. Some of the most-frequent questions I’m asked on Pit Stops for Kids is related to what to pack, what to bring, and what to wear. Our Travel Gear We Use series will address our most commonly requested gear recommendations.

best overnight backpack

Quality, backpack trip-worthy packs are hard to find that fit young kids and youth (tweens and teens). Many so-called kids’ packs are flimsy, or simply not designed for multi-day, serious hiking and trekking. It’s very important to find a pack for your kids that takes the weight off their shoulders and onto their hips, just like the grown-up models do. As with all travel-related activities, your kids will have better success and more fun when backpacking with the right gear. Here’s what we use when it comes to best overnight backpack picks for kids:

For young kids (ages 6-11):

Kelty Junior Tioga External Frame Pack

jr tioga
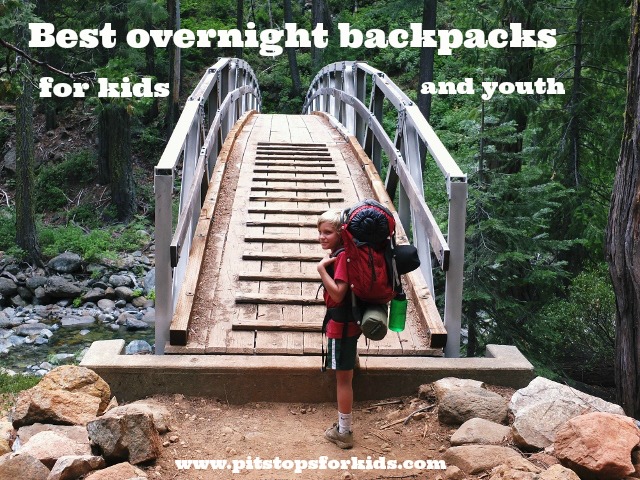
Why we use this pack: firstly, Kelty is a brand we trust to be of quality design at a reasonable price. Kids grow out of gear quickly and pack styles are improved upon often…no need to spend top dollar to hand-down something obsolete. The Kelty Jr. Tioga (shown in the photo above, worn by Toby, age 8) is 34L, which offers a large enough capacity to be helpful, but not so large that the child is over-burdened with too much weight. (Tip: our young kids carry only their own clothing, their own sleeping bag and pad, and lightweight food items, such as freeze-dried meals). 

While the Jr. Tioga isn’t too large, it still offers a secure waist belt and sternum straps, allowing weight to be carried on the hips. The external frame is nice at this age, because the pack is more highly adjustable than most with internal frames. Not only can the waist belt and shoulder straps be adjusted to size, but the frame can be made larger or smaller. This pack has grown with our kids from age 6-11. Buy at sale price on Amazon.

Deuter Fox 40

deuter-fox
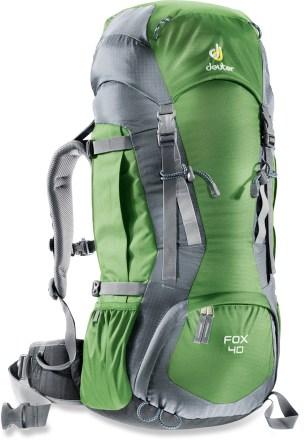
Why this pack: once kids have outgrown the external frame pack above, enter the Deuter Fox. We tried many internal frame packs for kids in the 40-45L range, and found the Deuter to provide the best ‘adult’ features in a kid-friendly package. There’s a dedicated sleeping bag compartment and an adjustable torso, and good ventilation on the back panel and hip belt. We kind of wish it wasn’t top-loading, and kids tend to toss everything out of the bag to find that one thing at the bottom, but this is a feature we can live with. Buy on Amazon for $109.

Note: if you find you simply can’t find a narrow enough hip belt for a thin child, try the REI brand Passage 38. It was the only pack to properly fit our narrow-hipped child!

For tweens and teens (ages 12-17):

Mountainsmith Youth Pursuit

youth pursuit
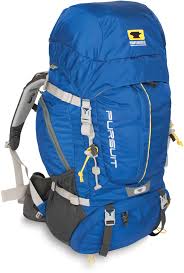
Why we use this pack: It is so hard to correctly size tweens and teens! They may be ready to carry the load of many adults, but for most teens, adult packs are still too large-framed, either in torso length or sternum/waist belt width or both. The Youth Pursuit is 45L (a nice in-between capacity) and offers an internal frame that’s fully customizable by velcro adjustment (for torso length). The waist belt fits our 12-year-old and our 14-year-old, and there are plenty of organizational pockets so older kids can be in charge of packing and using their own tools and gear. Kids get adult-pack quality ventilation on the pack pads, and pack material is equal to that of mom’s and dad’s. Read a full review here. Buy at sale price on Amazon.

Granite Gear Leopard

Why this pack: the Granite Gear Leopard is our older teen son’s all-time favorite pack. Yes, he’s in a height category that opens up his options to include any men’s pack, but with a thin waist, it can still be hard to find a proper fit. The Granite Gear Leopard fits perfectly, isn’t too big  at 58L (most men’s packs are 65 L or more), and doesn’t break the bank. It also comes in a minimalist 46 liters! He loves all the pockets and included loops for his accessories like an axe and a collapsible shovel, and how easily it can be cinched down or expanded. Buy on Amazon for under $150.

Top youth backpacking packs at a glance:

amzn_assoc_placement = “adunit0”;
amzn_assoc_search_bar = “true”;
amzn_assoc_tracking_id = “pitstoforkid-20”;
amzn_assoc_ad_mode = “manual”;
amzn_assoc_ad_type = “smart”;
amzn_assoc_marketplace = “amazon”;
amzn_assoc_region = “US”;
amzn_assoc_title = “My Amazon Picks”;
amzn_assoc_linkid = “2b3ff3efebcf632ee007032e7c7a5424”;
amzn_assoc_asins = “B00CQ9L2X2,B013FUTBAG,B009407Y60,B00BU96YIM”;