Why First Tracks ski tickets are worth the splurge

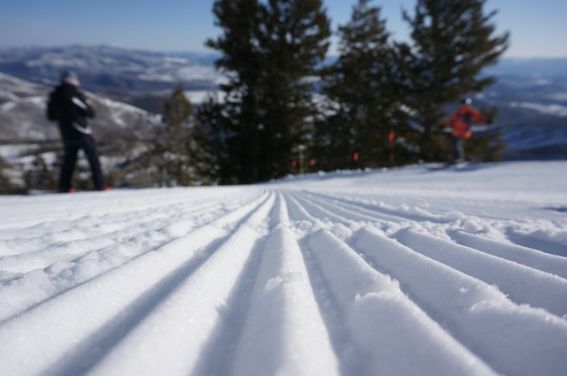
More and more family ski resorts are now offering First Tracks ski tickets. What is First Tracks? It’s a ski ticket add-on that allows the bearer to access the slopes earlier than the general public. Usually, First Tracks programs start at 7:30 am, allowing skiers first access at groomed and powder terrain before the lifts begin turning at 9 am. First Tracks tickets are fairly spendy at approximately $75 per person (lift ticket not included), and are usually limited to a small number of skiers and snowboarders. Some First Tracks programs set an age limit (usually 13), while others welcome kids of any age, provided they are intermediate to expert skiers, and accompanied by an adult. When (and why) are First Tracks tickets worth the money? Read on!
First Tracks

Upgrade to First Tracks when your time on the mountain is tight.

Last season, I skied First Tracks at Canyons Resort in Park City, Utah, and from 7:30 to 9 am, I skied seven long runs…over twice what I could accomplish during public hours. If you’re skiing a resort for only a day or so, or visiting during a peak season, such as spring break or Christmas, First Tracks allows you to get a significant amount of quality skiing in early in the day. We always remind travelers that time is money at Pit Stops for Kids, and First Tracks is a perfect example of maximizing your time with a moderate investment.

Upgrade to First Tracks when extra perks are included.

Nearly all First Tracks programs include breakfast at an on-mountain restaurant included with your ticket price, but First Tracks at Canyons provides an unique opportunity: skiing with an Olympian. Canyons Resort pairs their Olympic Ambassador program with their First Tracks offering, which means that with every First Tracks group skies an Olympic skier or snowboarder. I had the honor of skiing with Lake Placid’s Holly Flanders, which was not only a thrill, but a great source of Canyons information: Holly was able to take us to the best runs and glades, and was a wonderful ski companion.

Upgrade to First Tracks when the rest of your ski day will be slower-paced.

If you have babies, toddlers, or small children on your ski vacation, you’ll likely be spending a fair amount of time on or near the bunny slopes (or at least signing kids in and out of childcare and ski school). A First Tracks upgrade is a great way to give the adults what they crave: great skiing, even when skiing with young kids. On a trip to Jiminy Peak, MA, our east coast editor Kate Lepore skied First Tracks while her kids were in childcare…which allowed her to experience more of the mountain before taking over preschool ski duties.

Before you go: Not all ski resorts offer First Tracks, and those that do are on a limited schedule (most offer it two times per week). First Tracks age limitations and pricing varies, and most require reservations. If you do take the spurge, enjoy!

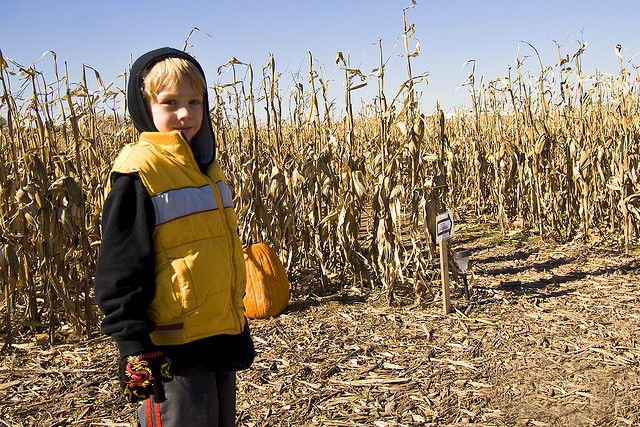
Spooky Pit Stops: Find a corn maze in 47 states!

Even so-called ‘family friendly’ haunted houses have become more and more frightening in the past few years, making us less enthusiastic about recommending them. If you’re looking for some Halloween family fun that doesn’t involve ultra-scary haunted houses or ghost tours, look to corn mazes with nighttime operations (spooky without the scares).

The MAiZE

Ready for the travel hack? Find a corn maze near you easily with The MAiZE! If you haven’t heard of the MAiZE, it’s the world’s largest cornfield maze company, and it currently has locations in 47 states and several Canadian provinces. Chances are, you have a MAiZE near you, making it easy to find a fun maze pit stop or autumn activity that’s Halloween and harvest focused without the scary elements.

Our favorite MAiZE is the MAiZE at the Pumpkin Patch in Portland, Oregon. Located within one of the biggest harvest festival farms in the area, this MAiZE sports a Portland Timbers soccer club theme, which is a hit with my kids. Other MAiZEes feature local themes as well. The Timbers maze is cut in the shape of the Timbers’ logo, which kids need to weave their way through to find the exit.

What we love about MAiZE:

How to find a corn maze

1. All are located within a harvest festival or u pick farm, which means you can make a day of the adventure should you like, and families enjoy a nice ambiance.

2. All offer a family-friendly, non-scary option. Some are designed for younger kids exclusively, while other MAiZE routes have nighttime hours with haunted maze options or simply dark maze opportunities. Check with the MAiZE you plan to visit to find out what they offer and plan accordingly. During the day, every maze is kid-friendly, and all take approximately 1 hour to navigate.

3. They’re everywhere! Find the MAiZE nearest you.

Admission cost:

Admission varies by MAiZe. The Portland MAiZE cost $7 for adults, $5 for kids 6-12 (5 and under free) during the day, with the option of a haunted maze for $10 at night.

Find more spooky pit stops!

Photo credit: Flickr

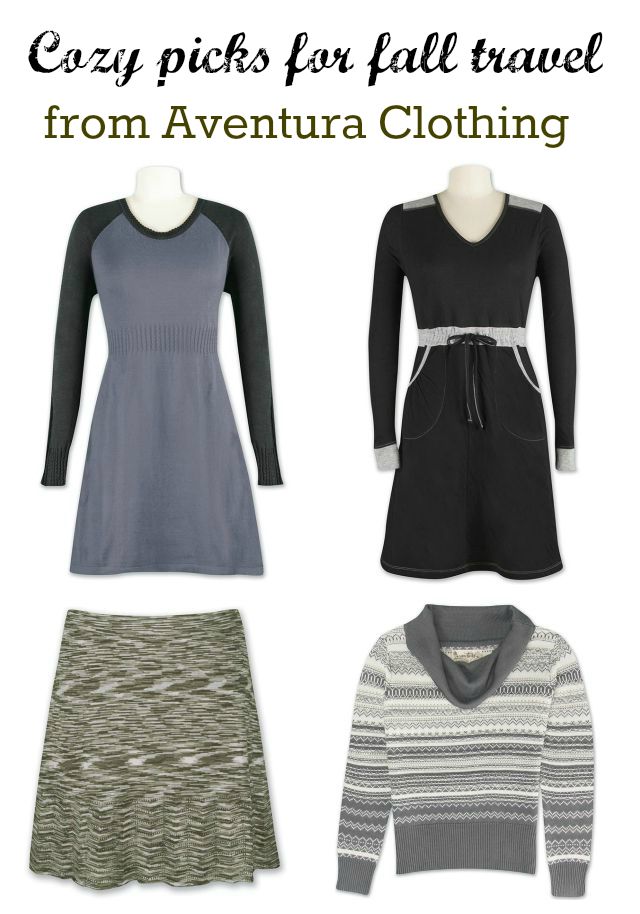
Travel Gear We Use: Fall styles from Aventura Clothing

I’m happy to announce that once again, I have signed on to be an ambassador for Aventura Clothing. What does this mean to you? Just like last year, Pit Stops for Kids readers will get 60% off all Aventura Clothing. To get a 60% off Aventura Clothing code, leave a comment and it will be emailed to you, or opt in for our quarterly newsletter (see banner on homepage).

aventura-clothing

I also get to tell you what’s new at Aventura each season. Clothing lines vary by year, of course, and this year, I have to tell you I am in love with every item I received. That almost never happens! I love each item because everything I picked out A) feels as comfy as wearing sweatpants, and B) does not look like I’m wearing sweatpants.

Jaylee Dress: I am a big fan of wearing comfortable dresses and tights on travel days. It’s important to keep circulation going on airplanes, and who likes to feel their waistband of their jeans dig into their stomachs on road trips? The Jaylee Dress is a knit sweater dress that is fitted but not clingy, and oh-so-soft. It’s 90% organic cotton, as most Aventura items are, with indulgent cashmere (7%) and some nylon mixed in for stretch. The length is 37″, which means the hem hits just about at my knee. It pairs great with leggings (I wear Aventura’s Bienne legging), and the design and colors are very simple, which I appreciate. I can add a scarf to dress it up, or pull on a hoody to dress it down. As the weather starts to turn, the Jaylee has been my go-to dress.

Keltie skirt: Skirts are perhaps even more versatile than dresses for your fall travel wardrobe. You can pair with the same leggings or tights, and wear the same skirt with multiple blouse and tee options. One solid skirt usually helps me create 3-4 outfits while away from home. The Keltie skirt is super classy-looking, made of an organic cotton/viscose blend. It’s knit, which means it will keep your bum warm on cold seats, yet not at all bulky (it can easily go from outdoors to dinner, for instance). It comes in three muted colors to go with everything. I might get one more, come to think of it. The only downside of the Keltie: it’s hand wash or dry clean only. Uh oh.

Spectra Dress: With its sporty, drawstring waist and sweatshirt-like feel, I wasn’t sure about the Spectra when I ordered it. Would it be too casual even for travel days? Nope…it’s my favorite piece in the fall line! It’s a cotton/poly blend, machine-washable, and looks adorable with a simple pair of boots or mules.

Farrah Cowl Neck sweater: I love sweaters, but rarely travel with them. They’re just too bulky in my luggage. The Farrah sweater is the exception to this rule, because it’s thin while still being substantial enough for fall travel in northern climes. Plus, the cowl neckline gives the Farrah a sophisticated look without adding any pieces, which makes me look dressier than I am (always a plus). It’s a poly/wool blend, and while it’s also hand-wash only, it seems to be able to go through quite a few wearings before it needs to be cleaned.

Want an Aventura code? Leave a comment!

Travel Gear We Use: Best water bottles for kids

Next up in the Travel Gear We Use series: best water bottles for kids! We go absolutely nowhere without our water bottles…one per family member. They need to be durable, spill proof, fit in car cupholders and backpack water bottle pockets, and be fun or trendy enough that my kids (ages 14-8) will actually want to keep track of them. Here’s which water bottles for kids make the cut:

best-water-bottles-for-kids

Sigg kids’ bottle:

The Sigg Primeval Glow Water Bottle is just the right size for young kids at .4 L (and they’ll fit in backpacks for school, too). They come in a wide variety of styles, but we’re partial to the glow-in-the-dark option. More important than the cute designs, however, is the spill-proof top: the kids like that it has a valve they can easily sip from, and I like that it closes completely (no more germ playground). Sigg bottles are lightweight, and of course BPA-free. Pick up a kids’ Sigg for $14-16 on Amazon.

Liberty Bottleworks sports bottle:

If your kids like drinking from a straw instead of a valve, but you’re sick of the sight of chewed, gross straw tops (you know it happens!), check out the Liberty Bottleworks Sport Water Bottle. The straw on this aluminum, USA-made bottle flips up only when needed, and it’s very thick and substantial. No harm can come to it, I promise! The size is just right for school-aged kids at 12 oz or 16 oz, and like the Sigg, there are tons of fun designs. I like that carrying the Liberty bottle is easy, too, due to the hook at top (which clips onto any backpack). Pick one up for $15-17 on Amazon.

Hydro Flask standard bottle:

If your kids kick it old-school, and like standard, screw-top water bottle tops without bite valves and straws, opt for my personal favorite bottle: USA-made Hydro Flask. They come in many sizes, but for kids the Hydro Flask Stainless Steel 12 ounce wins the day. What’s best about Hydro Flask: all their bottles are highly insulated. This means they’re heavy, but they will keep cold liquids ice-cold for hours, and ditto for hot liquids. Nothing beats a Hydro Flask for summer road trips, when everyone can sip cold water in the car! Pick up a 12 ounce Hydro Flask for around $18 on Amazon.

Camelbak Eddy and Chute:

We’ve fallen in love with Camelbak bottles when we want something lightweight, spill proof, and ready for adventure. Since both the Eddy and the Chute are designed to use with a carabiner when needed, they work wonderfully to clip to rafts or kayaks. We’ve used only Camelbak Eddys for both our OARS rafting trips. Because the Eddy has a flip-open straw top, we avoid spills when young kids are drinking out of them, and for those among us who like to gulp our water (er, that would be me), the Chute has a wide spout that doesn’t restrict the flow of water like other bottles do. Snap the Forge lid onto a handy holder when you’re drinking, so it won’t bop you on the nose. (Trust me.) Pick up the Eddy in multiple colors on Amazon for just $11 or the Chute for about the same price.

Avex Brazos:

Avex water bottles have one of the most innovative designs for water consumption we’ve seen. The Brazos gets our pick because it’s insulated for double-walled coolness of the water inside, along with a way to clip it to packs or kayaks and a slim design that still fits in side pockets. It does have some weight, however, so little kids may prefer the Avex Kids’ Freeride. It features the same open/close design, which opens at the press of a button and will not spill. Pick up the Brazos on Amazon.

amzn_assoc_placement = “adunit0”;
amzn_assoc_search_bar = “true”;
amzn_assoc_tracking_id = “pitstoforkid-20”;
amzn_assoc_ad_mode = “manual”;
amzn_assoc_ad_type = “smart”;
amzn_assoc_marketplace = “amazon”;
amzn_assoc_region = “US”;
amzn_assoc_title = “My Amazon Picks”;
amzn_assoc_linkid = “ff091f71741a3fbc1be67b0816ea564b”;
amzn_assoc_asins = “B00BUZM7P0,B0093AENWE,B00NTYIHNQ,B01GW2HCEG”;

Need a family thermos option for winter travel and ski days? We love the Sigg Thermal Classic. Fill it with soup or hot chocolate, and use the top as a cup!

More Travel Gear We Use:
Best carry-on luggage for kids
Best overnight backpacks for kids and youth
Best packing cubes and TSA bags for the family

Best point and shoot camera for vacation photos
Best iPhone cases for travel

Photo credit

Where to eat with kids on Kauai North Shore

Eating out is one of the most expensive aspects of any family vacation, right after airfare and lodging. When your vacation is in the Hawaiian islands, the cost can be even higher.

north-shore-dining

Wondering where to eat with kids that won’t break the bank? We have plenty of picks for Kauai, particularly on the North Shore. If you’re staying in a vacation rental, all the better…you can make meals at home, and supplement with these fun eats:

Best lunch to-go or dinner pick-up:

North Shore Country Store: 

Grab a great plate lunch here, or pick up a pizza to go to eat at home after a fun beach day. This store is right by the gas station at the entrance of the Princeville resort community, near the Foodland store and other convenience stops.

Kilauea Fish Market:

kauai-fish-market

This cute hole-in-the-wall near the Kilauea Lighthouse is located in a small shopping center (go around back). They have a limited menu with only what’s most fresh and available, and offer plate lunches with fresh fish, rice, and potato-mac salad. There’s also fish tacos, and people rave about the mahi mahi wraps…we tried the plate lunches only, and loved them. Order ahead and pick up to take back to your vacation rental or to the beach, or eat at outside picnic tables.

Puka Dog:

Located in Hanalei, Puka Dog has to-die-for hot dogs topped with relishes like pineapple relish, banana relish, or mango relish, plus mild to hot garlic sauce and Hawaiian spicy-sweet mustard. Veggie dogs are also available. Grab dogs to go for the beach, and be sure to try the homemade lemonade, too!

Sunshine Markets:

Look for these open-air farmer’s markets across the island, on designated days and times. We found the Hanalei one on Saturday morning, with acai smoothies, lots of fresh produce, juice bars, and handcrafted items. Pick up produce for dinner and treats for your morning.

Moloaa Sunrise Fruit Stand:

Hanalei

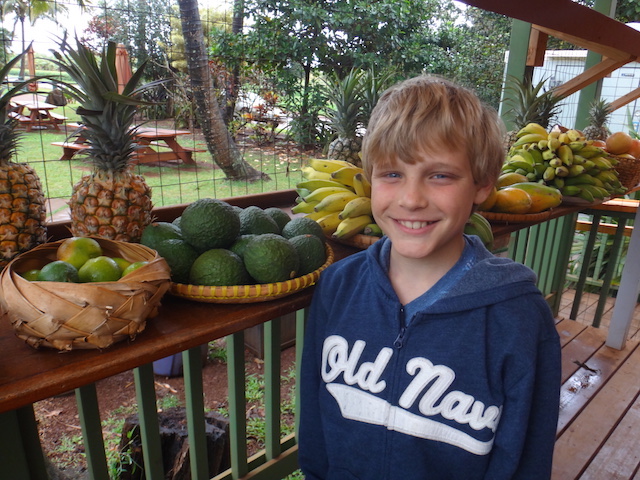
This small dining space along the highway between Princeville and Kapa’a is so much more than a fruit stand, but still looks just like one, which is part of its charm. When you pull up into the dirt parking lot, the first thing you see is fresh fruit lining the front counter in baskets, with a list of prices by the pound. At the counter, grab a menu and pick out a fresh fruit smoothie or freeze, or opt for a full meal. They serve amazing breakfasts and sandwiches here. Try the Ahi sandwich or the breakfast burrito. Eat at the open-air counter or take it to go.

Note: many readers also seem to love Bubba’s, in Hanalei, for their great burgers. We didn’t get a chance to try this counter-service establishment ourselves, however.

Best nice dinner out:

Dolphin Restaurant:

Located in downtown Hanalei, the Dolphin features an open-air dining room, outdoor ‘garden’ seating, and a fish market. Come at night to eat in the glow of tiki torches, and be sure to try the sushi. We had a nice meal out with the adults only during our trip, but we saw plenty of kids, too. Dolphin manages to be casual but also upscale, a rare but beautiful quality in a restaurant. They have a nice wine list and lots of fun cocktails. I loved the Skinny Chi Chi with coconut vodka. Plan to spend about $25-$35 per entree for adults…a bit overpriced, in my opinion, but off-set by the friendly service and nice ambiance.

Postcards Cafe:

We didn’t get a chance to eat here, but my sister and brother-in-law did, and reported that the food was as tasty as at Dolphin, in a more intimate, cozy setting. You’ll get excellent service at Postcards, and enjoy your meal in a quaint Hawaiian plantation house. The restaurant is located right across the street from Dolphin in Hanalei, and does require reservations on most evenings.

shave ice

Best Shave Ice:

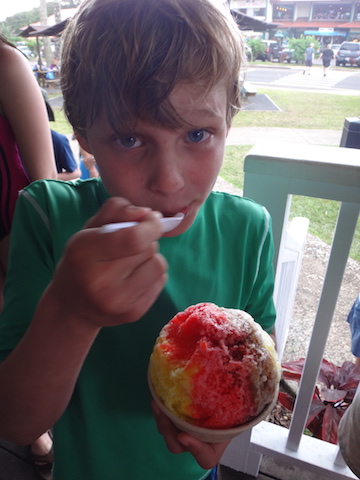
Let’s get serious: the most important meal of the day is your daily shave ice on Kauai, right? We enjoyed several shave ice stands in Hanalei, but the lines get very long in this resort area. Instead, head up the road toward Princeville to the shopping center. Directly across from the North Shore General Store, you’ll see Kauai Shave Ice. This hole-in-the-wall stand uses natural syrups, without any corn syrup and non-GMO. Hang onto your cone though, because the cups used can topple over.

We found the shave ice with the best price in Kapa’a, at Ono Ono Shave Ice. It’s in a parking lot, so we took our shave ice here to go, but prices start at just $3.50 instead of the usual $4 for four flavors. Add a scoop of ice cream to the bottom for just a $1 or $1.50 more.

Note: for a healthier option, try an acai bowl. This smoothie-type treat comes with fresh cut fruit and granola on top.

Best Luau:

Smith’s Tropical Island Paradise:

An evening at Smith’s is a full schedule of food and entertainment. Get there right when it opens (at 5 pm in the spring and summer) to walk the grounds before the excitement begins. When you arrive, you’ll be handed shell leis and a map of the gardens; either take the tram on a loop tour, or explore on your own. We took the tram, then wandered back to our favorite spots. Be sure to buy bird feed for the kids to throw to the many peacocks, chickens, and ducks!

smiths-luau

Dinner is served following a ceremonial uncovering of the roasted pig (which is optional to watch), and is served buffet-style. There was plenty to eat and drink, and the kids had fun trying Hawaiian dishes such as poi and shredded pork. There’s an open bar for the adults, with Mai Tais, wine, and beer, but we found out the bartenders will make you whatever you want. During dinner, you’ll be entertained by dancers and a band.

Check out the kids, or ‘keikis’ learning the hula:

After dinner, head to the amphitheater for the luau show. It lasts about an hour and fifteen minutes, and everyone in our group, from the four-year-old to the grandparents, enjoyed it. It was very professionally done, though the length was a tad long after a full day (we wouldn’t have minded a one hour show). The whole evening was well organized and relaxing, and we recommend it as a first luau for newcomers to the islands. Smith’s is affordable for families with kids (they’re only $19 each) but you’ll pay over $78 for each adult. Consider it a full scale evening out…dinner and a show.

Where do you like to eat on Kauai?

Hiking the Kalalau Trail on Kauai’s Na Pali Coast (with teens to toddlers)

You don’t have to be a through-hiker with a backcountry permit and backpacking equipment to experience Kauai’s Na Pali Coast.Yes, the further you hike, the more you’ll see, but it’s entirely possible to hike just half a day and see enough to be wowed.

na pali coast

The Kalalau Trail runs 11 miles one-way along the stunning and steep Na Pali Coast, and provides the only means of traveling this section of Kauai coastline…on foot. Through-hikers either traverse the entire 11 miles in one day, camp at the end near the south shore, then hike back, or break up the adventure further, camping en route at about mile six, mile 11, and mile 18. It’s a route that requires the right gear, plenty of fresh water, and nerves of steel on some sections, where the trail hugs the mountains with steep drop-offs to the ocean.

Experiencing the Kalalau Trail with kids:

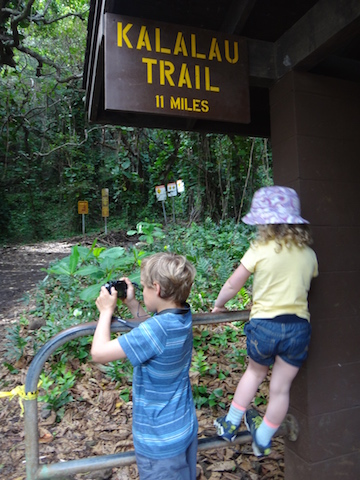
Most likely, you’re not prepared to make a multi-day adventure out of the Kalalau with kids in tow, but parents can certainly carve out a day of a Kauai beach vacation to see some of the trail. Start at Ke’e Beach on the North Shore, literally at the end of the road (you can go no further on Highway 56). The trailhead is well-marked, and you’ll likely see plenty of other hikers. Get to the trailhead early (before 9 am is best), as the parking lot fills up fast.

ke'e-beach

From the start of the trail at Ke’e Beach, families have multiple options on the length of their hike. We suggest:

  • hiking 1/2 mile in to the lookout point, then heading back for a 1 mile hike with preschoolers and young kids
  • hiking 2 miles in to Hanakapai’ai Beach, returning for a 4 mile hike with kids or teens
  • hiking 2 miles to Hanakapai’ai Beach, then an additional 2 miles up a side trail to Hanakapai’ai Falls and back, for a total of 8 miles with strong hikers

na-pali-coast

No matter which option you decide is best for you, note that the way will be steep. The Kalalau Trail rises and falls in elevation with every quarter mile (sometimes with every step!), with rocks, water runoff, and mud throughout. In many places, there are significant drops on the side of the trail to the ocean. There are not guardrails or other safety measures in place, so it’s crucial that young children are secured or holding a parent’s hand and older children follow directions and refrain from running along the trail.

hiking-in-kauai

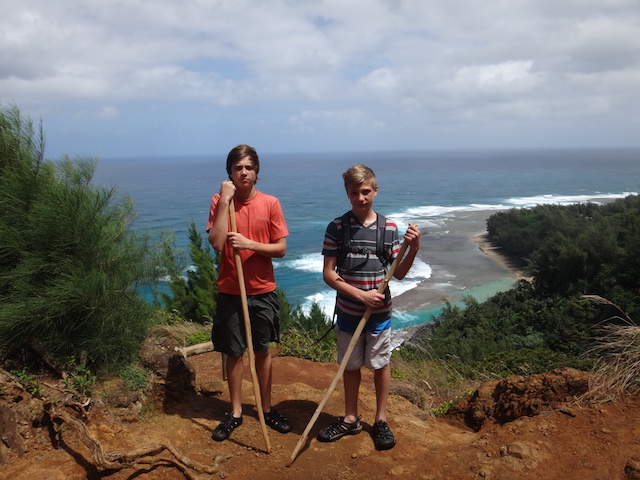
Our extended family of 11 set out on the trail on a March morning, with the plan to hike the four mile out-and-back with the option of some family members continuing on for the eight mile option. We made a family rule: all kids, even the teens, would be sandwiched between adults as we hiked. This prevented my teens from running ahead, and the preschooler and kindergartener from feeling left behind or getting too close to the edge. No where in the first two miles of the trail did we feel the trail was too dangerous, and I never felt too close to the edge, but a child running, jumping, or playing along the trail would not work.

hike-to-falls

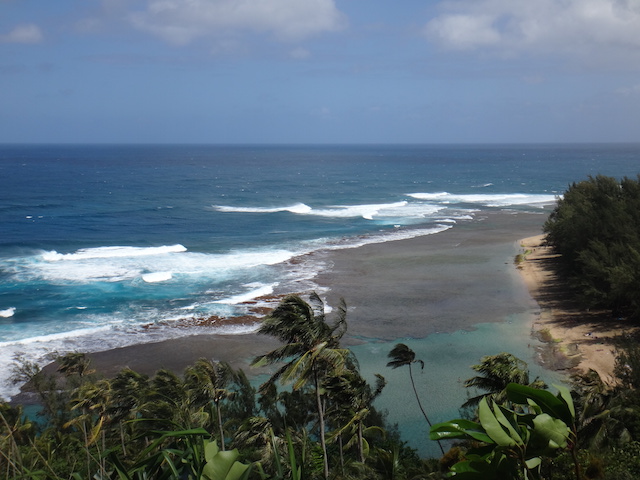
We hiked the first two miles slower than our usual pace, due to the steep trail but also due to the many photo opps along the way. At the 1/4 mile marker, families get their first glimpse of beautiful Ke’e Beach from above, but the even better views are yet to come at the 1/2 mile. The trail is mostly uphill for the first mile, then downhill for the second, as the trail drops down into Hanakapai’ai Valley and they rugged beach there.

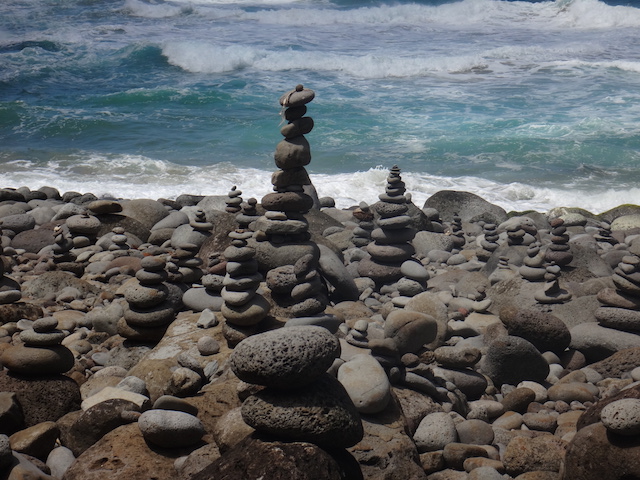
There’s a pretty major creek crossing right before arriving at the beach, which can be either an exciting reward for reaching the destination or a final obstacle, however you want to think about it. We had to help the young kids across, but the teens managed just fine. On the other side, there’s room for a picnic lunch and some ocean watching, but no swimming…the beach here is unsafe for swimming. Check out the lovely cairns other hikers have made from the smooth rocks lining the shore, instead.

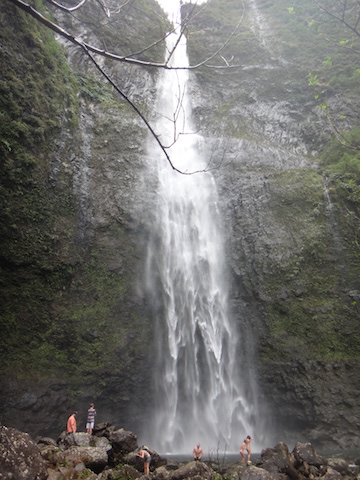
If you’re going on to Hanakapai’ai Falls, be sure to have plenty of water and adequate supplies, such as an extra layer of clothing, a small first aid kit, and snacks. The additional two miles to the falls is among the most strenuous I’ve encountered anywhere. There were at least six creek crossings, lots of muddy trail, slick rocks, and some actual bouldering to get up to the falls. The reward: one of the most beautiful falls I’ve ever seen, with space to take a dip in it’s pool. (Though if you opt not to get in the chilly water, you’ll get wet from the spray coming off the falls anyway!)

Retrace your steps to return to the beach, then retrace again to return all the way back to Ke’e Beach where you’ll end your eight mile day. We found the experience amazing, and would recommend the falls to anyone in good shape and used to hiking. The youngest hiker in our group for the extended hike to the falls was age 13. However, all kids, from age 4 and up, made it to and from the beach for a total of four miles.

What to wear:

Don’t wear your swimsuit, unless it’s comfortable to hike in. The only swimming is at the falls, and even that’s primarily a quick dunk. Be sure to have hiking shoes or very sturdy, rugged sandals, such as Keens or Tevas. Running shoes are a good bet, if you prefer them to hiking boots. (Browse more good stuff at Runnerclick.) I wouldn’t recommend anything without a closed toe. Wear sunscreen and sun protective clothing, and consider a bug repellent. We didn’t encounter many insects, but the area is known for them in certain times of year.

Additional activities and excursions to try on Kauai:

Cost of trail:

Free

Hours of operation:

Daylight hours. Note that the trailhead is often closed, depending on weather. The trail closes in severe rain, due to slippery mud and heavy flow of the creeks along the route (hikers have been swept all the way out to sea via flooded creeks along the trail). If the trail is closed when you arrive, wait a while. It usually opens. This was the case on our visit: at 9 am it was closed following a rainfall. We snorkeled at Ke’e Beach for a while, then the trail opened at about 10:30. This gave us a later start than we’d like, so please note possible trail closures when planning your trip.

Directions:

From Hanalei, continue along 57 to the end of the road, at Ke’e Beach.

Packing tip: How to pack only a carry on!

Have you lost luggage lately? Not much fun, is it? How about those baggage fees? Not a fan. But can an entire family really pack carry-on only? Yes! We’ve done it for years, for everything from a weekend trip to two weeks away. We’re full of packing tips, including how to pack only a carry on during your next family vacation, no matter where you’re headed. Read on!

packing-carry-on-only

1. Use the ‘roll’ method or packing cubes when packing.

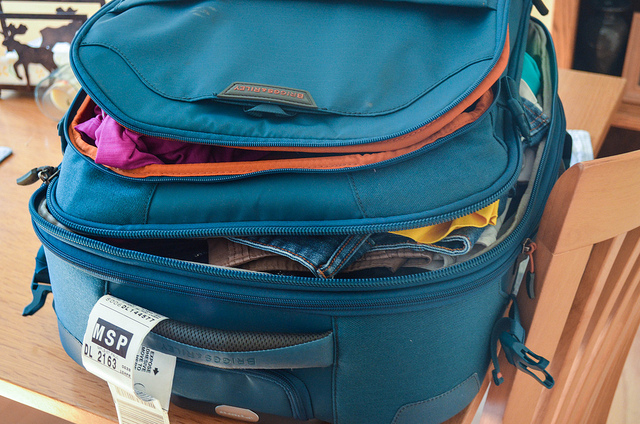
Thousands of Pinterest pins can’t be wrong: rolling clothes instead of folding them saves 30% more space in a duffle or suitcase. Line the bag with bulkier items such as shoes, then roll heavier clothing (like pants and jeans) on the bottom, layering next with shirts, t-shirts, and lastly, delicates and socks. Better yet, use packing cubes. Personally, we love Eagle Creek. (Check out all our best packing cube picks.) I use shoe cubes to keep kids’ socks and underwear organized, but many families ‘cube’ by day, packing complete outfits for each child in each cube.

Tip: Get all our travel tips in one place!

2. Pack more shirts than each child needs, and half as many pants.

Assuming your family vacation is not taking you too far into the wild unknown, the majority of messes will occur to your child’s shirts (think food spills, sweat, and sticky hands wiping). Pants and shorts can often be re-worn with minimal noticability to their wear. Try to find clothes that do double duty, such as pants that zip off to become shorts, and sun protection shirts that can be worn during active play. Our favorite is Columbia’s Silver Ridge pant. Likewise, try to restrict each child to two pairs of shoes: a sturdy pair of walking/hiking shoes (to be worn on the plane) and a pair of destination and season-appropriate sandals or boots.

3. Rent baby equipment at your destination.

By far the bulkiest part of the packing equation is baby gear such as portable cribs and play spaces, strollers, seats, and baby feeding equipment. Whether your destination is a hotel or resort or a relative’s home, there are numerous companies renting all of the above to vacationing families. Most allow parents to reserve the desired equipment online ahead of time, and will deliver equipment to their door. One I have used and recommend is Hotel Babies. And if your child is still in the logistically-difficult baby food stage, companies such as Petit Organics will deliver organic, hand-processed baby food as well.

4. Be prepared to do laundry.

No one wants to do laundry on vacation, but with a little preparation, it doesn’t have to ruin your day. We always pack 2-3 mesh laundry bags, which compact to almost nothing while empty. Travel-sized laundry detergent containers and stain remover can be purchased in TSA-approved sizing, and a roll of quarters can make finding change for washing machines far less painful.

5. Take advantage of the carry-on plus purse rule.

In addition to each ticketed passenger’s carry-on, he or she is permitted a personal purse, tote, or backpack. Since hauling a family’s worth of carry-on luggage can be challenge enough, consider foregoing each passenger’s right to bear a backpack and consolidate to only one or two totes or packs for family use. In addition to each passenger’s carry-on, we designate one large tote for in-air entertainment, which carries our laptop, iPad, and each family member’s book or Kindle and one backpack for snacks, medications, water bottles  (to be filled post-security) and other essentials.

6. Board as early as possible.

Because so many travelers are now packing carry-on only to avoid luggage fees, those bulk-head luggage bins fill up quickly. And when they’re full, you’ll be forced to check bags against your will. If you’re carting several large carry-on roller boards or duffles, board the plane as soon as you’re able. Doing so will ensure there’s still space for your carry-ons. It helps to have high-quality carry-on luggage like the brands on our Pinterest page, that can stand a few bumps and bashes (from your kids and others).

7. Gate check for free.

If you’re carrying-on only for the cost-savings, and don’t mind waiting at the baggage carousel for your bags at your destination, almost all airlines will offer free checking at the gate, as an incentive for travelers to save some cabin space. On smaller commuter flights, gate-checked bags will usually be waiting for you on a cart directly off the plane, but beware that on longer flights, they’ll be checked all the way through to your final destination.

Note: Don’t forget about the 3-1-1 rule! The 3-1-1 rule states that you cannot bring any liquid or gel that’s more than three ounces, and these must be carried in one quart-sized clear, zip-lock baggie. We love the reusable kind for this purpose (find them at eBags and Timbuk2).

When packing carry-on only may not work for you:

Carry-on travel is possible even during extended or long-term travel (thanks mostly to the laundry tip!), but there are situations in which it just may not be practical, such as 1) during winter vacations, for which bulky snow or ski wear or multiple layers are needed, or 2) during adventure travel, during which a wide-variety of clothing types will be needed (think hiking gear and snorkeling gear, or 3) during multi-climate travel, during which several drastic weather changes may necessitate bringing both winter and summer wear.

Photo credit: Flickr/m01229

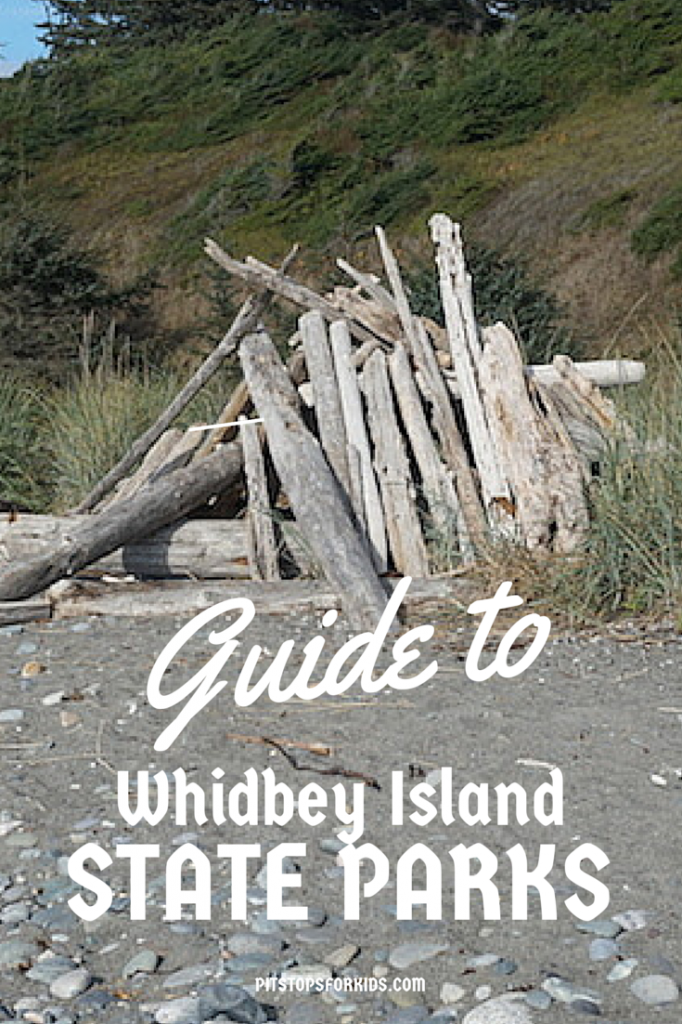
Guide to Whidbey Island State Parks

Whidbey Island, Washington is known for its picturesque coastline and pastoral setting. It’s true that Whidbey, located north of Seattle, offers abundant farm stands and a healthy agri-tourism trade, but many families –including mine!– had no idea how many beautiful, exciting state parks fill this small island! We recommend coming to stay at least three days in order to experience most of them.

Fort Casey State Park:

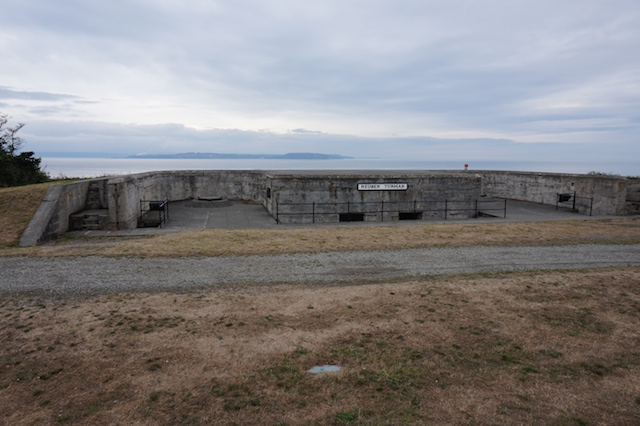
If you arrive via Washington State Ferry at Coupeville, you’ll notice Fort Casey State Park right away. This large park sits on the island’s west coast, and centers on the region’s military history. There are numerous batteries (created for defense but never used) lining the coast line, which contributed to the ‘triangle of defense’ offered by Fort Casey, Fort Worden (across the water in Port Townsend, WA) and Fort Flagler.

admiralty-lighthouse

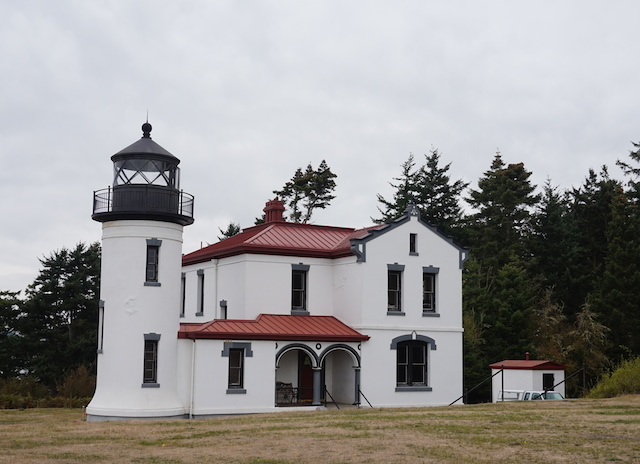
What to do here: Families will want to check out the batteries and commanders’ station, but should also visit the beach access and Admiralty Head Lighthouse. The light sits at Red Bluffs, and during day time hours in season, visitors can go inside and even climb the spiral stairs to the light. From here (and elsewhere in the park), kids can watch the ferries come and go from the landing.

whidbey-island

Campground: Yes! It’s right next to the ferry landing (which can be a good thing or a bad thing…).

Ebey’s Landing:

Ebey’s Landing National Historic Reserve encompasses the entirety of the town of Coupeville, Ebey’s Prairie, and Fort Ebey State Park. It marks the homestead and founding location of the Ebey family, and protects the historical significance of this entire section of the island. Fort Ebey includes coastline, hiking trails, and more batteries.

batteries

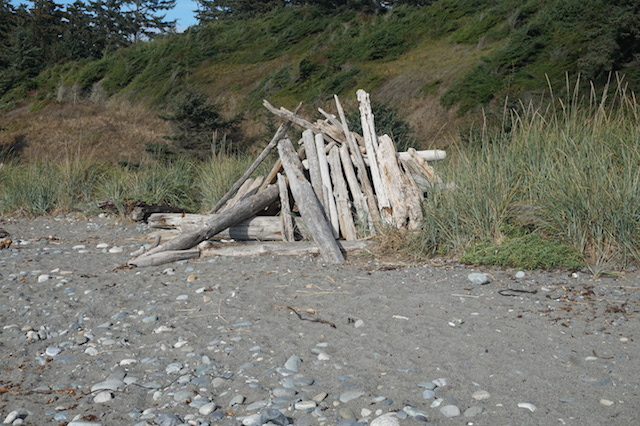
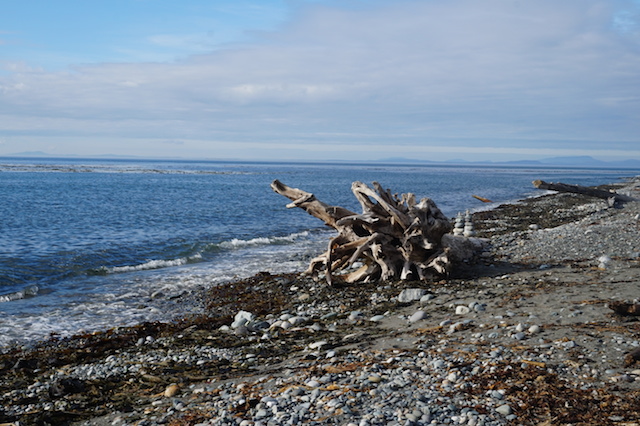
What to do here: At Fort Ebey, play on the beach! This section of protected coastline offers up oversized driftwood perfect for building a beachside hut or fort of one’s own, and the picnic areas are protected from wind and surf. The bluff-side trail is one mile long, and takes families from the beach to the batteries overlooking it. It’s worth getting back in the car to check out Jacob Ebey’s House. The house is open seasonally, but the adjacent cemetery is worthy of a visit in its own right. Families can overlook the prairie, and step inside one of the many ‘blockhouses’ the Ebeys built as protection from Native American conflict.

Campgrounds: Camping is available on the beach (in a protected forested area) at Fort Ebey, and on the prairie at Rhododendron Park (near the Whidbey Island Naval Air Station).

Deception Pass State Park:

deception-pass

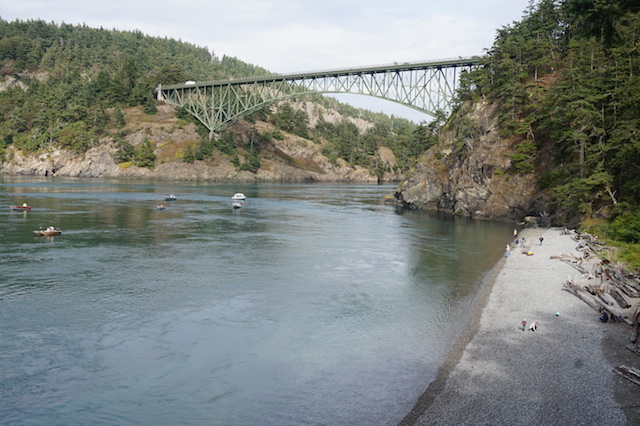
On the north tail of the island, Deception Pass State Park may be the most well-known. This breathtakingly beautiful park focuses around the Deception Pass bridge. Hiking trails are abundant, and the park hosts a busy marina with sightseeing vessels doing business.

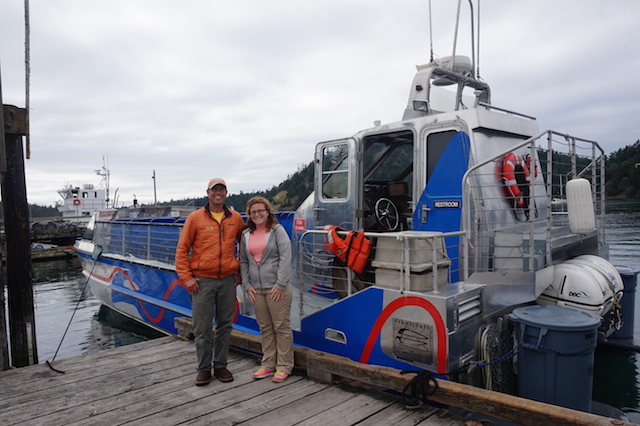
What to do here: Park at the visitor’s center (stand) on the south side of the bridge, and hike down to North Beach (.2 mile). From here, families will get a great view of the bridge before they cross it. It’s also fun to see the many fishing boats in the current that flows quickly here. Additional hiking trails take you further afield, or you can opt to cross the bridge. Cross either on foot using the pedestrian walkway (an exciting experience!) or drive.  Head to the marina dock on the other side, and take a Deception Pass Tours boat out on the water. This 45 minute tour in a catamaran Island Whaler takes you under the bridge and past the challenging water that churns there to the bay. During our tour, we saw porpoises and harbor seals, and many tour groups see whales. Tours are priced right at $24.95, and don’t last too long for young kids.

deception-pass-tours

Campgrounds: campsites range from forested to open, on or near the water. Like the rest of the park, they’re gorgeous!

South Whidbey Island State Park:

South Whidbey Island State Park is smaller and quieter, and feature shoreline and forested areas. Primarily, it serves as a campground. Families get great views of the Olympic mountains!

whidbey-beaches

What to do here: This state park is popular for clamming, but there’s also about three miles of hiking trails, fishing, and swimming.

Campgrounds: There are 46 tent camping spaces at South Whidbey. Of note: families may hear air traffic from the nearby naval base.

whidbey-island

While enjoying any Washington State park, you’ll need a Discover Pass. Passes are $10 per day, or just $30 for a year!


Travel gear we use: sun protection clothing for kids and adults

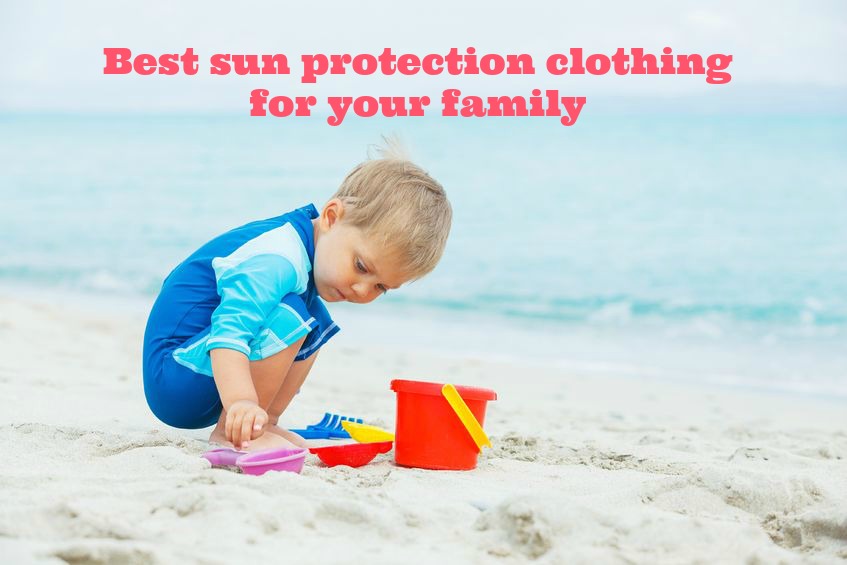
Today in Travel Gear We Use, we’re talking about best sun protection clothing for kids and adults. If your family plans to visit a warm-weather spring break destination, it’s time to make sure you have the right gear to protect everyone from the sun. Our sun protective clothing picks will last you through the whole summer, unless your kids outgrew them first!

best-sun-protection-clothing

Sun Day Afternoons clothing and hats:

Sunday Afternoons has sun protective clothing and hats for the whole family. We love their packable hats, like the Sun Tripper Cap with a foldable brim, and my husband prefers their Charter Hat. Young kids can be outfitted in wide-brimmed hats with SmartStrap–which uses an adjustable toggle and breakaway clip– like the Play Hat, and clothing ranges from long or short-sleeved shirts for the whole family to pool onesies.

Columbia sun protective shirts:

For on the trail or while traveling, I love the lightweight feel of Columbia Tamiami II Long Sleeve Shirt. Columbia wear is affordable, always returnable, and easy to order online…win, win, win! I can’t get my kids to wear collared, button-down shirts while on vacation, no matter how comfortable, so instead, I trick them into sun protection with Columbia’s Adventureland Long Sleeve Tee. While we’re on the subject, my older kids refuse sun protective wide-brimmed hats (they looked so adorable in them as little ones!) so they opt for bandanas or cowboy hats while under the sun. As long as something is on their heads, I don’t really care!

Exofficio cover-ups:

My favorite sun protection for a day near the pool is my Exofficio Women’s Sol Cool Hoody. Incredibly thin, very flattering, and always appropriate, the Sol Cool is the perfect go-to cover up for swimming that transitions well to the pool-side restaurant or even onto a hiking trail.

Madrone headwear for men:

My husband has absolutely fallen in love with his Madrone Navigator hat. This is a miracle, as he usually isn’t willing to wear anything on his head except a baseball cap. The Navigator offers full sun protection, a chin strap, and great ventilation. He’s worn it everywhere from on the river while fishing to hiking in California deserts. It can be found currently at CampMor for $49.

amzn_assoc_placement = “adunit0”;
amzn_assoc_search_bar = “true”;
amzn_assoc_tracking_id = “pitstoforkid-20”;
amzn_assoc_ad_mode = “manual”;
amzn_assoc_ad_type = “smart”;
amzn_assoc_marketplace = “amazon”;
amzn_assoc_region = “US”;
amzn_assoc_title = “My Amazon Picks”;
amzn_assoc_linkid = “5cff3a8b5f0e508e11c71a553e7363cc”;
amzn_assoc_asins = “B001IQKZIC,B018W43M6E,B00LCMD7VE,B01IDGGPX8”;

All of the above picks are linked to the lowest possible pricing on Amazon. All are affordable for families with growing kids!

Find more gear in the Travel Gear We Use series (click below):

Educational Travel: End of the Oregon Trail Museum

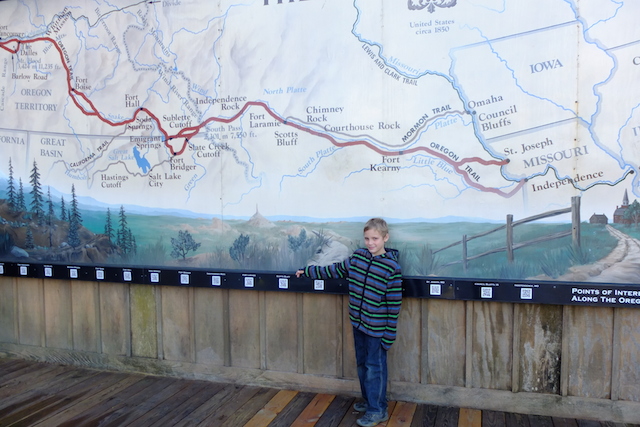
Historic Oregon City marks the official end of the Oregon Trail. It’s also home to the best Oregon history museum you’ve probably overlooked. Only minutes from downtown Portland, Oregon City and its End of the Oregon Trail Museum is easy to access via car or MAX, but often becomes overshadowed by other excellent Portland attractions for kids. The museum includes a wonderful indoor exhibit hall, a country store selling pioneer-era toys, candies, and garb, and gardens in the summer months. Families can also get information on area historic home tours.

end-of-oregon-trail-museum

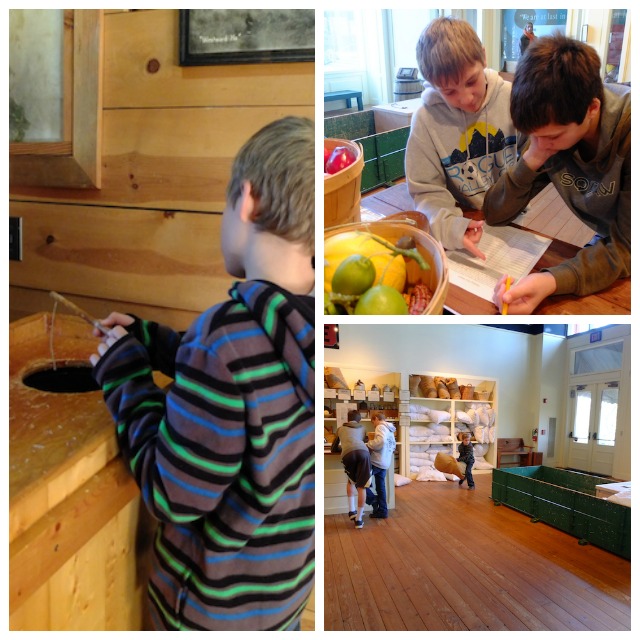
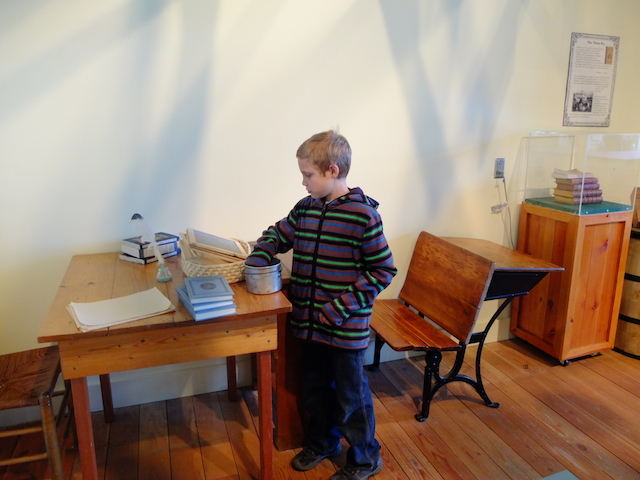
After checking in at the front desk in the country store, visitors are directed to the three main exhibit halls, where docents take you through the space. This is not a traditional tour, where guides are speaking to you all the time, but rather leading you and helping you along. In the first building, for instance, is a hands-on pioneer-era store, school, and wagon supply area, where kids are encouraged to play for a while. Young kids will like the school and store area, and older kids will love creating their own Oregon Trail supply list, then physically collecting the required items (bags representing flour, bacon, and coffee, medicines, tools, and the like) and fitting them into an actual wagon bed. All supplies must come in under 1000 pounds, so we kept track on our phone calculator.

end-of-oregon-trail

When they’ve played their fill in the first building, visitors are led to a hands-on activity (candle-making during our visit) and then to a 30 minute film depicting life along the Oregon Trail. All our school-aged kids were interested in the film, but very young children may want to opt out. The docents then lead families through to the third building, where the talking portion of the tour includes information on the Oregon City land office (where all Oregon Trail travelers had to ‘check in’ to get their land) and Oregon City history (it was the first capital of Oregon, and boasts additional firsts, such as the first hotel west of the Rockies, etc). The docents do a great job of keeping the talk engaging, with many questions directly to kids and many stories kids are interested in. You can stay here as long as you like (the docents will gamely keep answering questions) or can head outside to run around on the lawns, check out the gardens, and shop in the store. Free hot chocolate and coffee are offered in the store post-visit.

schoolhouse-end-of-oregon-trail-museum

Date last visited:

January 2014

Distance from the interstate:

10 minutes from I-5, right along I-205.

Admission:

$9 for adults, $5 for children 5-17. Kids under 5 are free.

Hours:

Summer: 9:30 am to 5 pm. Winter: 11 am to 4 pm.

Dining:

No food services are on-site. Pack a picnic lunch; picnic tables are available outside.

Directions:

The museum is located at 1726 Washington St., Oregon City. From I-5, take I-205 to Oregon City.