Stocking ideas for families who travel

Need help filling those Christmas stockings this year? We’re back with this year’s 10 stocking ideas for families who travel! Whether you have small children who need entertainment on long road trips or teens who love the outdoors, the following holiday stocking stuffers will fit the bill!

holiday-stocking-stuffers

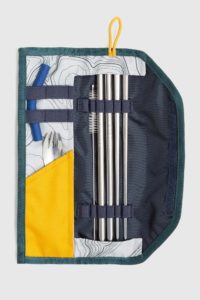
1. United by Blue Utensil Kit:

United by Blue has made a commitment to reusable products and the clean up of our planet. Their utensil kit includes two stainless steel straws, one silicone straw tip, one straw cleaner, one stainless steel spork, and one pair of stainless steel chopsticks. Mine fits perfectly in my tote or backpack to be at the ready for any on-the-go meal. The case it comes in is 100% recycled polyester ripstop with a water-resistant finish and velcro closure. Pick one up for anyone on your list for $24!

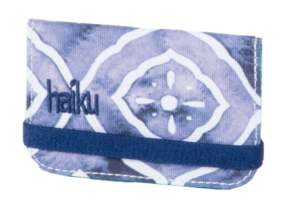
2. Haiku RFID Mini Wallet:

This tiny wallet packs a powerful punch, ready for any international adventure. You can fit your state ID and 3-4 credit cards in this slim wallet, which closes quickly with an elastic band. You get RFID-blocking technology in an CyclePET fabric made from plastic water bottles. Get one for $15.

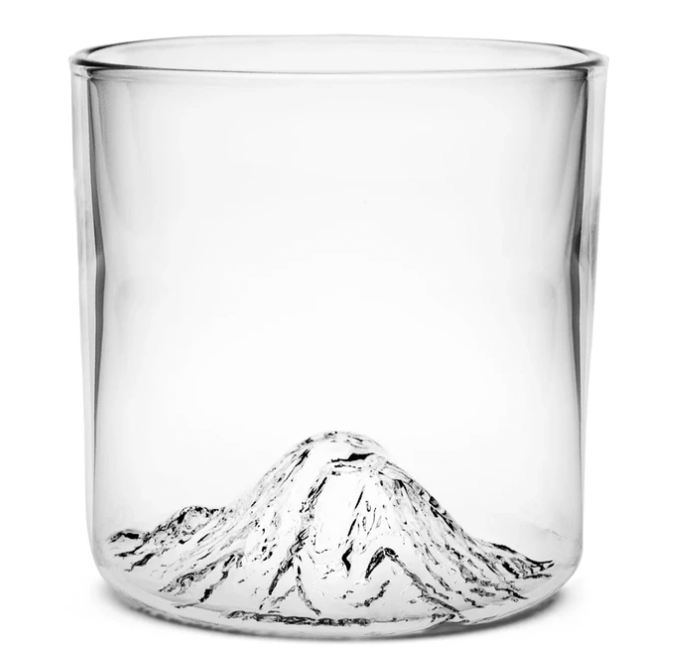
3. North Drinkware tumblers, pint glasses, and coasters

An Oregon company, North Drinkware creates beautiful pint glasses, tumblers, coasters, blankets, and more inspired by Northwest mountains. Their handblown beer tumblers and pint glasses have the raised imprints of iconic peaks on the interior bottom, such as Mt. Rainer, Mt. Hood, etc. The perfect gift for the outdoorsy NW traveler! We love displaying our Mt. Hood coasters, too. See all their offerings here.

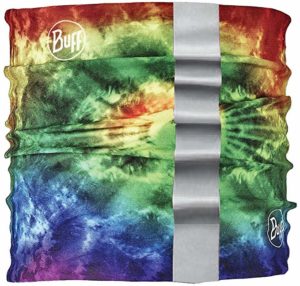
4. Buff Dog Reflective Neckwear:

Yes, it’s as cute as it sounds…a Buff for your dog! We love the reflective strip that keeps him or her safe on those nighttime walks or early morning jogs, and these Buffs come in multiple sizes and patterns, just like the human version. Pick one up for your pet for $12. Need one for your dog’s human, too? We love Buff’s new InsectShield line that protects everyone from ticks and mosquitoes.

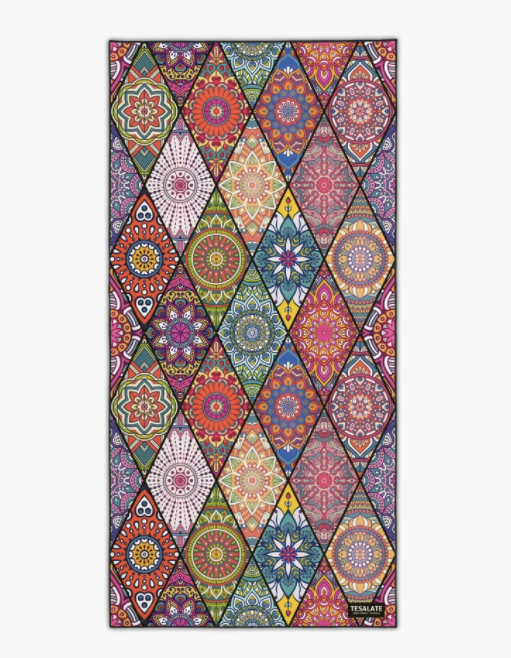
5. Tesalate ultimate beach towel:

These beach towels fold down small for road trips, car rides, and camping trips, yet absorb so much water! (Great for pets, too!). They do not allow sand to cling whatsoever, so you don’t get pesky sand in your car, van, or RV. We can’t get enough of these, so we got the XL, which is big enough to work as a picnic blanket, too! Check out all the fun colors and patterns.

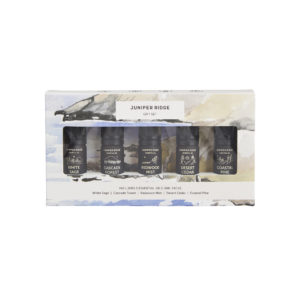
6. Juniper Ridge essential oils:

Can’t get out into the wilderness this holiday season? Bring the outdoors to you with Juniper Ridge’s set of essential oils, ready for any diffuser in your home. From Sierra Forest to Christmas Fir, you’ll be invigorated with the scents of the forest, helping with a sense of calm and relaxation when you can’t be outside.

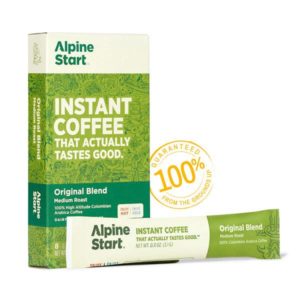
7. Alpine Start instant coffee

Instant coffee that still tastes good? Yep! Alpine Start is the coffee pack to pick up for your next #vanlife adventure, camping trip, road trip, or socially distant travels. They come in a variety of flavors and pack sizes, including original or a super yummy dirty Chai. Packs are $8.99.

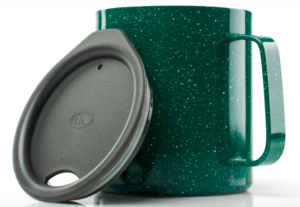
8. GSI Outdoors Glacier Camp Cup:

The perfect stocking stuffer for the camper or outdoor adventurer who has everything! This stainless steel camp cup has double-wall insulation and a snug-fitting lid, and is light enough to easily attach to any backpack for carrying from campsite to campsite. It comes in multiple colors so you can be sure you always know which cup of coffee (or whiskey) is yours. Pick one up on GSI Outdoors for $15.

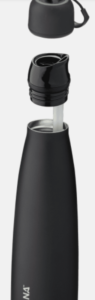
9. Avana insulated water bottle:

These beautiful and functional water bottles are leak-proof, spill-proof, and come with a built-in straw. You get a triple layer of insulation and a cool carry loop on the lid. It comes in a variety of colors and sizes.

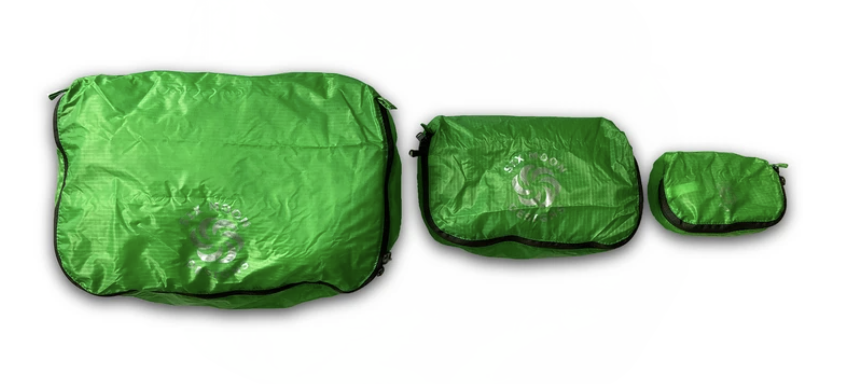
10. Six Moon pack pods:

Can you have enough packing cubes? Never. Six Moon Designs is a company we have long-trusted for their backpacks and shelters, and now their pack pods come in three size options for just $30. Ideal for storing miscellaneous camping gear, road trip snacks, or clothing. We like to keep some on-hand in every car and in our backpacks. Pick them up here!

Need more ideas? Check out more holiday gift picks from Pit Stops for Kids!

Photo credit: Flickr/popofatticus

Holiday stocking stuffers for family and outdoor travel lovers.

Teens flying unaccompanied: what to do when things go wrong

On Pit Stops for Kids, we’ve written tips for parents whose kids are flying solo. But what about teens? Most airlines allow kids aged 5-14 to fly as unaccompanied minors (with kids 5-7 restricted only to direct flights), which leaves kids 15 and up in a completely different category. When kids 15-17 fly solo, they’re still every bit as unaccompanied…and are still minors. But basically, they’re on their own. Pretty scary for parents, and even more so when things go wrong.

We decided our oldest, Nate, at age 15, was old enough to fly unaccompanied. The route: San Francisco to Dallas/Fort Worth, then DFW to San Jose, Costa Rica. Yep, it was a biggie: a non-direct flight through big airports to an international destination. Was he ready? YES…but unfortunately, we were forced to learn this the hard way as Nate was tested severely on his travel day.

Here’s what happened: I escorted Nate to his departure gate in SFO (it’s easy to get an escort pass!), and his flight departed on time. When he arrived in DFW, he found his connecting gate without a hitch, even though it involved a shuttle ride. He even boarded his second flight without a problem, texting me updates all the time. However, he never left the tarmac. As happens occasionally, his plane experienced mechanical difficulties. First it was some sort of brake fluid issue, then an engine overheating. He sat on the tarmac for two hours before his plane was taxied back to the gate. He deplaned, and moved to a new gate as instructed, but the flight continued to be delayed. Finally, the inevitable occurred: the flight was cancelled. The earliest he would leave the airport was 6:30 am the next morning.

Nate found himself facing the prospect of sleeping overnight, by himself, in Dallas/Fort Worth, with his chaperones far away in Costa Rica and his parents nearly as far away in Southern Oregon. He was a seasoned flier, but suddenly felt very, very alone. He faced several immediate problems:

  1. In the chaos that always accompanies a cancelled flight, he didn’t know to get online and try to book a better flight immediately. Even if he had, he lacked the resources to pay for an upgrade.
  2. The travelers on his flight were being issued hotel room vouchers by the airline (American Airlines), but as a minor, the Marriott they’d partnered with didn’t want to issue him a room.
  3. He was tired and hungry, and the long line of impatient travelers trying to get vouchers and demanding answers intimidated him.

Here’s how we helped:

  1. We stayed on the phone with Nate nearly constantly. Thank goodness for cell phones! If you have a teen flying solo, I strongly recommend sending him or her with a phone, even if he or she normally doesn’t carry one.
  2. I told Nate to give his phone to the gate agent, so I could speak with her directly. I was polite but insistent that he receive instructions, and more importantly, be issued a room. The American Airlines agent I spoke with was helpful and sympathetic. She got it done.
  3. I got online, and looked for any other flight that would save him from an overnight in Dallas. There was none, but in the case this happens to your child, be proactive: the airline would rather give any available seat to a minor than have to figure out what to do with him or her all night! Every airline I spoke with after this incident told me that minors do get priority over other travelers, when at all possible.
  4. I asked for the name and phone number of the hotel the airline had put Nate up in, and I called their front desk. I explained that Nate was a minor (which they already knew) and asked the questions I thought he may have forgotten: when does the morning shuttle back to the airport begin to run? Does he need a reservation? Can I place a wake-up call on his behalf? The Marriott Dallas/FortWorth Airport helped in every way possible, and gave Nate a toothbrush, to boot.
  5. The next morning, I followed the flight’s updates via texts from American Airlines. All I needed was the flight number to ensure any gate or time changes would come directly to my phone.

Nate and I both had restless nights, but in the end, he got through it. Without help, he found his airport shuttle, checked into the Marriott, woke up on time (at 2 am PST!), made it back to the airport, and got on his flight. It’s not the way either of us wanted his travel day to go, but he’s now a seasoned soldier in the battle of air travel.

air-travel-tips

Before embarking on your teen flying unaccompanied, I suggest the following tips (learn from us!):

Teen flying alone? Ensure you have stellar support from chaperones at the destination. When Nate’s travel day from hell occurred, he was flying to Costa Rica for an Adventures Cross Country trip. I cannot say enough good things about ARCC’s home office. When I called just before business hours ended, I got an immediate answer from Brooke in the office, and my updates were relayed immediately to Nate’s leaders in Costa Rica. This line of communication was so flawless, it was clearly protocol. When the afternoon turned to evening, and then night, Brooke gave me her cell phone number and continued to help. I was able to reassure Nate that his leaders hadn’t left him (of course not!), and that they knew what had happened to him.

Send your child with a debit card for teens, such as Buxx. Even though Nate’s flight was cancelled due to mechanical issues, and he therefore received vouchers for lodging and food, he spent more than we’d planned in the airport. We were able to look at his balance on his Buxx card and add to it from home. Had he needed to purchase a hotel room himself (perhaps due to a weather delay), we would have called a hotel directly and booked it for him, or put more cash on his card. I am not paid by Buxx in any way; we use this service personally for our teen.

Emphasize to your teen that he or she needs to be a self-advocate. It’s not easy to stand up for yourself, but it’s imperative that your teen is able to approach airport and hotel personnel and ask for help. Nate continually said to people, “I’m a minor flying alone, and I need some help figuring this out.” Even the most nurturing agent can’t assist if your teen has blended into the background and is unnoticeable.

Let your teen practice. In anticipation of Nate’s trip, we let him ‘take the wheel’, so to speak, during an earlier summer cross country air travel day. Even though I was present, I had Nate check us in, hand out boarding passes, direct us through security, and find our gate.

Absolutely wait until you think your teen is ready to fly alone. While we anticipated a long travel day for Nate, and prepped him on procedures from going through customs to finding his gate, we had no idea his day would become two days. But we should have been prepared for the possibility. Thankfully, I trusted Nate could navigate the situation because he’s flown many, many times with his family. Even though he’d never been asked to figure everything out himself, he was already familiar with boarding passes, security, customs, and yes, hotel shuttles.

We hope your teen never experiences a solo flight like Nate’s! 

Yosemite National Park travel tips: best tours, hikes, and advice

During a time when many vacations are not possible, outdoor activities in road trip-accessible locations offer the ability to safely social distance. Hotels.com asked me to share my favorite activities and tips for exploring the Yosemite area, so start here as you plan a safe and responsible vacation.

Yosemite National Park is one of the crown jewels of the national park system, and for good reason. Its stunning geological features, wildlife, and rich history make it ideal for an outdoors family vacation. This park has so much to offer, the following Yosemite National Park travel tips and touring advice are meant to supplement further research. Start with the official Yosemite National Park site to plan your trip, make sure activities and sites are open, and plan your lodging options! For touring advice and tips primarily for Yosemite’s Valley Floor region, read on.

Note: if you’re considering the Majestic Mountain Loop of three parks in one trip, start by viewing our Guide to Sequoia and Kings Canyon National Parks.

When to go:

Yosemite is open and active year round! While the vast majority of visitors arrive in the summer (of course), more is open during the off-season than many families realize. During fall and spring, some hikes and roads may be closed, but the majority are still at your disposal. Ditto for visitors centers and museums (just check seasonal hours). Winter is a wonderful time to stay on the valley floor without the crowds; families can easily rent snowshoes or Nordic skis to explore the area. If you must go in summer, don’t worry: the park is still very accessible with crowds. Plan to base your car in one location (ideally your lodging within the park) and take the free inter-park shuttle everywhere you need to go. We tried this out during a busy week in July (the peak of the busy season) and never waited more than five minutes for a shuttle bus. Busses run between campgrounds, lodges, visitors centers and hiking trailheads.

yosemite-national-park-tips

What to do on the valley floor:

Obviously, there’s too much to do in Yosemite to put into one post! The Tuolumne Meadows and Wawona regions are well-worth visits; however, if your family is new to the park, and you have at least three days, devote one morning to a Valley Floor Tour. This tour–conducted on motor coach in the off-season and open-air tram in the summer–offers a wonderful overview of the valley. If possible, ask for tour guide Bill: his knowledge is unparalleled, and he’s entertaining throughout! I loved that Bill described his tour as a ‘portal’ tour: he considered every major subject he addressed as merely a ‘portal’ to learning more (then gave the resources needed for those who wanted to dig deeper). Our Valley Floor Tour covered Yosemite Falls, Bridal Veil Falls, Tunnel View, Swinging Bridge, and Sentinel Rock, Cathedral rocks, and El Capitan. The bus stopped frequently, with plenty of photo ops. Because tours don’t stop for hiking, swimming, and the like, this is a good opportunity to note the areas you’d like to come back to on your own.

yosemite-valley-floor-tour

Lodging:

Where to stay in Yosemite National Park is as varied as individual family itineraries! For easiest access to the shuttle buses and to be within walking distance to the most sights, I’d opt for Yosemite Lodge or Camp Curry (be sure to reserve both well ahead of time). For families who may wish to divide their attention between Valley Floor activities and backcountry, many lodging options are located just outside the park.

Hiking:

Yosemite Falls: One of the easiest hikes to access from the valley floor, Yosemite Falls offers a very short hike to the lower falls, or a much more strenuous hike (3.8 miles one way) to Upper Yosemite Falls. Plan to spend the better part of the day if you tackle the latter! End your hike with a treat at the Food Court of Yosemite Lodge at the Falls.

yosemite-falls

Mist Trail: If you only do one hike in Yosemite, this should be it. But bear in mind that it will get very crowded in summer. Go early in the morning, or just before evening to beat the crowds (and heat). Enjoy the mist off Nevada and Vernal Falls as you make the short but very steep climb. If you’re up for more, this is the access point to hiking all the way to Half Dome to climb the backside using the cable system.

Note: permits are required for the Half Dome climb. You don’t need to be a rock climber, but you do have to be comfortable with heights and tall enough to hold the cables. If you’re not up for it, but do want a long hike, continue past the falls to Little Yosemite Camp, where you can watch the cable climbers.

yosemite-falls-trail

Glacier Point to Valley Floor: This is another hike for the hearty! Use the free shuttle system so you only have to go one-way! Because you are directly across from Yosemite falls, you get a great perspective since you start above the falls, and see it at every height as you descend to the valley floor. If the kids are up for it, bribe them with a promise of ice cream at Yosemite Village and keep trekking across the valley floor.

Our review of family backcountry hiking and backpacking in Yosemite.

Museums, programs, and visitors centers:

A trip to the Yosemite Village Visitor Center and museum is absolutely worth your time. Kids (and adults) learn about geography and wildlife in the center, then can tour an outdoor Miwok village at the attached museum. We also loved the baskets on display, and during the summer months, Native American artisans are on-hand to show you their techniques. The village center also has stores, restaurants, and the like.

yosemite-village-museum

For winter activities and snow play, start at Yosemite lodging, such as Yosemite Lodge or Camp Curry. Both locations will have sleds to purchase and snowshoes to rent. Camp Curry has an ice-skating rink (tickets can be bought at either lodge). Guided nordic skiing tours to Glacier Point depart regularly in winter. In fall, be sure to ask about the Swinging Bridge Ladybuy Hatch. This amazing event takes place annually on the Swinging Bridge in the valley, when hundreds of thousands of ladybugs hatch. An amazing sight, and one guests can only see in autumn.

Park programs and nature walks are available year-round at Yosemite! Definitely sign up for one of the park’s watercolor classes, Junior Ranger programs, or, my current favorite: the Night Prowl. Led by a naturalist, the Night Prowl takes visitors on wooded trails by moonlight, which chances to see or hear nocturnal animals. Even if you don’t see animals, guides do a great job of relaying interesting information and conducting fun group exercises to help you adjust to the dark and understand your surroundings. This program is ideal for school-aged kids, and is a deal at only $5.50 per person.

yosemite-programs

Tip: Did you know park rangers are not the only naturalists leading guided tours and programs in Yosemite National Park? The park’s chief concessionaire also employs naturalists to lead excursions, often filling the gap left by budget cuts. These services are available to book from park lodging!

10 easy ways to decorate your hotel room for the holidays

The Pit Stops for Kids crew will be spending the holidays in a Tahoe vacation home this year, so I’m making plans now to make our stay as festive as we’d enjoy at home. If you, too, will be spending your winter holidays away from home, we have 10 easy ways to decorate your hotel room for the holidays…or any condo or vacation home!

decorate-for-holidays

  1. Decorate condo or hotel room windows or porch with a string of battery-operated Christmas lights. Find these at your local dollar store! Tip: you can wrap them around the handle of strollers or even around ski helmets to be festive on-the-go!
  2. Buy a local wreath or garland. Once you’ve arrived at your destination, explore your immediate area by looking up a farmer’s market or holiday bazaar, where you can buy a locally-sourced wreath for your condo or vacation home door.
  3. Check condo and vacation home storage closets for decorations. Most will have a stash of holiday decorations stored in a utility closet or pantry. Ask the home owner or lodging association if it’s ok to put these up (and take them down). I’ve never been told no!
  4. Bring a holiday-themed tablecloth and candles for the table. It’s a small touch, but it goes a long way!
  5. Buy a permit and cut down your own tree upon arrival. Going somewhere rural? Look up where to buy a Christmas tree permit before you leave home, and stop by for it en route to your condo or vacation home. Your first vacation activity can be a hike through the snowy woods for your own tree!
  6. Decorate your cruise ship cabin door. Buy or make your own holiday magnets for cruise ship cabin doors, which are magnetic. The practice can get quite competitive, so bring your A game!
  7. Play holiday tunes. Don’t underestimate the power of music to set a holiday mood. Bring a portable speaker and sync it with your smart phone or an iPod set on a holiday radio station.
  8. Have a small tree delivered. Don’t have time or space for a regular-sized tree? Buy a small, live potted tree to use as a table-top centerpiece. Purchase at a local nursery, and decorate with a select few of your favorite ornaments from home, or order one.
  9. Bring holiday bedding. Kids love curling up in their very own holiday-themed sheets and blankets, and these decorate the room, too. Bring your own bedding from home, or make a gift of new holiday bedding, which is easy to bring to a condo or vacation home.
  10. Decorate yourselves! Buy the family holiday-themed pajamas to wear, or a matching set of Santa hats. When you’re all dressed up for the holidays, the feeling of celebration will live in your vacation home, hotel room, or condo with or without the decorations.

Remember: in addition to decorating your temporary living space, you’ll want to safeguard your actual home while you’re away. During our absences, we ask a friend to check on our house regularly, leave porch and holidays lights lit, lower heat and unplug appliances, and let ask multiple neighbors to watch our home.

Travel Gear We Use: All-time favorite healthy travel snacks

Today’s Travel Gear We Use segment isn’t exactly gear, but does help us as we travel: we’re rounding up our favorite healthy travel snacks. There are many, many products out there that claim to be wholesome, organic, and tasty. We’ve tried almost all of them. Yet, this list is short. Very short. Why? Let’s be real: most so-called healthy travel snacks are gross. Even my kids, who know their way around a natural foods store, go to schools that are GMO-free, and live in hippie-friendly Oregon, have their limits. Here are the winners that are kid-tested and kid-approved in our house. Buy these snacks for your next road trip or air travel day, and you won’t be wasting your money.

road-trip-snacks

SunRidge Farms mixes:

sunridge-farms
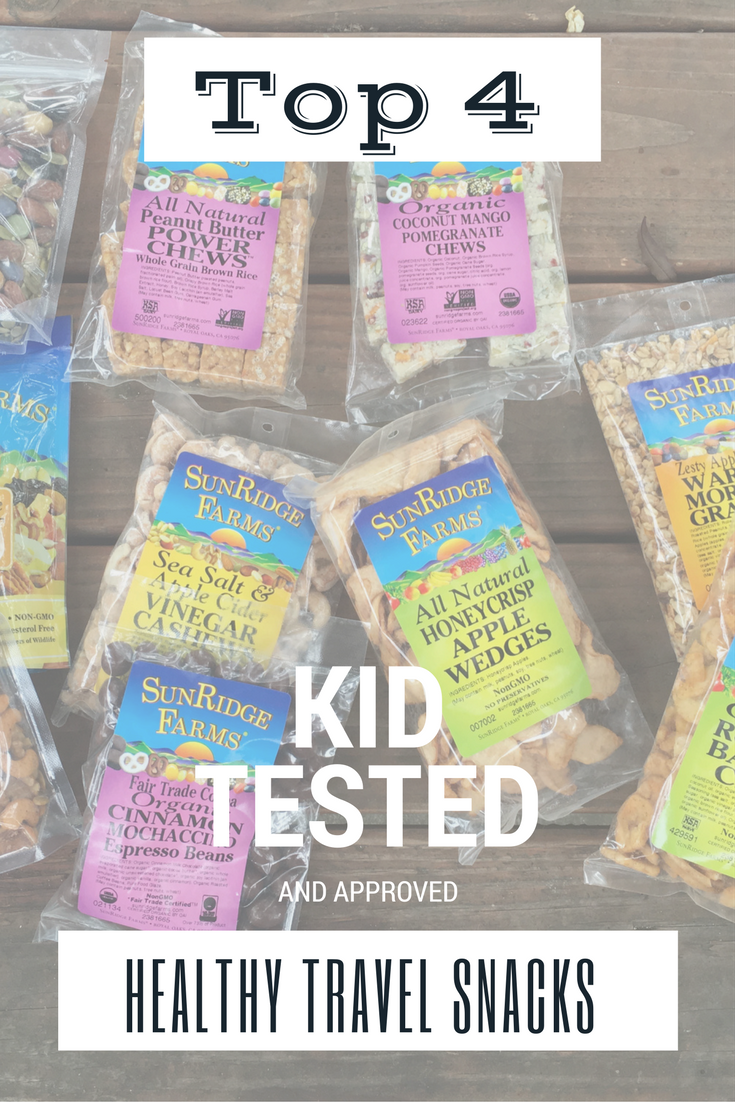
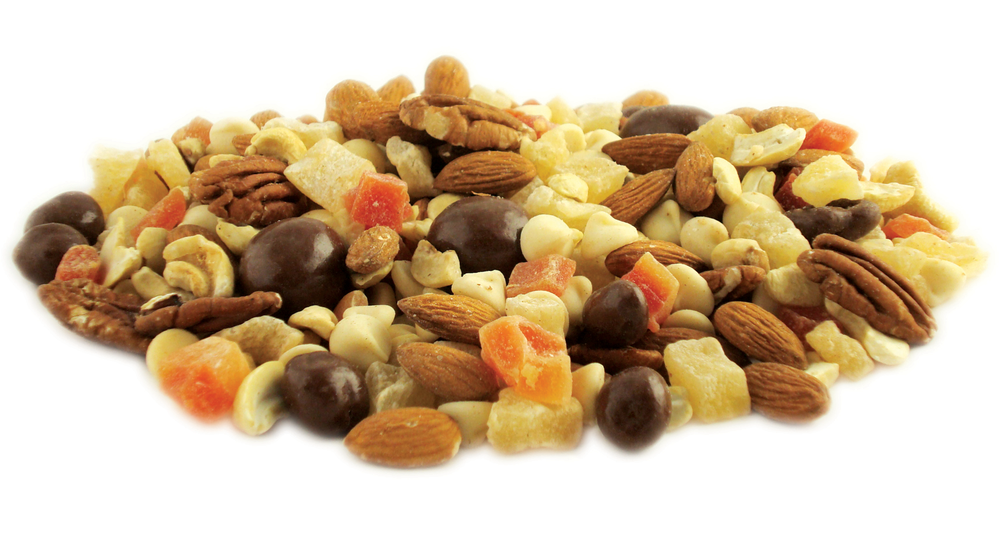
OMG, you guys. If you want to ensure everyone in the family has a healthy, delicious and dare I say, downright exciting trail mix to call their own for your next trip, check out SunRidge Farms. Their many, many trail mix varieties can be bought in 6-8 ounce bags, but also come in bulk. I love this option, as we bring our own containers and bento boxes when we travel to cut down on waste. You can create your own trail mixes by looking through their many nut, seed, dried fruit, and organic chocolate offerings, but save yourself some time and check out their pre-packaged ones. We love the Berries and Chocolate. You can also get square protein chews that my kids gave a thumbs up: the peanut butter power chews are a favorite. I love that SunRidge Farm’s production facility is powered by solar energy and that their foods are GMO-free, organic, and much of the chocolate and coffee offerings are Fair Trade. Yes, SunRidge Farms’ trail mixes are more expensive than average, but we found them on Amazon and if you buy in bulk, you’ll get high quality snack food for a reasonable price! You can even get gummies for a treat on the road you don’t have to feel guilty about!

Kate’s Real Food:

kates-real-food

Haven’t heard of Kate’s Real Food bars? I love these all-natural, organic creations originating in Jackson Hole, WY. Kate’s bars have been embraced by serious hikers, mountain bikers, climbers, and skiers all over the West, so you know it’s good enough for road trip noshing, too. We love that these bars are made from locally-sourced ingredients whenever applicable, and they never freeze…even when skiing or in the cold car. My kids quickly tire of the usual protein bars and granola bars, but Kate’s are just wholesome enough that they taste like, well, real food, instead of chalk or powder. And bonus: they’re on Amazon in bulk, too!

Nut butters from PB Crave

This high energy, high protein food is perfect for road trips because it can survive just fine without refrigeration and doesn’t melt (too much) in a hot car. Kids find peanut butter to be boring? They won’t if you try PB Crave. These peanupb-crave
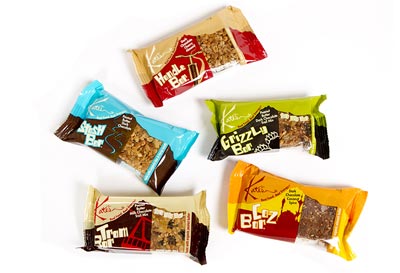
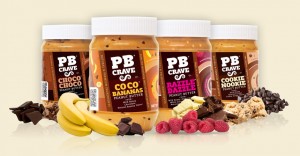
t butters come in super fun flavors, like Cookie Nookie (chocolate chips and cookie dough flavor) and Razzle Dazzle (dark chocolate, white cocoa butter drops, and natural raspberry flavor). They taste very sweet (maybe too sweet for grown ups), but all PB Crave flavors are sweetened with wild honey, and their more affordable than ‘gourmet’ nut butters. We put a jar in the car and toss in crackers, bread, or apple slices to eat with it.

Matt’s Munchiesmatts-munchies

Forget about any other fruit leather or fruit roll-up, and definitely forget about those artificial fruit snacks. My kids LOVED Matt’s Munchies dried fruit strips, and I loved that each package could feed two hungry kids…no skimping here! We love the tropical flavors with real strips of coconut blended in, but get a variety pack to start with and discover your favorites. For picky eaters used to basic flavors, try the Apple-licious.

As a peanut butter alternative, you can also try an almond butter. It could also be used as a good travel snack. Here’s a review on the best almond butter from Kitchenistic.

Bottom line: can you supply your family with travel snacks for less money? Sure, we know that. And our family can’t realistically buy these types of snacks every day. But eating healthy, wholesome, naturally sweetened snacks while traveling can enhance every part of your vacation. Kids will feel better, be better behaved, and have more energy to play and explore. And the truth is, so will you!

Subscribe to our Pit Stops for Kids seasonal newsletter, and get an exclusive travel ‘cheat sheet’, free! Click here!

Top 4 healthy snacks for travel

Main Salmon River rafting trip with O.A.R.S.

The best—and nearly only—way to experience the 2.3 million acre Frank Church River of No Return Wilderness of Central Idaho is by whitewater raft down the Main Salmon River. The route along the Wild and Scenic section of the Salmon runs 80 miles and requires extensive whitewater experience and permits…or can be booked with an adventure outfitter like O.A.R.S.

oars-salmon-river

Why choose the Main Salmon with O.A.R.S.?

The O.A.R.S. Main Salmon River trip takes five nights, six days and delivers families through pristine high desert and forested wilderness. Multiple outfitters take this course, but we recommend O.A.R.S for many reasons, including stellar guest service, the comfort of good food and camps, and river expertise.

The Salmon River remains undammed for over 400 miles, and the Frank Church Wilderness is alive with prehistoric, native, and pioneering history, as well as wildlife. O.A.R.S. guides are knowledgeable about both, able to educate guests along the way with nature talks, history lessons, and wildlife spotting. If that’s not enough for you, this O.A.R.S. itinerary employs no fewer than five modes of transportation down the river: guests can ride in an oar boat, dory, paddleboat, inflatable kayak (called a ducky), or stand-up paddle board (SUP).

salmon-river

What to expect on the Main Salmon:

All five nights along the Main Salmon with O.A.R.S. are spent on sandy beach campsites along the river, with tents and sleeping bags and pads provided. Guests start the trip in McCall, Idaho, where a pre-trip meeting takes place the night before departure. This is the time to ask last-minute questions, get your dry bags to pack belongings in, and meet your trip leader. During our meeting, we met Trip Leader Diego, as well as the other guests on the trip. Diego gave us a weather report—our trip would be hot and dry—and final tips on packing—we’d need two water bottles each, plus lots of sun protection. Our trip included 11 guests total: my multigenerational family of two teens, myself, and my father, plus one more father and son, one mother with two sons, and one couple. In total, we had five kids ages 12-16 and six adults.

salmon-river

The next morning, our trip started at 7 am with an amazing chartered flight from McCall to Salmon, Idaho in 2-8 passenger planes. We watched out the windows as the rugged peaks and mountain meadows passed below us, knowing we were essentially being deposited into our wilderness area. From Salmon, a rather brutally long bus ride took us to the put-in point along the river, where we were set to depart at the start of the Wild and Scenic section at Corn Creek. We stopped along the way of this two-hour ride at a small store where we could purchase any extra drinks we’d like on the trip. O.A.R.S. provides enough soda, wine, and beer for guests to have approximately two drinks per evening; extra is allowed in moderation. We could also grab any extra items we’d forgotten at this point, such as batteries, sunscreen, sunglasses, or water bottles. All extra drink purchases become communal unless requested otherwise.

dory-rafting

Once we arrived at Corn Creek, we met the rest of our guides who’d be joining us for our week on the Salmon. We had a great crew, as I always have with O.A.R.S.: guides Amber, Morris, and Prester, as well as college-aged gear guides (rowing only gear, not guests) Rose and Dakota. All are essential to the trip and all interact with the guests. We got dialed in on rafting safety (Day 1 of any trip includes multiple talks on protocol and safety) and were on the river before lunch.

river-trip

We rafted only an hour or so before stopping to eat on a sandy bank, during which we learned about dining protocol—hand washing, water bottle filling, and trash clean up—and were introduced to the inflatable kayak ‘duckies’. These solo-passenger rafts are popular but require just a bit of skill. Anyone wanting to raft the river in duckies needed to take a ‘swim test’ before we left the lunch spot. This test involves paddling the ducky in an eddy, purposely flipping it over, and getting oneself back in in deep water. This sounds intimidating, but with tips from the guides, everyone in our group who took the test, from the teens to the grandfather, passed.

oars-rafting

We rafted another three hours or so, navigating through our first rapids, Killum, Gunbarrel, and Rainer, before landing at our first night’s camp. Here, we learned all about camping protocol, including how to create a ‘fire line’ to off-load the boats of gear (everyone helps) to how to set up our tents and where to find our sleep kits (which included sleeping bags, tarps, and pillows). We also became acquainted with the ‘Unit’ at this point, sometimes called the ‘Groover’. This portable toilet system is required by all rafting parties on the river as part of the Leave No Trace principles followed. It takes some getting used to if you don’t spend a lot of time in the outdoors, but embrace the Unit: after all, it’s the only option.

oars-camp

After setting up camp, we found ample time to play, swim, and get to know one another better through conversation over cold beers and sodas. Our guides surprised us with several beach toys brought out from the depths of the boats, including frisbee games and a fun washer game similar to horseshoes. A salmon dinner was followed by more community time around the ‘circle’ (of chairs), where adults conversed and kids brought out card games. Around 8 pm, the summer heat was broken by a spectacular thunderstorm and hail storm: we all dug out rain jackets and scurried to the sanctuary of our tents to wait it out. For most of us, this was the only night on the trip we didn’t sleep out under the stars and bright moon.

river-rafting-camp

The next morning, the coffee call came around 7 am, followed by breakfast of huckleberry pancakes, sausage, and fruit at 8 am. We packed up camp around 8:30, filled up our water bottles with filtered river water, and were back on the boats before 9 am. The next five days followed the same general routine: coffee call, breakfast, camp breakdown, rowing on the water interspersed with challenging rapids, hikes to historic points, or wildlife, lunch, more river time, arrival at camp, playtime both in the water and on the sand, appetizers and drinks, dinner, and community time. As guests, we set up our own tents and helped on and offload boats, but never cooked or planned any of the itinerary.

oars-food

Each day on the river brought something new: on Day 2, we floated past a hot springs (and would have stopped had the temperature not been nudging 100 degrees) and stopped to look at Native American petroglyphs, on Day 3, we toured a historic cabin and ranch once owned by river legend Jim Moore, on Day 4, we stopped at hermit Buckskin Bill’s homestead and store, and on Day 5, we hiked a short distance to an old-growth yew tree grove and the foundation of a Chinese mining claim.

oars-river-rafting

Each morning and at each lunch break, guests can decide which type of raft to ride in or paddle: I liked to alternate between the paddle raft, where guests help paddle, the dory, which sits higher on the water and cuts through rapids with precision and grace, and the duckies, which takes more concentration with bigger rewards. When we needed a break, we could sit back and relax on a gear boat, rowed by guide Morris, who regaled his passengers with stories and tales. The kids gravitated to Morris’ boat as well, but mostly clamored for time in the duckies and on the SUP (allowed in small rapids and riffles, after kids have proven themselves).

history-salmon-river

Evening entertainment took on varied forms as well: we played games of ultimate frisbee and card games, played in the water during kayak wars and SUP practice, and even made a ‘raft slide’ of an overturned paddle raft. During two magical evenings, we were treated to talks by the campfire circle on local history and conservation by geology teacher turned river guide Morris. Meals were excellent and varied from Day 1 to Day 6, and to a person, our six guides were hard working, fun-loving, and responsible.

oars-rafting

By Day 3, we’d hit a stride of river life that truly fell into pace with the current. Without screens or smart phones, we slowly felt the tethers of day-to-day demands fall away, to be replaced by a quiet rhythm of sunshine, river water, and fun companionship. By Day 6, we felt so acclimated to river life it felt odd to return to civilization: trucks on the road overlooking the river on the last day felt jarring after so many days without the sound of them and day trippers felt like intruders. While we were ready for a shower and to call loved ones with news of our trip, we never felt uncomfortable on the river: with some much time in the water, we didn’t feel as dirty or grimy as we might backpacking.

rapid-scouting-oars

Tips for a successful O.A.R.S. trip:

  1. Remember you’re in a communal environment. This means helping out with gear, respecting rules and people, being considerate (please don’t cut in line at lunch or take the best tent site every night), and acting to keep rafts and camp clean and safe. O.A.R.S. makes sure a hand-washing station (a rather ingenious bucket and hose contraption) is available before every meal and at every ‘bathroom’ location, and everyone is expected to use it to keep germs at a minimum in such an intimate environment. Parents, don’t just do all the above yourself; teach kids to follow rules and be considerate as well.
  2. Expect to follow Leave No Trace guidelines. This means all trash, even ‘micro-trash’ such as table scraps, must be disposed of in the designated containers, because everything packed in will be packed out. It also means you’ll be expected to follow Unit protocol, which does have some rules involved. For instance, liquid waste goes in a different place than solid waste, as does toilet paper and feminine products. Yes, this is gross to think about, but the sooner you leave your inhibitions behind, the better. The Unit is always set up in a discrete place at camp, and while it’s odd to go to the restroom in a place without walls or a door, it affords a beautiful view, and there’s a system to ensure some privacy. Wondering what the ‘Unit’ is, exactly? It’s a metal bucket with a toilet seat attached, which can be seated shut between camps. Does it smell? Not as badly as a pit toilet or port-a-potty. Is plumbing preferable? Sure, but it’s better than being the cause of waste left in camps that will be used by numerous rafters all summer.
  3. Follow the packing list. Our trip was a hot one, with days over 100 degrees, but I was still glad to have my rain gear when we encountered that thunderstorm. And you never know when the weather will change, so you can bet I had my fleece and base layers at the bottom of my bag, albeit untouched.
  4. Don’t expect showers, cell service, or cold water in your water bottle, though you can expect excellent, fresh food and cold drinks at the end of each day. It’s amazing what can be packed into the O.A.R.S. coolers: we had steak on our last night, and fresh nectarines our last morning.
  5. Bring two sun hats and two pairs of sunglasses each. Sunglasses get lost or broken easily, and sun hats are just to precious to be without. Sunscreen is crucial as well, of course.
  6. Don’t expect O.A.R.S. to control the weather or the river (though you can expect them to navigate it with expertise). The natural elements of any river trip must be respected.
  7. Expect rules. There’s an inherent danger in any whitewater rafting trip, and while many freedoms are afforded on the water and in camp, rules are in place for a reason. We found that when we proved to our guides that our teens would listen to and respect rules right from Day 1, more privileges were granted. We love rafting with O.A.R.S. because we feel safe, but not coddled. Our boys were able to push themselves on the water, rafting every rapid in duckies if they wished, and some on the SUP. They were able to explore around camp and even sleep solo on a beach around the corner from us. They loved the freedoms they’d earned.

oars-camp

A comparison of O.A.R.S. Salmon River to O.A.R.S. Rogue River:

Both river trips are excellent family trips, though the Salmon requires kids be age 12 and up in high water (spring and early summer). Both offer 5-6 day trips filled with incredible scenery, though the Salmon is largely high desert and canyon while the Rogue is more heavily forested with more dramatic canyon walls. We found the same level of guide service on both rivers.

On the Salmon, the trip begins with the scenic flight from McCall, a bonus treat, and includes rafting on dories in addition to rafts. Duckies and SUPs can be found on both rivers.

Ready to book? Get more generalized O.A.R.S. booking tips and read our Rogue River report.

As we disclose whenever applicable, we experienced the Salmon River as guests of O.A.R.S., for the purpose of review.

American Colonial and Revolutionary History Road Trip

Touring Boston, Philadelphia, and Virginia with kids!

Looking for a ready-made American history road trip itinerary? We’ve got it! This itinerary starts in Boston, MA and ends in Williamsburg, Virginia, and hit highlights of American colonial and Revolutionary history. Civil War history can be added, as well!

paul-revere-freedom trail

Days 1-3:

Start your trip in historic Boston. Walk the Freedom Trail, visit Faneuil Hall, and see Old Ironsides. Older kids will love seeing Paul Revere’s house and the historic cemetery.

Where to stay: be part of history when sleeping in the Custom House building, which is now operated by Marriott Vacation Club.

Days 4-6:

Drive down the Eastern Seaboard to Philadelphia to continue your Revolutionary history. In Philly, see where America began in Independence Hall where the Declaration of Independence was signed. Tour the Constitution Center, see the Liberty Bell, and visit the site of Ben Franklin’s home and offices.

Where to stay: Hotel Monaco Philly is located directly across the street from Independence Hall. Need we say more? 

valley-forge

Day 7:

Head out of Philly and stop at Valley Forge, PA. Spend half a day on the self-guided auto tour of Washington’s winter camp, including his officer’s quarters and many bunkhouses of enlisted men. In the afternoon, drive either to Gettysburg, PA to learn about the Civil War battle (plan to stay two days), or take the long road trip down to Williamsburg, VA.

colonial-williamsburg-with-kids

Day 8-10:

Spend three days touring Colonial Revolutionary City in Williamsburg, VA. Take the time to visit the various shops and tradesmen, eat in the pubs, and book an evening tour or two. Definitely walk from the Visitor’s Center to Great Hopes Plantation, and play RevQuest if you have older kids or teens.

Where to stay: Williamsburg Woodlands is within walking and shuttle distance of Revolutionary City, plus includes a splash play area, mini golf, and a pool. 

Day 11:

Devote one full day to touring Jamestown, VA. Located adjacent to Williamsburg, this original site of the Jamestown Settlement has two parts: the original national historic site, where kids can see ongoing excavation in progress, and the recreated historic settlement and fort. Take time to tour the museum as well!

colonial-american-history


If there’s time, round out your historic road trip with a visit to Washington DC to see the actual Declaration of Independence and the flag that inspired the Star Spangled Banner.

Travel Gear We Use: 30 Road Trip Products

I know, your car is already packed to the gills for your family road trip. But trust us, you need these 30 road trip products and ideas to make your travel day run smoothly. We travel every month of the year, and test new road trip products every time we hit the road. Check out our list of road trip gear, updated to include new gear for 2017, and see what you’re missing!

road-trip-products

Road trip safety gear:

1. My Bucklemate: This innovative little piece of plastic makes it easy for young kids to buckle themselves into their seats more easily…without mom or dad needing to crawl into the back seat to dig the seat belt clip out of the seat crease! Pick up Bucklemate on Amazon.

2. Cardiff Booster Seat Headrest: By far, the best headrest we’ve seen for toddlers and preschoolers. No more floppy heads when kids are trying to nap!

3. Bubblebum: This portable booster seat goes everywhere, from your own car to taxis to theaters. We guarantee you’ll use it in at least three ways on any road trip!

4. Adventure Medical Kit: There are several pre-made first aid kits to choose from when you browse the offerings at Adventure Medical Kits. Our favorites are listed here!

5. AAA Emergency Road Assistance Kit: Pick out a pre-made kit like this one, or design your own, ensuring you have flares, chains, and the gear you need to change a tire.

bucklemate

Car organizational gear:

6. Seatback car organizer: Every family needs at least one of these organizers that fit on the seat back, for storing books, DVDs, games, and cups. Don’t want to spend much money? Check for a hanging shoe organizer at your local dollar store. Pictured above: Prince Lionheart Backseat Organizer.

7. Trash bags: Yep, good old-fashioned trash bags. Don’t forget them! You’ll need them for the obvious purpose, but trash bags also pull double-duty as wet storage for swimsuits or soggy gloves and hats, storage for muddy shoes, and, unfortunately, as a much-needed receptacle if someone gets car sick.

8. Packing cubes: Used by our family for so much more than packing, packing cubes are ideal during road trips as carry-alls for kids’ gear. Give each child a large packing cube to fill up with his or her items for the ride. Packing cubes are easier to stow under the seat than backpacks, take up less room, and are easy to open and close. Here are our favorites.

9. Mesh laundry bagsGo ahead and use these cheap, lightweight laundry bags for their intended purpose once you arrive at your destination, but while on your road trip, use them to store boots and jackets the family will want at pit stops in winter and sandals or swimsuits in summer. Grab one bag when you reach your pit stop, and off you go.

10. KIDS ‘N’ PETS All Purpose Stain & Odor remover: You might need it. Ok, you’ll probably need it. Fine. We always need it. If you want something more portable than the liquid version, try their new Stain and Odor Remover wipes! We keep a tube of these in one of the car’s drink holders.

11. Refresh your Car: These car freshener products are the only ones my kids will tolerate. Plus, you can use these products to clean your dashboard, too. Here’s our full review.

In-car and rest stop entertainment:

12. SOL REPUBLIC headphones: These are the only headphones we use now, because they’re nearly indestructible. Kids can twist them, step on them, or toss them into a bag, and they keep on delivering high-quality sound. Check out more info in our best electronics picks for travel.

13. Splitter for headphones: Don’t forget one of these! When kids want to listen to a DVD or CD together, they need a splicer for their headphones. Forget it, and you’ll be listening to the entire soundtrack of Frozen too, Mom and Dad. Pair with the screen of your choice. Don’t forget about Kindles!

14. Brunton Revolt: This power cube is worth the investment. Even with in-car chargers and USB ports, everyone needs more power at some point. The Brunton can go from the car to your hotel room, offering an extra place to plug in. Plus, it comes with lots of built-in cables, so there’s no need to bring a tangle of your own.

15. Family puzzle and coloring books: Guess what? It turns out you’re never too old for Where’s Waldo. Candlewick Press’ Where’s Waldo: The Totally Essential Travel Collection includes hundreds of pages of Waldo illustrations, all in a compact, durable book. Like to color instead? ColorIt sells adult coloring books also ideal for kids. Try the Greatest Adventure Adult Coloring Book…it’s packed with pages suitable for kids or adults, and is in a durable spiral-bound notebook ideal for the road. Keep it in the car…you won’t be sorry!

16. Redbox movies: Don’t want to (or can’t) stream movies en route? Get the Redbox movie app, and find Redbox kiosks en route via your car’s entertainment system or a portable DVD player. We like to utilize Redbox because we never have to pay late fees (we find another Redbox to turn movies into down the road) and we have a constant supply of new movies without needing 4G.

17. SOL REPUBLIC Punk SpeakerWant to listen to audio books or podcasts as a family on the road, but don’t have the capability of plugging a smart phone into the car’s audio system? Use a Punk speaker! This little portable speaker packs a big punch. It’s also good for small kids who don’t like to use headphones.

18. Outside Inside Adventure Games: Have you ever stopped at a rest stop so the kids could stretch their legs, only to find nothing to do? We absolutely love these portable games for kids! Some are best for the campsite or fire pit, but others are ideal for grassy spaces, playgrounds, and even hotel rooms. Plus, they all pack down for easy transport. The magnetic darts are our favorite for the hotel room, and the bocce ball set and ladder ball/cornhole games are our favorite for rest stops.

bocce-ball

19. Wipe board and dry erase marker: Don’t underestimate the power of a simple board and marker. Kids can play classic games like ‘hangman’ or ‘tic tac toe’. No need to invest in expensive versions of these games!

20. Magnetic Fun: Can’t go wrong with these tried-and-true car entertainment kits! Magnetic Fun is ideal for the toddler and preschool set, but older kids will play too.

Road trip snacks and food:

21. Yeti cooler: A Yeti is a big investment, but if you road trip often, it’s well worth it to have this top-of-the-line cooler. Foods will stay cold in a Yeti far longer than in standard coolers, allowing families to stop and drain it less often and eat more meals on the road. We have the Tundra 45. Can’t swing the cost of a Yeti? Try Mountain Khakis’ new rugged Compass Cooler.

22. BooginHead Pack ‘Ems snack bags: We only use reusable snack bags. BooginHead are our current favorite, because they wipe down easily, are washable, and stand up on their own when packed. Plus, they velcro open and closed, making it easy for little hands to open them. They’re very affordable, too.

23. Sea to Summit Seal ‘n Go: We’ve long been fans of Sea to Summit’s bowls and cups for backcountry camping, and now they have a product perfect for families on the go, whether you’re on a road trip or simply serving kids a snack in the car on the way to school. The Seal ‘n Go comes in multiple sizes, and is a collapsible container with a threaded lid for secure food carrying. They pack down small when you don’t need them, and are virtually accident-proof.  Of  course, you can take them camping, too! Each piece is around $20.

patagonia-provisions

24. Patagonia Provisions: Bet you haven’t heard of this! Patagonia (yes, the brand that brings you ski wear and down vests) also makes road trip-ready food. You can buy their energy bars, or better yet, get their breakfast grains to make in hotel rooms for an easy and healthy breakfast (just add hot water from a coffee maker). They also make healthy soup mixes for in-room dinners.

25. GSI Outdoors macro camp table: Made with camping in mind, the GSI Outdoors Macro Table is also excellent for road trips. It collapses completely for easy transport, is lightweight, and opens up for an instant table anywhere. We love it on road trips for pit stops at parks where we’re setting out a snack or lunch, in addition to a meal prep space at campsites. It comes in a micro size, too!

26. Jelly Belly candies: You have to have some candy on your road trip, and Jelly Belly candies entertain with their many flavor options while kids (and adults) snack on them. If you’re driving through California, take a Jelly Belly tour at the factory in the San Francisco Bay Area!

rumpl

Miscellaneous items:

27. Water bottles: Everyone needs to stay hydrated on a road trip, and personal water bottles help families save money when they stop for food, too. We love HydroFlask bottles, because they’re insulated and stainless steel. For a lighter weight bottle, go with Camelbak Eddy or Chute.

28. Duct tape: We won’t judge parents on how duct tape is used, especially at the end of a road trip, but here are our ideas: use it to designate ‘territory’ within the car, to keep kids in their own space, or allow kids to create art with it. Ours like to make their own wallets or frisbees.

29. Paper maps: Go old-school when you stop at gas stations or welcome centers, and pick up paper maps of the region you’re road tripping. Allow kids to follow your route by themselves, or enlist their help navigating. Older kids can pick out pit stops en route, or calculate distance.

30. Pillows and blankets: Make your road trip a slumber party with small pillows and lap blankets to make the drive more comfortable. If you don’t have room for full-sized pillows, opt for travel pillows. We love Rumpl’s travel blanket, which packs down small and is waterproof against spills.

Need kids’ gear for the road and want to shop online? Find great deals on essential baby and child gear.

SaveSave

Travel Gear We Use: The Seventy2 Survival System bug-out bag

You may not be a doomsday prepper or preparing for a zombie apocalypse (or maybe you are), but every family should have a car bug-out bag, ideally for each family member and certainly for road trips and emergencies.

emergency-bug-out-bag

Opt for the Seventy2 Survival System from Uncharted.

Preppers define bug-out bags as gear they can grab quickly in case of emergency, that’s ready to go when they are. The folks at Uncharted simplify this even further: their Seventy2 bag are designed with the premise that 95 percent of emergencies are rectified within 72 hours, so they make sure you have everything you might need for those crucial hours, nothing more, nothing less. The result? A streamlined system in an easy-to-carry, high-quality backpack that you can gift to family members or buy for yourself.

The ‘shell’ of the Seventy2 bag is a 48 liter backpack that’s waterproof and very clearly organized. This backpack alone is worthy of a review. It has pockets and features galore. Inside, clearly marked ‘survival pouches’ make it easy to find essentials, plus know what to do with them. The ‘tools’ pouch is thus labeled, for instance, with all the contents listed underneath, including paracord, shovel, axe, duct tape, knife, and fire starter. In the ‘warmth’ pouch is a tent, blanket, hat, gloves, and hand warmers. For a full list of everything in the Seventy2 bag, including USB chargers, radios, and more, check here. 

Can you put together your own survival go bag? Of course. Will you, to this extent? I can almost guarantee you won’t. At least, I won’t, which is why I gifted my college-aged son with a Seventy2 bag and now need more for my household. This bag could be essential on a camping or road trip, but it might also save your life when you’re not traveling.

Pick one up this holiday season as a very special gift for $349. You will have purchased peace of mind along with essentials you needed any way.

Want to design a less extensive, road trip bug-out bag?

For families who like to road trip or car camp, a car bug-out bag can be any kit that contains supplies and extras, such as MOLLE gear, that may be needed in an emergency while away from home.

Whatever type of bug out bag you create, be sure to stock it regularly for minor injuries, sickness, or weather conditions. We’ve never needed ours for a serious emergency, and hope we never do.

Start with any large backpack or duffel. We keep our basic bag, which we use in addition to our Seventy2 bag now, in our primary vehicle. You don’t want to put it anywhere it will need to be frequently moved. Ours is in the back, near the space reserved for the car jack and jumper cables.

What to put in your more basic road trip bug-out bag:

2-4 emergency blankets: These blankets are made of vacuum-metalized polyethylene and reflect 90% of your body heat, allowing you to stay warm despite their thin shape and low weight. They are the size of your palm when still folded, and can also be used as shelter or a ground cloth. We use SOL emergency blankets, which are less than $5 on Amazon.

1 small first aid kit: Ideally, you already have a family-sized first-aid kit in your car (if not, check out our recommendations). However, since your car bug-out bag is meant to be portable, opt for a smaller sized one. We use Adventure Medical Kits’ .5, which is housed in a lightweight, waterproof pouch and includes all the essentials (and not much else). At $15, you can’t make a cheaper one at this weight. Place some extra easy-access bandages in there, too. These nifty band-aids require only one hand to unpeel and place on a cut.

Gloves and winter hats for everyone: Reuse or buy a cheap pair of fleece or knit gloves for everyone in your family, and place them in the bag. Ditto for winter ‘beanie’ hats. These don’t need to be anything fancy; after all, you’ll want to wear your good ones regularly, and you’ll likely never use these. But in case of bad weather or the need to put chains on your tires, you’ll be glad to have some protection for your hands and heads. In winter months, we also add a lightweight jacket for everyone, which just stays in the bag until summer. Remember, you’ll have extra seasonally-appropriate clothing for everyone in your car already if you’re on a road trip or camping trip.

Pocket survival pack: These neat packs fit into your pocket, and include only the barest of essentials for outdoor survival. We have a pack in our backpacking gear, in the ‘just in case’ category, and one more in the car. In the case that someone needed to leave the shelter of the car to seek help, I’d want him or her to have this kit on them. Included is a whistle, mirror, sparker and tinder for an easy flame, and tiny portions of helpful items such as duct tape, safety pins, wire, and foil. It doesn’t seem like much now, but as a former Search and Rescue volunteer, I’ve seen people do amazing things with these items. We like the SOL pocket survival pack, because it comes with a waterproof card of instructions. Pick one up for under $30.

motorola-talkabout
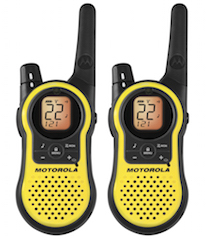
2-way radios: Sure, you have mobile phones, but as we all know, they can be unreliable. If you’re out of coverage area, low on battery power, or–unlikely but possible–if cellular service is down, you’ll want another way to communicate. We recently tried out the Motorola Talkabout 2-Way Radios (in other words, walkie-talkies), and they’ve now been added to our bug-out bag. Why we like them: they’re easy to juice up, they have a long range, and you can receive NOAA weather alerts through them. The Talkabout runs on either alkaline or rechargeable batteries (or can be charged using a mini-USB port, if you have access to that). They work in a 23 mile range, and has a scan feature which allows you to search a programmed list of channels. In the past, we’ve found that walkie-talkies can be useless if too many people are using them, but the Talkabout filters interference from non-Motorola units. They’re not toys, by any means, but still under $50 on Amazon.

Supplies for your car: Hopefully you already know where your car’s extra tire and jack are housed, but in addition, most families should carry chains for winter weather (depending on where you live), and jumper cables. We also store a small, collapsible shovel in our bag, which can (and has been) used to dig out of snow or mud.

Matches and firestarter: If you need to, you want to be able to make a fire for signaling help, warmth, or cooking. If you’re on a camping trip, you’ll have these supplies anyway, but we keep a waterproof case of matches and fire cubes in our bug-out bag all the time, so we don’t have to remember to grab them on each trip. What are fire cubes, you ask? These sugar-cube sized fire starters burn at 1300 F in any conditions…even a downpour. Use them to start a campfire or even boil water. Speaking of which…

Water: This is the only item we do not store in our bug-out bag, because we all carry personal water bottles with us in the car for any trip, so we already have them at the ready. For longer trips, however, we buy a case of water and place it in the back by the bag. If we don’t need it, we use this water on our travels, and buy more.

Want to be even more prepared? Have a water filter handy, or do what we do: pack your bug out bag with a LifeStraw or LifeStraw Go. This award-winning personal filtration system uses a filtering straw, so you have safe water to drink anywhere, anytime. We use ours on international travel days, too, so we get use of it regularly, not just during emergencies. After our son Nate lost his on a trip to Costa Rica, we replaced it immediately!

Basic foods: We don’t go overboard on this, which would probably dismay true preppers. But our bug-out bag is only meant for short term emergencies and even car-ride inconveniences, so we pack snacks with a long shelf life, like beef jerky and Nature Made granola bars. We change these snacks out every 2-3 months. I simply like knowing they’re in our bag should we get stuck in traffic for a very long time or need to leave our car for any reason.

amzn_assoc_placement = “adunit0”;
amzn_assoc_search_bar = “true”;
amzn_assoc_tracking_id = “pitstoforkid-20”;
amzn_assoc_ad_mode = “manual”;
amzn_assoc_ad_type = “smart”;
amzn_assoc_marketplace = “amazon”;
amzn_assoc_region = “US”;
amzn_assoc_title = “My Amazon Picks”;
amzn_assoc_linkid = “2b3ff3efebcf632ee007032e7c7a5424”;
amzn_assoc_asins = “B00EVGD2JK,B000G7YIL4,B001UE6MIO,B00H90PFOK”;

Find more Travel Gear We Use!

Do you have a car emergency bug-out bag? What’s in it?

Photo credit: Richard Riley

How to find the lowest airfare prices for any trip (STEP BY STEP)

Securing low airfare doesn’t have to be frustrating, stressful, or futile! Cheap flights are out there, if you know where to look and how to book! You can take control of your airfare purchasing by planning ahead…far ahead. Here’s how to find the lowest airfare prices for your family…consistently:

lowest-airfare

Step 1:

Be thinking about airfare even before knowing when and where you’re going.

To find the best airfare, I’ve found it helps to be set on only one of two criteria: when you’re going, or where you’re going. If you are flexible on one of these two factors, you’ll be able to snag competitive airfare.

Let’s use the example of a recent airfare purchase I made for a family trip to Cancun. In this case, I knew where we wanted to go, but I was flexible about when. I was able to start at an airfare comparison site to use their fare forecast predictor.

I like JustFly, an online travel agency that has an easy to use search field. On the site, I could see a calendar of fares from my point or origin (more on that later) and my destination. From that chart, I was able to see at a glance that the cheapest time of year for me to visit Cancun was August, and that the cheapest week in August was the third week.

If you are not flexible about when you can vacation (you know you have the last week of July, and that’s that, for instance), try to be flexible about where you go. Start at Airfarewatchdog and enter your home airport to see what destinations pop up on the low fare list. You can set email alerts for a few weeks or months to see what rises to the top.

Note: Let’s say you don’t have any freedom at all: you know you have the last week of July off, and you know you’ll be visiting Grandma in Florida. Is there still hope for you? Yes. By following the next steps below, you can still do as well as is possible for yourself.

Step 2:

Once you know when and where you’re vacationing, determine exact travel dates.

The key here is that you’re still flexible. You’ve identified the week you’re vacationing, but fares fluctuate even in that window. Start at a booking site that specializes in search tools, like Yapta or the aforementioned Kayak. Put in your information, and click on the ‘flexible about dates’ icon. This will present you with fares within a 2-3 day window of your dates. See what comes up.

Once you’ve identified some flight options, open a new window to view each viable fare directly from its airline website. As each home page opens, scan it for promo codes or other web-only discounts. Search on the airline sites the same way you searched on the booking sites, with date flexibility. There’s a decent possibility of finding the fare lower here, or of finding options not listed on the booking site.

Most airline sites have quite decent calendars to show higher or lower fares on each side of your travel date. Most will show one-way fares, which is fine as long as you remember that your return fare (even if the same day of the week) may be dramatically different than your arrival fare. Most offer steep discounts if you travel for less than a week or more than 8 days with low fares on Tuesdays and Sundays, for instance. Usually, traveling to your destination on a Tuesday is the cheapest day of the week, but they’ll ding you on the way back, so plan to fly home again on a different day of the week. For an example, let’s return to my trip to Cancun: I planned to travel Tuesday to Tuesday, but fares were almost double to return on that day, so we opted for Sunday to Sunday…with a slightly more expensive arrival fare, but significantly lower return fare. Remember, we shopped this while our dates were still flexible.

Continue to Step 3!

Pages: 1 2