When to upgrade to Park Hopper tickets at Disney theme parks (and when not to)

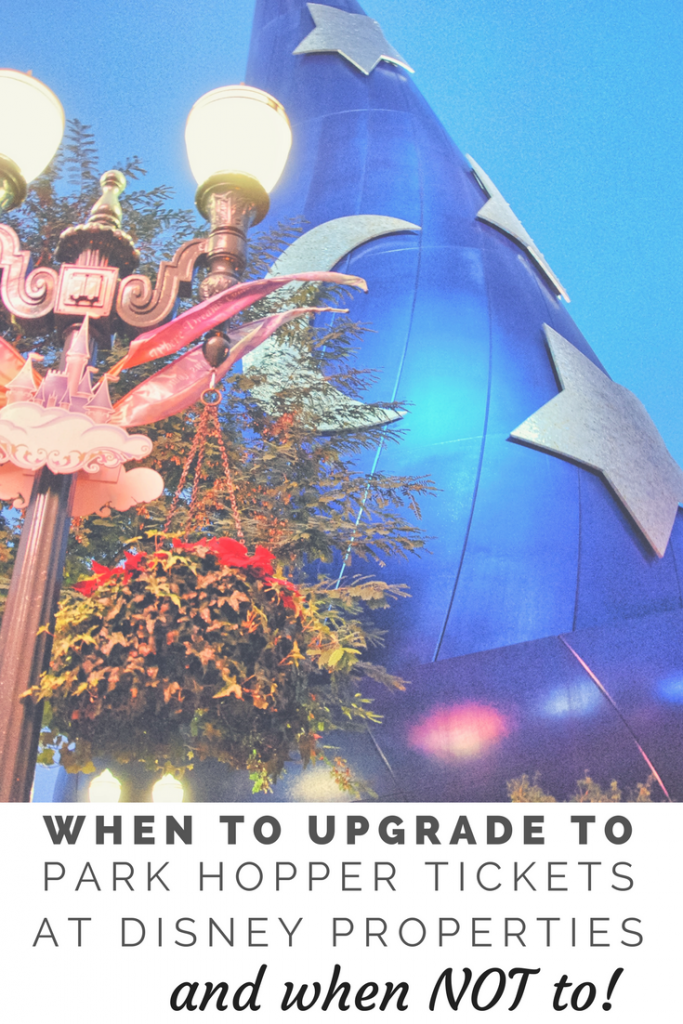
When buying Disney theme park tickets, families have the ability to upgrade to Park Hopper tickets. What does this mean? Instead of gaining admittance to one park per day, you have access to all four (plus water parks, if desired). Do you ‘need’ Park Hoppers? Most families believe the answer is yes, but in fact, it depends on your family’s plans in the theme parks, style of touring, and organization. Read on to find out when it’s really valuable to upgrade to Park Hoppers at Disney theme parks and when it simply doesn’t make sense.

upgrade to park hoppers

Park Hopper myths:

1. It’s easy to ‘hop’ from park to park. The term ‘park hopper’ implies it’s only a hop, skip, and a jump from one Disney theme park to the next. In fact, it can take up to an hour to ‘hop’, depending on your luck with bus schedules and how crowded Walt Disney World is at the time of your visit. During a non-peak week in late April, it took me 45 minutes to get from Animal Kingdom to the Magic Kingdom, for example. Why? Disney busses don’t go directly from park to park. Rather, they go from park to hotel resorts, or from parks to the Ticket and Transportation Center, where you ‘hop’ onto different lines.

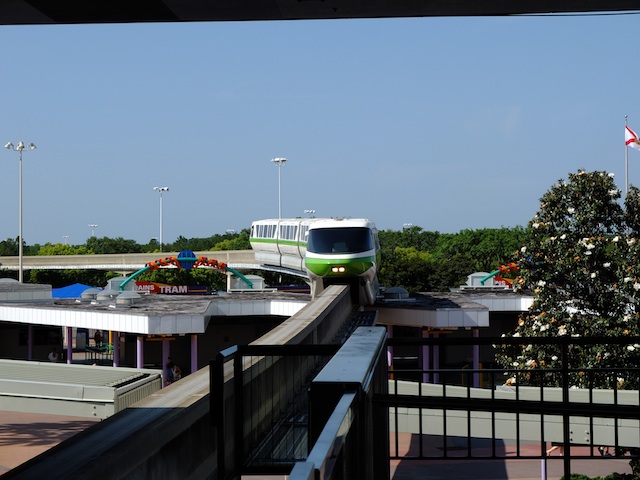
Even commuting from the Magic Kingdom to Epcot, both on Monorail lines, requires a transfer and occasional resort stops en route (plan on 30 minutes, depending on Monorail queues). Planning to drive your own vehicle? You still need to commute to your current parking lot, drive over, then park and commute again. This is not to say to avoid Disney transportation: we’re fans. Just know that while reliable and relatively stress-free, Disney transportation is not swift.

2. You can hop to a second park late in the day and still ride major attractions. Again, it depends on the season and how busy the park, but sometimes you can, and sometimes you can’t. If you spend your day at Epcot, for instance, and decided to hop to Hollywood Studios at 2 pm to ride Tower of Terror, you may run into difficulty if Fast Passes have run out for the day. Because your party cannot all obtain FP until they’re all in the park, there’s no way to secure Fast Passes until you’ve ‘hopped’.

upgrade to park hoppers

3. The Park Hopper add-on barely costs anything. In fact, at $35 extra per ticket (over $50 extra with water parks), the cost adds up! Savings can be in the hundreds of dollars to opt out of Park Hoppers. If your family typically tours a park for most of any given day, then enjoys resort time, or likes to spend time in other areas not requiring theme park admission, such as Downtown Disney or Wide World of Sports, you may have no need of a Park Hopper. Just be sure to plan to attend evening shows and entertainment at the same park you visited earlier in the day. (This will take planning.)

You need the Park Hopper add-on if:

1. You plan to take advantage of a morning Extra Magic Hour and then get out. This is a wise strategy, as the Extra Magic Hour park tends to become overcrowded after the hour is up and regular park guests arrive on top of the resort guests. If you plan to leave a park by 10 am and hop to another, you’ll likely have time to arrive before lunch and secure the Fast Passes you need for the afternoon.

2. You plan to utilize the Park Hopper just for evening dining and entertainment (not rides). If you like the idea of arriving at a park early in the morning, focusing on rides, then leaving for a mid-day rest, then heading to a different park for a relaxing dinner and evening entertainment, the Park Hopper may be a great value to you.

3. You’re visiting at a very low-crowd time of year. In this case, you may not need a full day to accomplish what you want in one park, and your transportation time may be lower due to smaller crowds.

When to upgrade to park hopper tickets

Guide to Sequoia and Kings Canyon National Parks with kids

On a recent tour through several California National Parks, I heard the same thing over and over again from fellow guests and even park employees: “We love Yosemite, but we’ve actually never been to Kings Canyon.” Or, “We come to Yosemite annually, but haven’t experienced Sequoia, yet.” This tells me two things: Yosemite National Park is one of the most popular in the nation (no surprise there), and neighboring Sequoia and Kings Canyon National Parks will be vastly less congested nearly all year long. Are they worth visiting? Absolutely!

Park overview:

Sequoia and Kings Canyon are two distinct national parks with one planning site. They have separate entrances, though the same entry fee will get you into both. They sit side-by-side along the General’s Highway off Highway 198 (accessed from Fresno, California) and sit at impressively high elevation: between 6,000 and 8,000 feet for the most part.  We suggest at least two days in the parks in the off-season, and three in summer, with the majority of your time spent in Sequoia.

What to do:

Giant Forest: 

giant-sequoia-trees

Most of us come to Sequoia for the Giant Sequoia trees. And yes, they’re absolutely worth the trip. These towering giants reside in this region because of the ideal conditions: they cannot grow like this anywhere else in the world. Take the Big Trees Trail to walk amid these giants (you’ll find the hush of the forest soothing…unless you have restless kids with you!). The General Sherman Tree is the largest tree in the world. Bear in mind: the General Sherman is not the tallest tree in the world, but rather the biggest, measured in circumference around its trunk.  The nearby Giant Forest Museum is worth a stop (in the off-season, it opens at 10 am).

Moro Rock:

moro-rock

Absolutely plan an hour or so at Moro Rock in the high season. This overlook includes a short but steep hike up the cliff-like rock, which will feel unsettling to anyone with fear of heights. I fall into that category, but had no problem with this short hike, because guard rails are set at key locations. There’s nothing to stop small children from wandering, however, so extreme attention is necessary. From the top of Moro Rock, the views are unparalleled. It’s possible to see the valley floor from one side of the viewing platform, and the peaks of the Sierras from the other. Point out the tops of the Giant Sequoias to kids: they look like bunches of broccoli from this height. Tip: after Moro Rock, continue a very short distance on the same road to drive through Tunnel Log and picnic in Crescent Meadow. Wolverton Snow Park is another nice resting stop in any season.

Crystal Cave:

I had no idea hundreds of caves lay under the surface of Sequoia National Park! The only cave available to tour is Crystal Cave, and it’s only accessible in summer. If you visit during the high season, this should be on your list.

sequoia-sightseeing-tour

Tip: Take a tour with Sequoia Sightseeing Tours with Paul Bischoff! Paul is a long-time resident of the area, and runs the best sightseeing tour I’ve taken from a private concessionaire in a national park. We spent a full morning with Paul, and learned more about the parks in a few hours than we ever could have guessed. Paul knows where the animals are, the best ways to avoid crowds, and can walk guests right to the most interesting trails and natural wonders.

Grant Grove of Giant Sequoias:

In Kings Canyon, the Grant Grove offers the General Grant Tree, plus a nice, easy hiking loop of additional Sequoias which includes some naturally downed trees. This is a great place for kids to see the root system of these giants, crawl through a fallen Sequoia log, and walk through a Sequoia tunnel! The Grant Grove Visitors Center is nearby as well, but we found it to be pretty limited.

Tip: While staying at Kings Canyon, catch the John Muir impersonation program by talented Frank Helling. Frank performs most Fridays at the Grant Grove evening campfire program during the summer months. I learned more about John Muir from Frank than I have before or since, and it was entertaining for all ages. Check at the Grant Grove Visitor Center to find out exactly when he’ll be performing during your summer visit.

giant-sequoias

Kings Canyon:

In summer, families can drive into the famed canyon, stopping for short hikes along the way. Kings Canyon is home to fabulous backcountry as well: if you plan to backpack in Kings Canyon or Sequoia, apply for a free backcountry permit. The good news: they’re far easier to get than Yosemite permits!

Tip: if you have the opportunity to listen to the storytelling of John Muir impersonator Frank Helling, make time to do this! Frank is absorbing and entertaining, and I learned more about John Muir in the 45 minutes I listened to him than I have before or since! Frank conducts his performances when available; as a park ranger or at the John Muir Lodge about opportunities to hear him speak.

Where to stay:

Kings Canyon offers the busiest ‘village’ of tent cabins, lodging, general stores, and visitors centers at Grant Grove Village. In the off-season, it’s quiet and we recommend the adjacent John Muir Lodge. However, in the height of summer, we’d opt for the less congested Wusachi Village of Sequoia National Park, where you’ll find Wusachi Lodge. This village center houses only the lodge and its restaurant (no adjacent camping and conveniences), which makes it somewhat quieter year-round. Read reviews of John Muir Lodge and Wusachi Lodge.

How to get here:

Access either park from Highway 198 from Fresno California. If you’re doing a loop of Sequoia and Kings Canyon as well as Yosemite National Park (called the Majestic Mountain Loop and highly recommended), you’ll need to depart Kings Canyon and return to the valley floor, then loop around to Yosemite via Highway 41. It’s not possible to drive over the Sierras, which is a good thing for all of us enjoying the parks!

Home prep for holiday travel (STEP BY STEP GUIDE)

You’re going away for vacation…yay! But what about your home when you’re traveling for the holidays, sitting empty? We’ve all heard horror stories: the pipes froze and burst…the mail piled up, enticing theft…we really didn’t leave our home secure. Home prep for holiday travel isn’t hard. Here’s how to prep your house for holiday travel, to ensure your home is safe, energy efficient, and secure while you’re gone.

prep your holiday home

10 steps to prepping your home for holiday travel:

1. Make plans for the pets.

When we travel, our dogs go to their ‘doggie hotel’, a local boarding kennel we trust. It took us a while to find one we liked, and we have to make sure to book well in advance. Other options: a pet sitter who comes to your home, or a friend or relative who wants to temporarily adopt your fur babies.

2. Talk to the neighbors.

Let at least one trusted neighbor in on your plans. A good neighbor can keep an eye on your house and pick up any packages that might be delivered. Consider giving him or her a house key to check pipes and heat occasionally.

3. Place a hold on your mail and regular deliveries.

Go to your post office and place a hold on your mail until your return. Pause all regular deliveries such as newspapers, milk, or eggs. If you know you’ll be receiving a package during your absence, have a neighbor pick it up.

4. Reset your thermostat.

Depending on whether you will have pets in the house, set the heat or air conditioning accordingly. Even lowering (or raising, depending on your climate) the temperature by two degrees will save you money.

5. Unplug non-essential appliances and computers.

I’ll admit we skip this step when going away for less than a week, but for longer trips, it’s important to unplug. Your home will be safer as well as more energy efficient. Give that desktop monitor a rest!

6. Set your water heater to ‘vacation mode’.

Almost all newer water heaters have this mode, which will lower the temperature just enough for savings without freezing any pipes.

7. Be smart about home security.

Ideally, families spending significant time away from home during the holidays should have a home security system in place, or a home video monitor in use. You want to maintain that ‘lived in’ look. At bare minimum, it’s essential to decide which lights to leave on in your absence.We opt to leave on porch lights and one light in the entry hall. We set what lights we can on a timer, so they’re no continually on, day and night. Any consistent setting, such as lights always on, curtains always drawn, or a car always parked, will signal to potential burglars that no one’s home.

8. Make sure smoke detectors are in order.

Of course, they should always be in working order, right? Carbon monoxide detectors, too.

9. Insulate pipes if living in a cold climate.

After insulating, consider asking that trusted neighbor to stop in a few times during your absence to run the water at the tap in the kitchen. If water only trickles out or will not come out at all, the pipes are likely frozen.

10. Don’t announce your vacation on Facebook!

This is sometimes the toughest step! Given my job as a travel writer, I usually cannot avoid ‘announcing’ where I am (and that I’m not at home), so I always make sure neighbors are watching my house (and say so). However, if you can avoid telling everyone on social media that you’re away, all the better. It’s more fun to post about your trip when you’re back home and can show off those travel photos anyway, right?

Non-essential but helpful upon return:

We do the following before leaving home to make our ‘return landing’ less bumpy:

  • wash and put away all dishes
  • do any unfinished laundry (you’ll have enough when you get back!)
  • clean out the fridge of food that may spoil during the trip

Have tips of your own? Share in the comments!

Hiking Safety: How to keep kids safe in the outdoors

A ramble through the woods, a stroll across a mountain meadow, or a strenuous alpine hike with the reward of a breathtaking vista – it all sounds idyllic until something goes wrong. As a former search and rescue volunteer and EMT, hiking safety is very important to me. I’ve participated in too many wilderness searches that could have been avoided with a few precautions, a little know-how, and the right hiking gear.

nature-hike
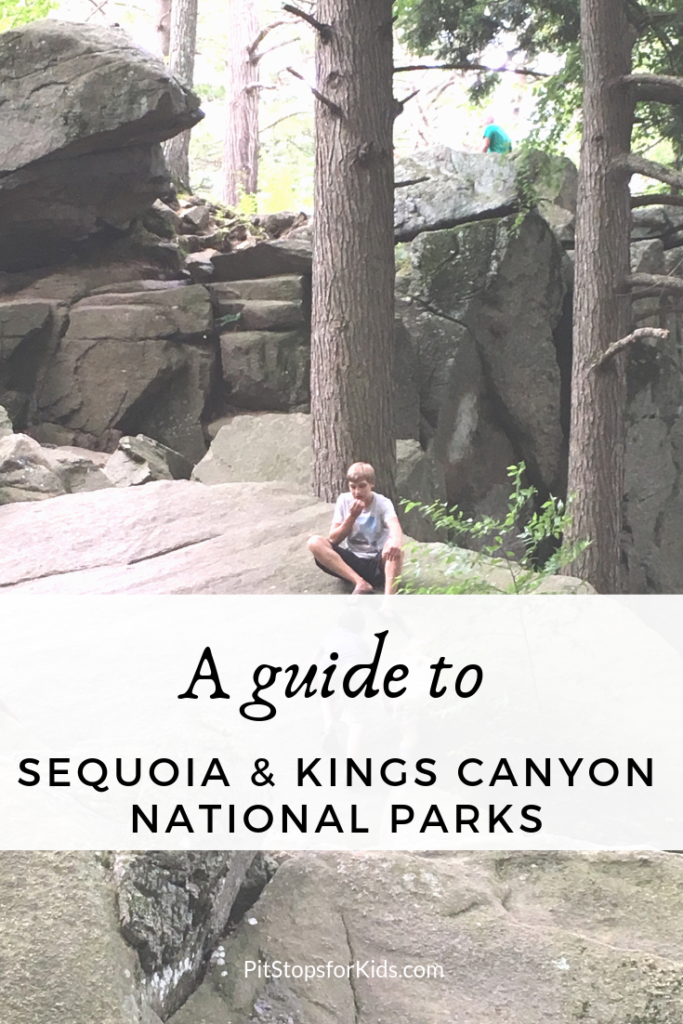
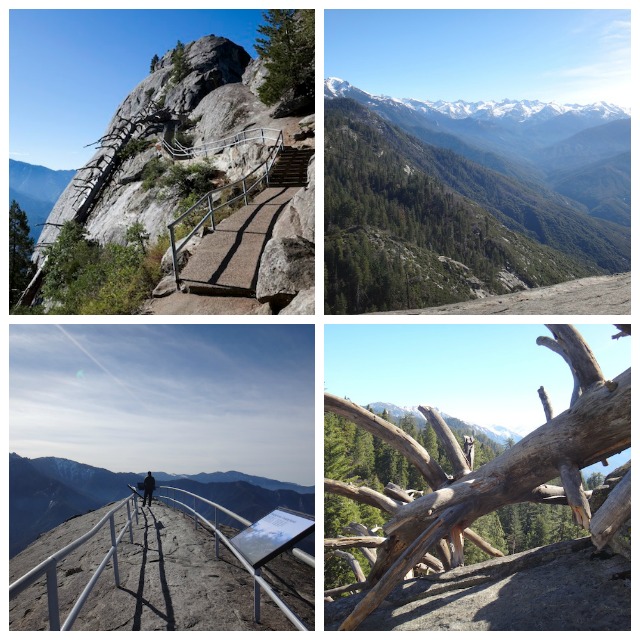
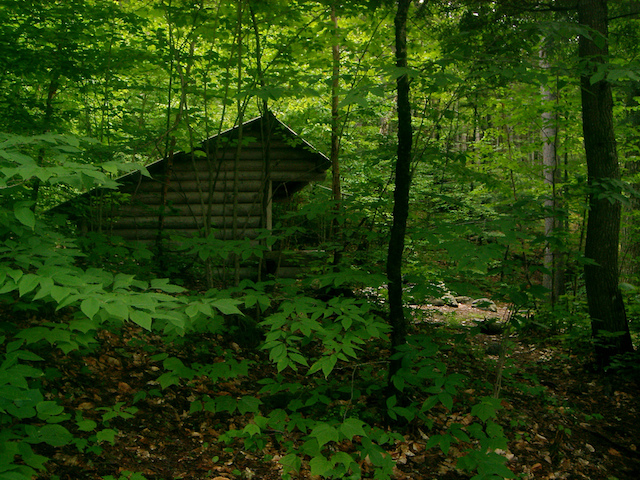
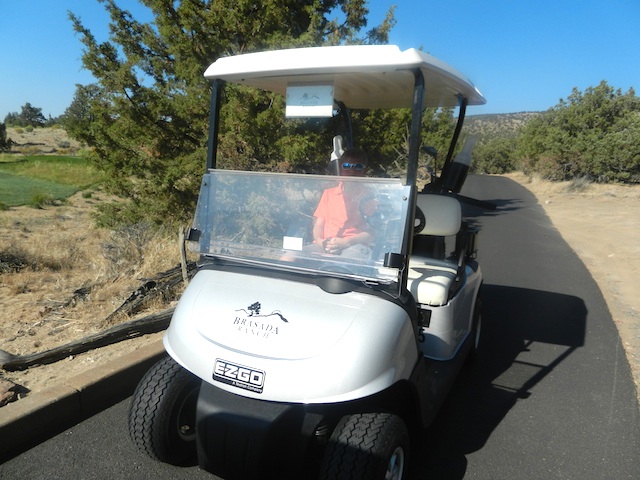
Trust me – if golf is “a good walk spoiled,” so is a search for a missing hiker! If you’re planning to explore hiking trails in your region this fall and winter, know what is needed to have a fantastic outdoor experience (and make it home in time for dinner).

Safety Precautions

Before setting out on any wilderness hike, download or buy a topographical map of the trail network so you’ll be aware of trail crossings and alternative routes. Consider hiking with a buddy, or, if you must hike alone, always tell a friend or loved one where you’ll be and when you plan to be back. Many trailheads offer “sign-in stations,” where hikers can register their presence.

Lucky hikers will enjoy spotting wildlife en route; with very few exceptions, these animals will respect your presence if you respect theirs. Carrying bear spray is a good precaution against the rare event of an aggressive animal, but a camera will come in handy far more often.

Gear to Take

Most hikers remember to pack weather-appropriate clothing and their best hiking boots, plus to carry a water bottle when setting out, but they are surprised to learn what else should be in their day pack. While compasses and GPS units are useful, they don’t make the list of absolute necessities. Neither do high-tech hiking poles or hydration systems, despite being nice to have. In fact, hikers carrying just the following five items will greatly increase their chances of survival in the wilderness should they spend more time in the elements than planned:

  • Bandana
  • Whistle
  • Glow Stick
  • Plastic Poncho
  • CD or Mirror

All five of the items above can be purchased for under $10 at any outdoor store or dollar store. Keep all five safety tools in your hiking day pack permanently to ensure they’re at the ready on every hike.

Read our full article on fix.com.


Source: Fix.com

Five outdoor travel experiences any family can try

Good news parents: Most kids’ favorite vacations involve sleeping bags and campfires instead of five-star luxury and turn-down service. Traditional camping trips are a crowd favorite, but if you’re looking for something a bit further off the beaten path of family travel, check out one of the following outdoor travel experiences any family can enjoy, no prior wilderness knowledge necessary.

outdoor travel experiences

1. Spend a night in a fire tower lookout.

2014-02-18-pickettbuttebed.jpg

Un-used or seasonally manned fire tower lookouts dot US Forest Service lands, especially in the Western states. Many of these lookouts are available for seasonal rental. Our fire lookout stay at Pickett Butte, Oregon included two nights in an isolated three-story high tower, with plenty of room to play, hike, and let our dog roam. We enjoyed downtime, plenty of paperbacks, roaring campfires, and the excitement of sleeping above the treetops while the wind blew. Fire lookouts are available to reserve via Recreation.gov, just like state campground sites.

2. Book an overnight river rafting trip.

2014-02-18-rafts.jpg

Untried on the river? Don’t try to plan an overnight float trip by yourself. We’ve seen the results first-hand (and they usually involve stuck rafts and miserable families). When we wanted to explore Oregon’s backcountry via the Rogue River, we entrusted our vacation to OARS, who took care of everything from experienced rafting guides to three-course meals. Rafting tours are available in most states, with the most popular overnight trips for families in California, Oregon, Utah, and Idaho.

3. Go dog sledding.

2014-02-18-BigWhitedogsledtrip.jpg

A day trip that involves speed, snow, and happy, barking canines? Sign us up! The best dog-sledding tours will include educational opportunities for kids to learn about the history and practice of dog sledding, as well as time to greet the dogs, learn about their care, and see where they eat and sleep. We loved our dog sledding tour in Big White, British Columbia, as well as our summer tour of a dog sledding training facility in Juneau, Alaska.

4. Rent a state park yurt.

2014-02-18-yurtstay.jpg

Want to camp in the Pacific Northwest in the off-season, but don’t have an RV or camper to keep warm? No problem: rent a state park yurt. Reservable via Recreation.gov, state park yurts in Washington and Oregon (as well as other states across the US) provide families with just enough comfort to still be considered a camping trip. Yurts along the Pacific coast provide heat, electricity, and beds… perfect for a weekend of whale watching or winter storm viewing. Reserve early: yurts are very popular!

5. Take a hut-to-hut ski or hike tour.

2014-02-18-amc.jpg

Perhaps you grew up taking overnight backpacking trips, but your children aren’t quite old enough to carry full packs of gear (yet). Or maybe you’d like to get into the sport, but are first-timers. Enter hut-to-hut hiking or skiing, where families can enjoy the backpacking experience combined with the comfort and security of a winterized (and sometimes stocked) hut at the end of each day’s journey. Our favorite hut-to-hut trips are located in the heart of the White Mountains, run by the Appalachian Mountain Club. Families can opt to trek on their own, or base in one of AMC’s family-friendly lodges such as the Highland Center Lodge for a guided day trip. Just in time for summer, AMC has extended their guided family vacations.

Photo credit: Amy Whitley, Flickr Creative Commons

What you need to know about going through international travel customs with kids

To some parents, the thought of navigating immigrations and customs with kids is intimidating. For some, the first experience in customs will be during a trip to Mexico, or Canada. For all of us, it can be tiring, especially after a long travel day (or night). But by knowing what to expect (and having the forms and documents you need) going through travel customs with kids can be a breeze. Here’s what you need to know:

going-through-customs-with-kids

1. Finding customs will be easy.

To frequent travelers, this may be obvious, but I’ve been asked by several parents how they’ll know where customs is. The answer: you can’t miss it. Airport security won’t let you. Once you deplane, the only way to go will be through immigrations and customs (through an international arrivals terminal). On the way, don’t delay, if you can help it. There are usually restrooms just before you enter the customs line, but if everyone’s good to go, it’s best to keep moving to avoid a long line.

2. You’ll go through Passport Control/Immigration first.

Get in the line that applies to you (foreign citizen or American citizen, depending on where you are and who you are). Have your customs declaration form ready (one per family, given to you on the plane), plus everyone’s passports. Keep your cell phone off, and pay attention to when it’s your turn. Keep all carry-on luggage with you (just as you would elsewhere in the airport).

When it’s your turn, hand the immigration agent all the passports and the customs declaration form, and be ready to answer some basic questions, such as why you’re in the country, how long you’ll be there, and where you’re staying. The agent may ask questions of your children, as well. He or she will give you the customs declaration form back.

3. Head next to pick up your bags (if you have any).

Again, you won’t be able to miss this step. On the other side of immigration, the baggage carousels will be waiting. Get your bags before heading to customs. If your bag is delayed (bummer!) be sure to have your baggage claim form handy. You will have to pick up your bags whether or not you’re in your final destination. If you’re connecting to another flight, get the bags, go through customs (explained below), then follow signs to ‘connecting flights’ or ‘luggage drop off’.

4. Go through customs.

Get in the proper line (do have something to declare, do not) and turn in your customs declaration form. Declare everything you might have bought in the country, including duty-free items. Our souvenirs never add up to much, and we’re always waved through without much fanfare.

5. Head out and connect with your next flight or ground transportation!

That wasn’t so bad, was it?

If you’re traveling without your children’s other parent:

Learn from my mistakes, because this is where we’ve hit a snag. If you share custody of your children (either in a custody arrangement or as married parents), but you’re traveling without the other parents, you MUST have a signed letter stating that you have permission to take your children out of the country. If possible, get it notarized. We were delayed and ‘interrogated’ (using that term loosely) when I neglected to have a letter from my spouse on a recent trip to Canada.

If your teen is traveling alone:

In addition to his or her passport and customs declaration form, any teen traveling without a parent or guardian should also have a notarized letter from both parents (if both have custody) explaining his or her purpose in the country. He or she should also have a document with the names, addressees, and phone numbers of whomever he or she is meeting in the country. We also send our son with a photocopy of his passport, carried in a different bag on his person.

Will your child be flying as an unaccompanied minor? Read our tips for kids flying solo.

Photo credit: J Aaron Farr

Summer in the Berkshires: Hancock Shaker Village

The Berkshires is a wonderful region in Massachusetts to explore with kids, and summer in the Berkshires can’t be beat! Parents will appreciate the rural, countrified setting with farmer’s markets, rolling hills, and quaint towns, and kids will find plenty to do in the form of roadside ice cream stands, gentle streams and rivers, and museums and gardens.

hancock-shaker-village

The Hancock Shaker Village is located outside Pittsfield (the county seat), near the New York state border. This sprawling property is preserved beautifully from the time Massachusetts Shakers communed here, with gardens, lawn, and buildings to explore. The Shaker way of life was peaceful and industrious, with an emphasis on equality, hard work, and kindness that is still taught at the property today.

summer-in-the-berkshires


Families can start with a short video, or make their way immediately to a self-guided tour, which includes the famous round barn (ideal for milking productivity), the main Shaker living quarters (with dining rooms, kitchens, infirmary, laundry rooms, children’s rooms, and more), a blacksmith shop, tannery, and coops of chickens, turkeys, and sheep.

shaker-village

Kids will not want to miss the Children’s Discovery Room, in which docents will help kids make bracelets of yarn, learn Shaker games, and milk a replica cow. Dress up clothes from the period are on-hand to try, as well as a Shaker chair to mend.

hancock-shaker-village


In every building, ask a docent to tell you more about the place! In most buildings, experts are demonstrating different types of Shaker work; during our trip, we had a great conversation with a local blacksmith, who made the five-year-old in our group his own handmade nail. In another section, a man was spinning wool, and in a third, stablehands were mucking out stalls. Holstein cows grazed nearby.

summer-in-berkshires

Plan to spend a few hours in the village, with time to check out the shop (kids can buy old-fashioned simple games or candy) and have a picnic. There’s a cafe on-site, plus space for bringing in outside food. We opted for a combination: picnic food complimented by hot dogs bought on-site.

Date last visited:

June 20, 2014

Distance from the interstate:

Right off Route 20, not far from I-90.

Admission:

Adults are $18, teens are (13-17) $8, and kids 12 and under are free!

Hours:

Open seven days a week (including holidays) from 10 am to 4 pm in winter, 10 am to 5 pm in summer.

Directions:

If using GPS, plug in the address instead of the name of the destination: 34 Lebanon Mountain Road, Hancock. Get full directions here.

Golf vacations with kids: tips for a great resort golf experience

Our kids like to golf, but they’re hardly miniature pros. They’re kids, and they want to have fun on the links. We want them to have fun, too, but also appreciate that other guests may want to enjoy the course without distractions or delays. It’s easy to get stressed when on golf vacations with kids, which is why we’ve compiled the following tips for a great golf resort experience:
pga-tour-kids

1. Pick a resort that’s youth golf-friendly.

When you step into a golf course pro shop and see only adult clubs and apparel, that’s a bad sign. A kid-friendly golf course will have kids’ clubs lining the walls, and even better yet: rentals. Think this is only the case at less luxurious nine-hole courses? Not so. Our favorite golf resort, Brasada Ranch, offers a course for the most sophisticated golfer, and yet staff members still smile when kids come in the door of the pro shop. It’s no surprise to me that Brasada Ranch is pro-youth golfer: this Preferred Hotel is a designated Preferred Family location, which means it offers kid-friendly perks on and off the links. We were able to play nine holes instead of 18 with our kids (not usually allowed for adults on the course), and the starter took extra care to time our start when no one would be crowding us.

Brasada Canyons golf

Likewise, the Coeur d’ Alene Resort in scenic Idaho appeals to kids because of its fun floating green on Lake Coeur d’ Alene, but parents will get more excited that kids golf free. Better yet: sign up for Preferred Hotel Group’s point-based reward program like we have, and Mom and Dad can golf with the kids this time around, and return later on points for a couples’ day on the links. This option extends further than Idaho: to find the best family friendly golf property that’s included in iPrefer, start at PreferredFamily.com/iPrefer. Win-win.

2. Opt for a twilight tee time.

Every golf resort has a least desirable time of day to be on the links; the key is to find out when that is, and book a tee time. Often, twilight tee times are least desirable, as the light gets bad, but depending on the resort location, the least desirable time could be mid-day or late afternoon. If you’re golfing in Palm Springs in summer, of instance, the courses are empty at 3 pm. Golfing at low-crowd periods ensures kids can golf at their own pace, and parents don’t need to worry about backing up pairs behind them. Another perk: twilight tee times are often discounted.

3. Play every other hole with young kids and beginners.

If you’re golfing with a beginner, let the starter know. If you’re indeed at a kid-friendly course, he or she will be able to offer suggestions of holes to pass up. Skipping a hole or two is a good strategy to implement when parents start to notice groups waiting for them to finish each hole, or when kids begin to wilt. Our kids are now tweens, and they’ve yet to finish 18 holes at one time.

tigh na mara

4. Try a golf academy or kids’ camp.

If you have a serious golfer in your midst, consider finding a golf destination offering a PGA Tour Academy lesson.  We had an amazing experience in Central Oregon with the PGA Academy, where our golf swing was recorded on video and we were instructed by the best. If you’re not ready to go pro, look for a resort with a kids’ camp that includes golf. We’ve enjoyed kids’ camp experiences that take kids to the driving range for a one-on-one lesson with the golf pro after-hours.

5. Play on the putting course or green.

Everyone knows to start at the driving range, but far more interesting to kids is the putting course. Many resorts now feature these ‘mini courses’, which offer nine or 18 holes complete with rolling hills and sand traps but require far shorter driving distances. In fact, your kids will need only a chipper and a putter. These courses can be completed in an hour, and cost a fraction of the price of the real deal. We tried our first putting course with the expectation that we’d graduate to the regular course right after: instead, we hit the pool, completely satisfied with our golf experience.
The most important step in experiencing a kid-friendly golf vacation is to start with a kid-friendly resort. What’s your favorite?
For more family travel tips, see Spas and Family Vacations: The Perfect Combination by Mother of All Trips.
Disclosure: This post is part of a series about Preferred Hotel Group’s Preferred Family and iPrefer programs.

Santa Fe with kids: dining, shopping, and touring

When most parents think of Santa Fe, New Mexico, spas and art galleries come to mind. However, this small town in the high desert has its share of kid-friendly activities. Here where to go, where to eat, and where to shop if vacationing in Santa Fe with kids.

santa-fe-with-kids

Attractions:

There are a few must-sees in Santa Fe with kids. To start, you’ll want to tour the Plaza and Palace of the Governors with kids, which is located in the heart of downtown and within walking distance of most hotels. Historically a trading center, the Palace of the Governors features a shaded walkway filled daily with local artisans; the Native Americans here get their spot by lottery. Wares range from small handmade trinkets for a few dollars to $400 fired bowls and other pottery.

palace-of-the-governors

Also in the Plaza is the Five and Dime, a kitchy souvenir store filled top-to-bottom with fun gifts and foods. Be sure to head to the back of the store to try a Frito Pie; this Santa Fe treat is a bag of Fritos filled with chili, cheese, and toppings. Many other shops line the square, including Rippel, featuring authentic silver buckles and innovative hand-crafted jewelry, but even better for kids is the outdoor market area one block toward the Loretto Chapel and La Fonda Hotel on E. San Francisco: here you’ll find baskets of low-cost gems, necklaces, bracelets, and trinkets.

plaza-santa-fe

Canyon Road features over 100 of the world’s finest art galleries, but if your kids won’t last long in this environment (mine don’t!) head left of the Canyon Road entrance to the site of Fort Marcy and the Cross of the Martyrs. This regional park includes a short walkway up the hill to the site of the original fort from the 19th century, and offers a beautiful view of the city. Get your art fix by visiting the Georgia O’Keeffe Museum, ideal for kids.

cross-of-the-martyrs

For adventure in the high desert, join Santa Fe Walkabouts for a 4×4 ride along historic Route 66 to see remnants from the Camino Real trading route and a fun drive to the bottom of a steep mesa.

Want to travel the US? Learn more about traveling to the US with ESTA.

Dining:

When choosing dining options in Santa Fe with kids, plan a meal at each of two restaurants, both located near downtown on Guadalupe Street. The Cowgirl Hall of Fame  is well-known as a local watering hole with nightly live entertainment, but this fun and funky restaurant is so much more. Head to the back of this meandering establishment to find an outdoor seating area in a courtyard featuring a full-sized children’s play structure, plus chalkboard walls and other toys.  Listen to the live music, enjoy one of many local microbrews on tap or a great margarita, and let the kids play! The food here ranges from burgers and fries to authentic New Mexican cuisine. We recommend the nachos as an appetizer.

cowgirl-hall-of-fame

Across the street at the railway depot is Tomasitas, with the most authentic Northern New Mexican cuisine in the city (according to locals). Tomasitas is completely casual, making it an excellent pick for kids, plus serves up the best margarita I’ve ever had. The guacamole and blue corn chips pair with the margarita perfectly, and their entrees range from enchiladas, tacos, chile rellenos, and tamales. All meals come with authentic sopaipilla (fried bread) and feature green or red chiles in the New Mexican tradition. Ask your server to have the chile sauce on the side if you’re not used to it: it’s very hot, but delicious! A kids’ menu is available, and restless kids can go outside with a parent to watch for trains.

tomasitas-santa-fe

Check out our review of the Inn and Spa at Loretto, our Santa Fe lodging pick.

Why study abroad: how to help your teen travel

As my children grow and become more experienced travelers, I’ve been thinking and writing more often about teen travel and study abroad experiences. Last year, our 15-year-old flew solo to Costa Rica to join an Adventures Cross Country trip, which proved to be an enriching, deeply impactful two-week adventure for him. The experience left us wanting more!

I recently had the privilege of interviewing Jessie Voigts, publisher of Wandering Educators, a travel library for people curious about the world. She founded and directs the Youth Travel Blogging Mentorship Program, and has published six books about travel and intercultural learning, with more on the way.

I wanted to hear from Jessie about the importance of teen and college-aged travel, and how to get started. For many, including myself, the sheer range of study abroad options can be overwhelming. Here’s what Jessie has to say about both the WHY and the HOW of teen travel.

Q: What age did you first travel abroad? Where did you go, and what were your most lasting impressions from this trip?

I first went abroad to Japan when I was in 8th grade. We had hosted a Japanese exchange student the summer before, and I was eager to go visit her! I was very happy to be going somewhere I’d always wanted to go, and also very surprised at how different Japan was from what I’d researched. This was before the internet, and so all the research we could do was in books, encyclopedias, and movies. I loved the food, the house structure (the toilet separate from the rest of the bathroom, taking off your shoes), my host family, and all of the wonderful things we did together. It instilled in me a love of discovering new adventures, food, friends, and places. It also taught me that there’s nothing like sushi.

Q: How (and why) have you instilled a love of travel in your own child? 

We definitely have instilled a love of travel in our daughter, who is now 12. We have always had global meals, art, music, friends, and culture in our home – it’s just a part of our lives. When she was small, she was enamored with Paris. (Still is. Don’t blame her, I love Paris, too.) When she was three and at gymnastics class, the teacher asked the kids to imagine they could go anywhere…where would they go? Answers included McDonald’s, the playground, a friend’s house… and Lillie said Paris. Most of the kids there didn’t even know what that was!

Get your kids started early in being curious about the world. There’s more to the world than what’s in your town – show your kids that!

It’s easy to strew your house and lives with both intercultural artifacts and curiosity, and by living your own passion for different places, foods, and the arts. Once your kids see you being interested in the world, they will become so, too.

study-abroad

Jessie with her family

Q: As an educator, what benefits can you see from travel in your own child or students you come across? How does the experience of studying abroad translate to better study habits or learning at home?

I think the most important thing that travel and international experiences teach is that difference exists, and it’s ok to have different world views – this is called ethnorelativism. Any time people learn about the world first-hand, they have a personal stake in that place, culture, and people. Wars are personal, because people we know and love can get hurt. Natural disasters mean more, because our friends or places we love might be forever changed. A meal we loved in a new place can be recreated at home, for our friends and family. This makes the world smaller, and peace possible – connection by connection.

Global knowledge is also a necessity in the workplace – because the workplace is global! Your coworkers might be located all around the world. There’s, of course, the focus on flexibility, adaptability, and nimbleness to change – all things that travelers learn first-hand.

But when someone speaks multiple languages, and understands how different cultures work, they not only become a critical asset to a company, but also showcase how international business should be run – with experience, wisdom, and intercultural sensitivity.

Also, it’s been proven that study abroad makes you smarter.

 Q: Studying abroad is very expensive. What would you say to the parent who might argue that for the price of one child studying abroad, the whole family could travel together? Is this more beneficial?

There are so many grants and programs for studying abroad that this is not really true for those who are willing to put in the time to research it, and who fit into the guidelines for these programs. Our government runs many programs that are free to participants.

chicago

Jessie with daughter Lillie in Chicago

Can’t find a grant or program? Crowd-fund! Teach your child how important it is to work for something they want. Maybe they will take photos and print them for donors, or learn to cook a meal and prepare it for them, when s/he gets home from abroad. Or work hard mowing lawns, babysitting, or shoveling snow. Have them cook meals when you want to go out to eat – and put that money you would have spent into their travel fund. There are many ways to earn money – and this will show your child the benefits of hard work. Saving $40 on a meal here will buy them plenty of espresso and gelato in Italy. Tip: read this article before deciding teen travel is too expensive!

And while I love family travel, there’s also a time in your kids’ lives where they need to learn to stand on their own two feet. You’re there for them, but really, that adventure should be their own. They’ll emerge remarkably strong, with a resilience that should be cherished.

Save money yourself and take the family to visit your overseas child at the end of their time abroad – not only will they be showing their family a place they love, but it will also show your child that you are excited about their new experiences, explorations, and life changes they’ve gone through.

 Q: How can parents best identify the right study abroad programs for their teens? There are so many out there!

I’d suggest sitting down together and discussion what they’d like to get out of it. Do they want to study a particular field? Or are they more interested in being in a place – and fulfilling some general education credits? Is there a professor they’d love to work with, or an experience they can’t get anywhere else? Once you’ve narrowed that down, and put some thought into it, then google will be your friend. There are so many programs out there that by knowing what they want before they dive in, they’ll be better able to target the exact programs that fit their needs.

Tip: Help kids have success wherever their academics take them by teaching them how to construct well-written essays with programs like https://www.customessaymeister.com

Don’t forget direct enrollment – many students do this, and gather credit for their home university, or graduate from an international university (with full scholarships!). This is also a good option for those committed to a certain place, field, or faculty.

Q: What are your thoughts on traveling in groups (a school class or select friends) vs. traveling solo (meeting up with a group you don’t know)? Do kids get more out of the experience when they’re not with friends?

First, I’d like to say that any international experience is a good thing! However, there are ways to inter-culturally maximize your time overseas, and the main way is to immerse yourself in the culture as much as possible.

costa-rica

My son Nate making new friends in Costa Rica

Go without a group of friends, and make friends there – from the locale in which you’re living, or with other international students. Don’t stay connected to home so much – and I know you miss your friends and family! But calling and texting all the time won’t get you out the door and experiencing life where you are now. It’s a crutch that keeps you from living.

Figure things out yourself, go explore, make new friends, and be willing to try new things, foods, experiences. You’ll never be in that exact place again – take advantage of it, and you’ll have a rich, challenging, life-changing adventure.

Q: Your site is so clearly focused on lifelong learning. How does travel naturally facilitate learning at all ages?

The genius thing about travel (and life) is that you’re always learning! Whether it is culture, history, literature, music, food, languages, geography, anthropology, sociology, religion, architecture, art, sports, media, and more, travel packs a learning punch like no other. It can teach us at any age, and will always teach us. That’s the beauty of the world, isn’t it? We’re always learning!

Thank you, Jessie, for taking the time to talk to Pit Stops for Kids readers! 

Jessie Voigts is a mom who loves sharing the world with her daughter. She has a PhD in International Education, and is constantly looking for ways to increase intercultural understanding, especially with kids (it’s never too young to start!). She has lived and worked in Japan and London, and traveled around the world.

Photo credit: Visions Service Adventures and Jessie Voigts