Travel Gear We Use: GlocalMe WiFi hotspot for travel

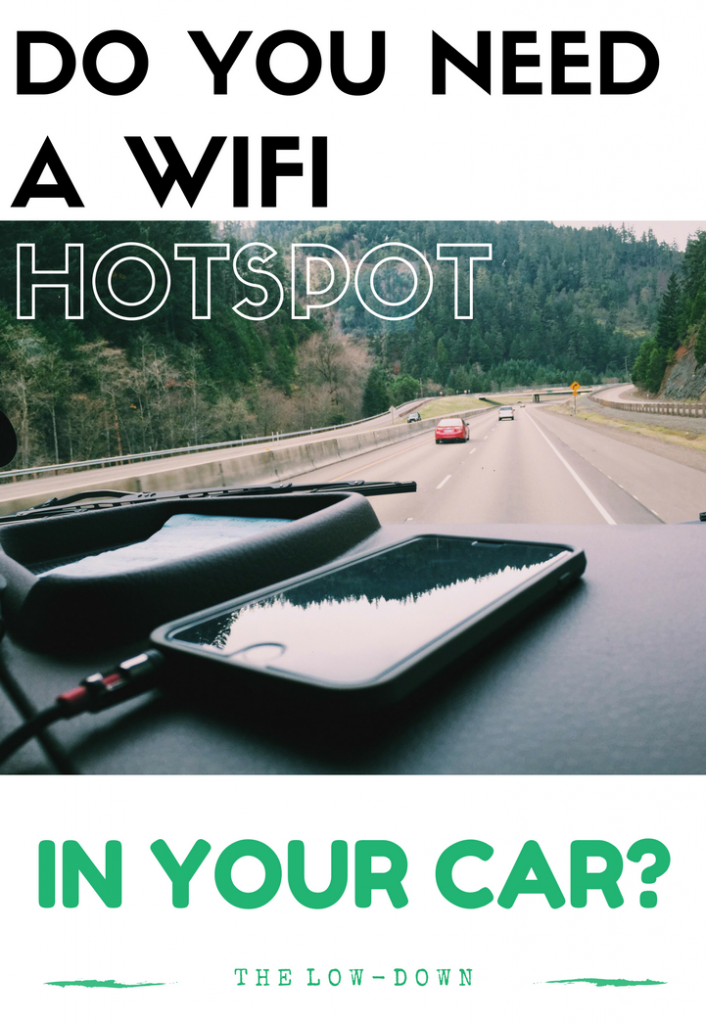
Let’s get real about WiFi usage and fees while traveling internationally as a family. When we travel, we embrace being off-the-grid most of the time, but we absolutely need wifi at various times. Sometimes, this is due to necessity: we need turn-by-turn directions out of a foreign city, or we need to call the credit card company to check our damage (I mean, balance). Other times, someone needs to download an episode of Parks and Rec, or someone else really wants some quality Instagram time.

iceland

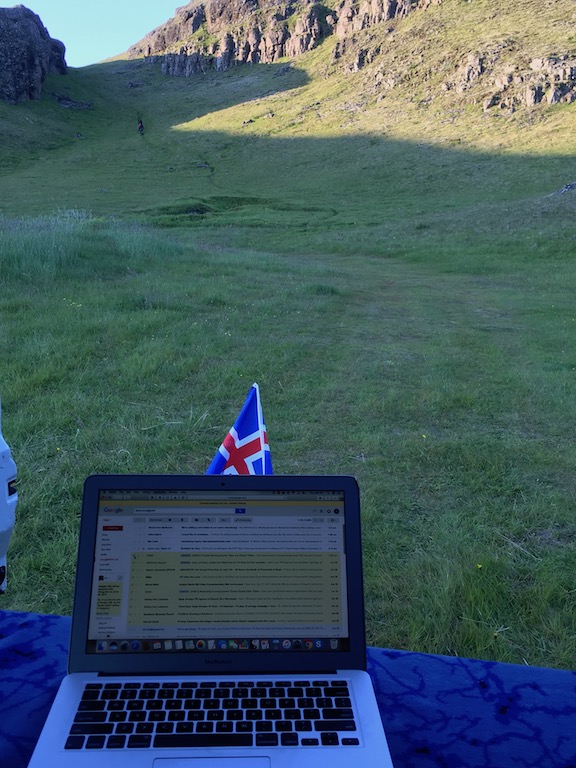
Staying connected in Iceland: using GlocalMe to work from locations like this.

We are a family of five, with older kids and teens who all have phones. Therefore, we have five phones to connect when we travel. Usually, we simply don’t connect them: the parents pay for WiFi, and the kids are basically SOOL. Why? Because our cell service plan charges us $10 per day for an international plan. Now, that’s not terrible, until you multiply it by five. $50 per day seems excessive, even for luxury travelers.

What to do? Invest in a WiFi hotspot for travel.

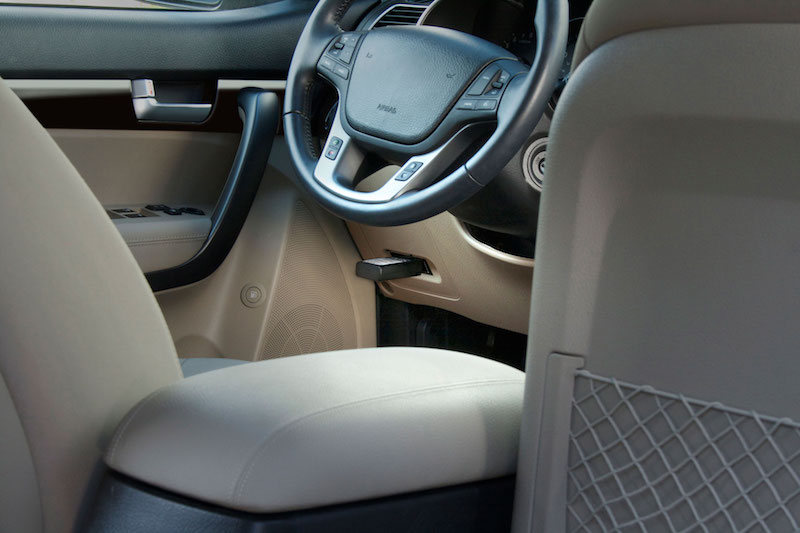
During our most recent trip, which took us through Iceland for ten days, we tried something new: a GlocalMe WiFi hotspot. For an initial investment of about $150-250, you get the hotspot, which you can then load with varying amounts for different destinations. Or, you can rent the device from Roaming Man.

I spent $20 for 3 GB of data in Iceland, which would ‘turn on’ (for lack of a better word) when I got to the country, and expire after 22 days. The hotspot can connect up to five devices (hey, perfect for us!) and you can add data at any time, either by ‘topping it off’ or buying a second package.

As I noted above, we use WiFi sparingly when we travel, preferring to enjoy the freedom from screen time (for the most part). We turned on our hot spot for about 30 minutes each day to check email, upload photos to Facebook and Instagram, and text, plus a few extra times to navigate when we needed directions, and our package of 3 GB easily lasted us 10 days. So instead of $50 per day for unlimited use we didn’t want, we paid $20 total for all of us to have a little bit of WiFi per day.

This is a perfect solution for us, and we plan to use the GlocalMe hotspot on many more trips.

Note: the hotspot is not intended for streaming video or downloading TV (it will, or at least will try, but it uses tons of data quickly).

How to load the hotspot with data:

Once you have a hot spot, go online to GlocalMe and register. It will ask you for your device’s registration number. Once you’re registered, you can add money by scanning the list of countries (I didn’t see any missing that were within the realm of visiting) and choosing a package or pay-as-you-go option. You can monitor your usage and add money with the free app or with the website. The device itself shows your data usage so you can monitor it there, too. The hot spot recharges with a standard USB cable (included) but during our 10 days, we never ran out of battery life.

How to buy:

The actual GlocalMe device is a one-time purchase of about $130-150, depending on where you buy. We recommend Amazon for the best deal.

Disclosure: We were given a GlocalMe hotspot device for the purpose of review. We paid to use it at our own expense.

SaveSaveSaveSave

SaveSave

SaveSave

Travel Gear We Use: The Seventy2 Survival System bug-out bag

You may not be a doomsday prepper or preparing for a zombie apocalypse (or maybe you are), but every family should have a car bug-out bag, ideally for each family member and certainly for road trips and emergencies.

emergency-bug-out-bag

Opt for the Seventy2 Survival System from Uncharted.

Preppers define bug-out bags as gear they can grab quickly in case of emergency, that’s ready to go when they are. The folks at Uncharted simplify this even further: their Seventy2 bag are designed with the premise that 95 percent of emergencies are rectified within 72 hours, so they make sure you have everything you might need for those crucial hours, nothing more, nothing less. The result? A streamlined system in an easy-to-carry, high-quality backpack that you can gift to family members or buy for yourself.

The ‘shell’ of the Seventy2 bag is a 48 liter backpack that’s waterproof and very clearly organized. This backpack alone is worthy of a review. It has pockets and features galore. Inside, clearly marked ‘survival pouches’ make it easy to find essentials, plus know what to do with them. The ‘tools’ pouch is thus labeled, for instance, with all the contents listed underneath, including paracord, shovel, axe, duct tape, knife, and fire starter. In the ‘warmth’ pouch is a tent, blanket, hat, gloves, and hand warmers. For a full list of everything in the Seventy2 bag, including USB chargers, radios, and more, check here. 

Can you put together your own survival go bag? Of course. Will you, to this extent? I can almost guarantee you won’t. At least, I won’t, which is why I gifted my college-aged son with a Seventy2 bag and now need more for my household. This bag could be essential on a camping or road trip, but it might also save your life when you’re not traveling.

Pick one up this holiday season as a very special gift for $349. You will have purchased peace of mind along with essentials you needed any way.

Want to design a less extensive, road trip bug-out bag?

For families who like to road trip or car camp, a car bug-out bag can be any kit that contains supplies and extras, such as MOLLE gear, that may be needed in an emergency while away from home.

Whatever type of bug out bag you create, be sure to stock it regularly for minor injuries, sickness, or weather conditions. We’ve never needed ours for a serious emergency, and hope we never do.

Start with any large backpack or duffel. We keep our basic bag, which we use in addition to our Seventy2 bag now, in our primary vehicle. You don’t want to put it anywhere it will need to be frequently moved. Ours is in the back, near the space reserved for the car jack and jumper cables.

What to put in your more basic road trip bug-out bag:

2-4 emergency blankets: These blankets are made of vacuum-metalized polyethylene and reflect 90% of your body heat, allowing you to stay warm despite their thin shape and low weight. They are the size of your palm when still folded, and can also be used as shelter or a ground cloth. We use SOL emergency blankets, which are less than $5 on Amazon.

1 small first aid kit: Ideally, you already have a family-sized first-aid kit in your car (if not, check out our recommendations). However, since your car bug-out bag is meant to be portable, opt for a smaller sized one. We use Adventure Medical Kits’ .5, which is housed in a lightweight, waterproof pouch and includes all the essentials (and not much else). At $15, you can’t make a cheaper one at this weight. Place some extra easy-access bandages in there, too. These nifty band-aids require only one hand to unpeel and place on a cut.

Gloves and winter hats for everyone: Reuse or buy a cheap pair of fleece or knit gloves for everyone in your family, and place them in the bag. Ditto for winter ‘beanie’ hats. These don’t need to be anything fancy; after all, you’ll want to wear your good ones regularly, and you’ll likely never use these. But in case of bad weather or the need to put chains on your tires, you’ll be glad to have some protection for your hands and heads. In winter months, we also add a lightweight jacket for everyone, which just stays in the bag until summer. Remember, you’ll have extra seasonally-appropriate clothing for everyone in your car already if you’re on a road trip or camping trip.

Pocket survival pack: These neat packs fit into your pocket, and include only the barest of essentials for outdoor survival. We have a pack in our backpacking gear, in the ‘just in case’ category, and one more in the car. In the case that someone needed to leave the shelter of the car to seek help, I’d want him or her to have this kit on them. Included is a whistle, mirror, sparker and tinder for an easy flame, and tiny portions of helpful items such as duct tape, safety pins, wire, and foil. It doesn’t seem like much now, but as a former Search and Rescue volunteer, I’ve seen people do amazing things with these items. We like the SOL pocket survival pack, because it comes with a waterproof card of instructions. Pick one up for under $30.

motorola-talkabout
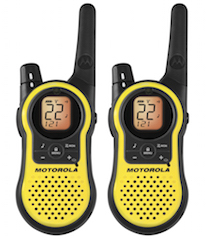
2-way radios: Sure, you have mobile phones, but as we all know, they can be unreliable. If you’re out of coverage area, low on battery power, or–unlikely but possible–if cellular service is down, you’ll want another way to communicate. We recently tried out the Motorola Talkabout 2-Way Radios (in other words, walkie-talkies), and they’ve now been added to our bug-out bag. Why we like them: they’re easy to juice up, they have a long range, and you can receive NOAA weather alerts through them. The Talkabout runs on either alkaline or rechargeable batteries (or can be charged using a mini-USB port, if you have access to that). They work in a 23 mile range, and has a scan feature which allows you to search a programmed list of channels. In the past, we’ve found that walkie-talkies can be useless if too many people are using them, but the Talkabout filters interference from non-Motorola units. They’re not toys, by any means, but still under $50 on Amazon.

Supplies for your car: Hopefully you already know where your car’s extra tire and jack are housed, but in addition, most families should carry chains for winter weather (depending on where you live), and jumper cables. We also store a small, collapsible shovel in our bag, which can (and has been) used to dig out of snow or mud.

Matches and firestarter: If you need to, you want to be able to make a fire for signaling help, warmth, or cooking. If you’re on a camping trip, you’ll have these supplies anyway, but we keep a waterproof case of matches and fire cubes in our bug-out bag all the time, so we don’t have to remember to grab them on each trip. What are fire cubes, you ask? These sugar-cube sized fire starters burn at 1300 F in any conditions…even a downpour. Use them to start a campfire or even boil water. Speaking of which…

Water: This is the only item we do not store in our bug-out bag, because we all carry personal water bottles with us in the car for any trip, so we already have them at the ready. For longer trips, however, we buy a case of water and place it in the back by the bag. If we don’t need it, we use this water on our travels, and buy more.

Want to be even more prepared? Have a water filter handy, or do what we do: pack your bug out bag with a LifeStraw or LifeStraw Go. This award-winning personal filtration system uses a filtering straw, so you have safe water to drink anywhere, anytime. We use ours on international travel days, too, so we get use of it regularly, not just during emergencies. After our son Nate lost his on a trip to Costa Rica, we replaced it immediately!

Basic foods: We don’t go overboard on this, which would probably dismay true preppers. But our bug-out bag is only meant for short term emergencies and even car-ride inconveniences, so we pack snacks with a long shelf life, like beef jerky and Nature Made granola bars. We change these snacks out every 2-3 months. I simply like knowing they’re in our bag should we get stuck in traffic for a very long time or need to leave our car for any reason.

amzn_assoc_placement = “adunit0”;
amzn_assoc_search_bar = “true”;
amzn_assoc_tracking_id = “pitstoforkid-20”;
amzn_assoc_ad_mode = “manual”;
amzn_assoc_ad_type = “smart”;
amzn_assoc_marketplace = “amazon”;
amzn_assoc_region = “US”;
amzn_assoc_title = “My Amazon Picks”;
amzn_assoc_linkid = “2b3ff3efebcf632ee007032e7c7a5424”;
amzn_assoc_asins = “B00EVGD2JK,B000G7YIL4,B001UE6MIO,B00H90PFOK”;

Find more Travel Gear We Use!

Do you have a car emergency bug-out bag? What’s in it?

Photo credit: Richard Riley

Best essential oils for travel

Like everyone else (it seems), I’ve recently started using essential oils in my home and for my family. While I don’t deem them lifesaving (gasp!), I do believe essential oils add to our family’s well-being and overall health. Why not take this show on the road? We have a round up of the best essential oils for travel (and when to use them):

Three best essential oils for travel:

essential-oils

Motion sickness:

Several members of our family suffer from motion sickness in cars and on ships. I hate medicating for this, because no matter what we use, we seem to get drowsy. Before motion sickness can hit, I like to use essential oils topically (to the back of the ears, temples, or wrists) to fight nausea. It’s important to apply the essential oils before getting in the car!

Essential oils for motion sickness: ginger, peppermint, or spearmint. Alternatively, get a pre-made blend. We like Motion-Eaze, which is a combination of lavender, peppermint, frankincense, chamomile, myrrh, Ylang Ylang, and birch.

Immune defense:

This is a biggie. We do everything in our power to prevent sickness while on vacation. For immune defense, we diffuse essential oils at home pre-trip. If you have a small diffuser, you can even bring it along on road trips to use in hotel rooms and vacation homes. You can also just bring the oils, and add a few drops to a bowl of boiling water to breathe in.

Essential oils for immune defense: clove, lemon, cinnamon, eucalyptus, rosemary. Or use a blend like Thieves. We are using Best Friend, from Better Essentials. Better Essentials makes blends nearly identical to those made by the big essential oil makers, at a lower cost. Their oils are 100% pure, therapeutic grade, and third-party tested.

Sleep:

Sleep is absolutely essential (no pun intended!) while on vacation. To assist with sleep in hotel rooms and other unfamiliar places, we apply essential oil to our wrists, plus perhaps a dab behind the ears. You can also spray pillows lightly. I just don’t suggest doing this in enclosed spaces like airplanes, as the scent could bother others.

Essential oils for sleep: lavender, or a blend like Breathe. We are using Fresh Air from Better Essentials (their version of Breathe), or we use pure lavender. Hard to beat it!

How to conveniently bring essential oils:

Luckily, essential oils come, by their very nature, in small packages. They are easy to bring along on road trips in any first aid kit or medication kit, and easy to bring for air travel in a 3-1-1 bag. Almost all are under 3 ounces. Several travel-sized diffusers are on the market, but we don’t bother with this: for our use on the road, we apply our essential oils topically. However you decide to use your oils, make sure you buy therapeutic grade, and place all oils in a plastic bag or otherwise airtight container. This will contain the scent (when you don’t want it) and also prevent any leakage.

amzn_assoc_placement = “adunit0”;
amzn_assoc_search_bar = “true”;
amzn_assoc_tracking_id = “pitstoforkid-20”;
amzn_assoc_ad_mode = “manual”;
amzn_assoc_ad_type = “smart”;
amzn_assoc_marketplace = “amazon”;
amzn_assoc_region = “US”;
amzn_assoc_title = “My Amazon Picks”;
amzn_assoc_linkid = “87cfb6f6de58c95d5111725a5c4ebbe0”;
amzn_assoc_asins = “B002D6M94E,B01ETQXMM8,B016PSMSHI,B0183K2AG0”;

Do you use essential oils? What are your favorite blends?

Travel Gear We Use: Best day pack for international travel

I’ve been conducting travel bag reviews here and at Practical Travel Gear since 2009 and 2011 respectively. That’s a lot of reviews! I’ve tried crossover bags, messenger bags, backpacks, totes, and roller bags. Finally, I think I’ve nailed it. I think I’ve found the best day pack for international travel, especially with kids in tow. That’s right…


Best travel bag for international travel: we reviewed it!

The Eagle Creek Catch All Courier Pack RFID

What is it: The Catch-All Courier is a courier bag (with shoulder strap) that converts to a backpack with the ease for just two clips. It weight just over one pound, and the capacity is 12L. It’s made of tough poly ripstop, and has several compartments, or zones. The first zone is the outside zippered pocket, which is pretty straightforward. The next is a zone under the flap. This zone is the main organizational section, with several sleeves, a key fob, and slots, plus a passport-sized RFID paneled pocket. The zipper on this compartment is lockable in two ways (more on that below). The largest zone is the central interior of the bag, which is roomy enough for some layers, a large camera, snacks, and a 13″ laptop (in padded sleeve). To convert the bag to a backpack, unzip the backpack straps from the back panel (they’re zippered in when not in use), and snap them by a simple clip to each side of the bag. You’re done.

What makes it great: It’s exactly the right size (and no bigger) for day use while city touring, with just the right amount of pockets and organization panels. We appreciate the security of the RFID panel when we’re traveling with important documents and credit cards, and I love the way the zippers lock. In addition to being lock-ready (with your own small padlock) like most bags, they also have a built in toggle which you can slip into a slot, ensuring the zippers cannot be pulled by anyone around you while you’re wearing the pack. The front panel additionally locks with two snap closures. You can access the ‘zone 2’ panel really easily without opening the main section of the pack, which is nice when you need to get out a wallet or cell phone. There’s a water bottle sleeve, too (though I wish there were two!). There’s a nice handle at the top for easy grabbing, and the bag fits under airplane seats nicely, and isn’t too heavy to wear around a city.

Grab your own for around $70 on Amazon.

Honorable mentions:

Fjallraven Tote 2: This tote is really pretty, and functional, too. You can read a full review on Practical Travel Gear, but essentially, the selling points are the waxy, weather-proof material, the classy canvas look, and the ease of converting between tote and backpack. The downside: the backpack straps are not comfortable enough, leading to a sore neck if the pack is pretty full.

Osprey FlapJill: I really love Osprey packs, and the FlapJill delivers with a nice grab handle, a secure flap opening, and a roomy interior. The best thing about Osprey packs…the comfort of wearing them. The shoulder straps are the best of any of these picks, by far. The only reason the FlapJill is an honorable mention: it’s just a bit bulkier than the Catch-All, lacks RFID, and is more expensive.


Gift for outdoor adventurers: Cairn subscription box review

I adore subscription boxes. Maybe it’s the thrill of getting regular packages in the mail, or the fun of never knowing exactly what’s going to be inside, but we’ve tried several varieties, from kids’ craft boxes to snack boxes. By far the best we’ve seen, however, for our crew? The Cairn box

cairn box


Named after one of my favorite sights along mountain trails, the trusted rock cairn, Cairn boxes contain goodies of the outdoor adventure variety. Subscriptions are $25/month, and even at a glance, I can tell the items sent have a value of at least that, or more, every time. You never know exactly what you’ll get, which is part of the fun, but Cairn does guarantee they’ll include things from the following five categories:

  • Gear: this could be a headlamp, a backpacking food container, a carabiner, etc.
  • Apparel: wool socks, a beanie, lightweight gloves, etc
  • Food/Energy: maybe a new hydration supplement, an energy bar, or a dehydrated snack
  • Skin care: perhaps a tube of sunscreen or lip balm
  • Emergency/Medical: think first aid items, fire starters, and the like

Could I go out and buy these types of things for myself for $22/month? Maybe, but I wouldn’t know what to get. This, to me, is the point of subscription boxes like Cairn: it will introduce you to new products and cool stuff you didn’t know existed. For me, Cairn is a teaser…a chance for me and my hiking sons to say, ‘Whoa, I didn’t know they made battery packs like this,” or, “Now this is an energy bar I’d actually eat.” Or, perhaps we find an item or two we’d never use again. Either way, it’s fun, it’s experiential, and it’s adventurous.

Here’s what we found in our first Cairn box:

cairn-box-review

  1. LuminAID PackLite 16 ($25 value): I’d actually been eyeing this lightweight, waterproof, solar-powered LED light for some time now. It easily clips to backpacks and inflates to be a great lantern for backpacking trips.
  2. Pocket Outdoor Survival Guide ($10 value): I haven’t looked at this yet, because my 16-year-old took it immediately and began reading. He’s an avid hiker and backpacker, and I’m glad he’s brushing up on his skills.
  3. Kate’s Real Food Grizzly Bar ($3 value): I’ve reviewed Kate’s Real Food bars in the past, and have recommended them ever since. I know this product well, and can vouch for the quality. Well done, Cairn!
  4. Mancha by Nazqiz ($2.50 value): this corn snack made with heirloom chulpe corn is completely new to me. In my opinion, this is what Cairn is all about…being introduced to new products.

In our most recent box, we received:

  1. Uco Leschi Lantern and mini flashlight
  2. Urban Gear tool (the kind you can put on your keychain)
  3. HumanGear GoTubb (those little water-resistant containers perfect for packing small items)
  4. GoToob (the squeezable kind)

As noted above, I was already aware of several of these outdoor gear products, but as a reviewer, I’m more in touch with the outdoor industry than most consumers. I imagine Kate’s Real Food, UrbanGear, and LuminAID is new to most people.

We learned about new gear from Cairn in time to outfit our son for his PCT trip last summer. It’s easy to gift a Cairn box, perfect for holiday giving!

WiFi hotspot in your car: ZTE Mobley review

AT&T reached out to us to product test their mobile hotspot, the ZTE Mobley. We said we’d give it a whirl on a seven-hour road trip, because I was curious about the pros and cons of having a WiFi hotspot in your car: after trying it out, would we want to keep it? Would we decide we needed it, or not?

Do you need a mobile hotspot in your car?

We opted to set up the ZTE Mobley mobile hotspot in our Toyota van for use during a seven-hour road trip from Southern Oregon to Eastern Washington. I figured it was a good journey for testing: most of the route is on interstate, with plenty of cell towers close enough to be in range, with only occasional loss of coverage during mountain passes. It’s also a mixture of rural, suburban, and urban areas. It’s a typical road trip route for us here in the Northwest.

Note: this review is written for AT&T customers. If you’re not with AT&T, you can skip the set up instructions and scroll down to the part where we describe whether we think the hotspot is worth bringing on road trips.

Setting up the ZTE Mobley:

I tend to dread the ‘set up’ process when it comes to new technology, but as it turned out, setting up the mobile hotspot was easy-peasy. The ZTE Mobley is shaped a lot like an ink cartridge, and inserts directly into the OBD II connector port in your car (yeah, I didn’t know I had one, either). All you need to do is start your car’s engine, then connect your smart phone (or other WiFi-enabled device) to the network. To do this, you go through the usual steps: under WiFi on your phone, search for the WiFi network name and input password. Launch your browser.

ZTE Mobley hotspot

Note: you can always manage your hotspot at http://attwifimanager.com.

On the road:

Once we were up and running, we could connect up to five wireless devices to the mobile hotspot, shared across main and guest networks. Parents: you can block certain devices from logging onto the WiFi, though it would seem to me that if you have activated the hotspot in your car, you’re ok with everyone using it. Just like any other WiFi network, you can change the password as desired.

The ZTE Mobley worked great for us on our road trip, during which we had three devices logged onto the WiFi. My teenaged sons streamed some Netflix TV shows, and I was able to work on my laptop, researching an upcoming travel story, when not in the drivers’ seat. Normally, we have a ‘no streaming’ rule on road trips, because we go through 4G data so fast when we allow it. The kids thought it was a nice treat to entertain themselves with Brooklyn Nine-Nine episodes.

Of course, there were a few places en route where we lost connection due to signal strength, but this was expected. We simply refreshed. I read criticism of the Mobley that sometimes, the signal dropped from LTE to 3G or lower, but we didn’t experience this problem.

So, do you need a WiFi hotspot in your car?

Potentially, a hotspot in your car can allow you or your kids to entertain themselves with gaming in the car, movies, TV shows, and other apps that require WiFi. I really enjoyed the ability to get work done. We were also able to stream audio books we didn’t want to have to download, saving us time and storage before our road trip. That said, in my opinion, a WiFi hotspot in the car is a nice luxury, but certainly not a necessity. We don’t personally allow screens in our car for short trips, but do allow them on long trips, making the hotspot desirable sometimes, but not all the time. With a two-year contract, however, you unfortunately can’t turn your hotspot on and off as desired.

My conclusion: I view car WiFi much like I view GoGo Inflight WiFi: well worth paying for when you need it, but not needed for every trip.

With a two-year contract, you can’t, unfortunately, turn your hotspot on and off as desired.

Cost:

If you decide a mobile hotspot is right for your family, it’s pretty affordable. If you’re an AT&T customer, the Mobley is free with a two-year contract. You can get 1 GB for $20/month or 3 GB for $30/month.

Disclosure: We tried the ZTE Mobley free of charge for six weeks, for the purpose of review.  We are AT&T customers, and unfortunately for us, AT&T does not pay our monthly cellular bill. 

Products for parents who work on the go

None of us want to, but sometimes as parents, we simply must work on the go. My job has me working on the fly on airplanes (pun intended), in cars, and in hotel rooms on just about every trip we take, and while I’m the exception, I know most parents have to check in with work at least a few times during most family vacations.

work-from-the-road

Below are my favorite products to help ease the pain of working while away, plus some tips for getting that proposal sent or that project done from the road.

Tip: Parents trying into balance work and family life can use Cloud Services such as Windows Desktops hosted with CloudDesktopOnline and online file storage with CloudAppsPortal .

logitech
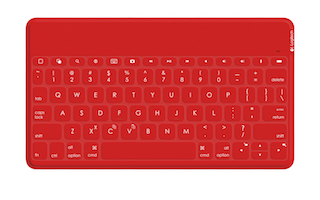
Logitech Keys to Go:

Anyone who’s ever tried to get actual work done on an iPad knows how crucial it is to have a keyboard. We’ve tried many portable keyboards, but find the Logitech Keys to Go pad works the best for us. It works on both iPads or iPhones, which we love, and is small enough to fit in a jacket pocket. The keys are still full-sized with iOS shortcuts, and the pad is spill-resistant (which we’ve put to the test). Pick one up in one of several colors for under $80 on Amazon…if you work from the road even a few times a year, it’s worth it.

Tip: Use an internet fax service if your hotel isn’t business friendly.

Yurbuds noise-isolating wireless ear buds:

yurbuds
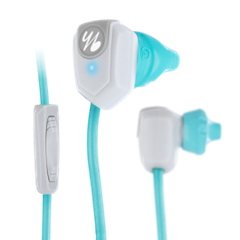
Ear buds that don’t get tangled, stay in your ear, and don’t restrict your movements? Yes, please. I love Yurbuds Leap (for women) when I need to listen into a conference call or edit a video while traveling because I can move around in the car or on the plane and not feel tethered to my screen. These bluetooth enabled ear buds have three inline remote buttons that make it easy to pause or resume work, control volume, and skip tracks, and Yurbuds ‘twist and lock’ technology that keeps them from slipping out of your ear. This feature is nifty: by angling the buds when you place them in your ears, then twisting, they become very secure in your ear (read the instructions when you get them, or you’ll be confused!) You get two bonuses with Yurbuds, too: 1. they double as great workout ear buds, and 2. they’re easy to pack in their own carrying case (included). Pick up a pair for $99 on Amazon.

Cube light from Enevu:

I love this little (big!) light. Billed as a personal light by Enevu, the cube is a small but efficient LED light you can take anywhere. Great for emergencies, it also works wonders when you have to see while getting a bit of work done after the kids go to sleep in a hotel room, or as a nightlight for kids in unfacube-light
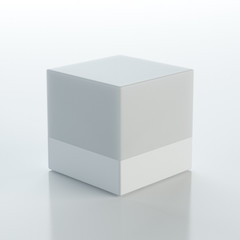
miliar places. Extremely lightweight and packable, I toss our cube into my day bag or carry-on to have for whatever comes up. Its especially useful when you don’t have a power outlet nearby on trains or when the overhead light in a plane cabin is just too bright or intrusive. The cube can be set to multiple settings, from dim to bright to colored light. Best of all, it’s under $30! (Beware of cheaper knock-offs online.)

Amplifyze TCL Pulse bluetooth alarm:

Let’s say you need to get up earlier than everyone else to get some work done, but don’t want to wake everyone else in your hotel room with your alarm. The TCL Pulse is a bluetooth enabled vibrating alarm you can set bedside, or even under your pillow. Controlled by your smartphone, the Pulse has adjustable vibration levels and snooze option. You can set it to wake you by sound if you prefer.

tcl-pulseWhat I love about it: I used to set my iPhone alarm in hotels, never wanting to figure out different alarm clocks in each room. But sleeping next to my phone is not restful, as it wakes me throughout the night with various buzzes and updates if not in sleep mode. With the Pulse, I can set the alarm on my phone, then put it far from my bed. Pick it up for $39.

Put your newfound productivity to use with these tips:

1. Pick a work hour and stick to it. Having a schedule while on vacation may not always be possible, but if you need to carve out some work time, it simply won’t happen unless you schedule it in. Opt for a quiet time of day for your family. Maybe that’s nap time at mid-day, or maybe it’s the hour just before dinner or the hour after the kids go to bed.

2. Find a place to work. Maybe this is in your hotel room or vacation rental, but if you’re trying to work after the kids go to sleep or while it’s noisy in the room, it simply won’t work. Think outside the box that is your 300 square feet…head down to the lobby or a coffee shop in the immediate area. The change of scenery will motivate you to get to work.

3. Think strategically when looking for wifi: Always have an app ready to tell you where the closest free wifi is, but also be ready to think on your feet. If you’re camping or staying in an otherwise remote location, the local grocery store or postal center will likely have wifi. Ditto for laundry facilities. I once found excellent wifi sitting on a picnic table outside the public laundry area of a national park lodge. In less rural areas, opt for quiet corners of hotel lobbies, coffee shops, or libraries. Worst case scenario: just suck it up and pay for wifi in your hotel room or on the plane. Sometimes, it’s worth it. Check to see if joining a loyalty program (always free) will grant your free wifi first, however! This is true of Kimpton hotels, among others.

amzn_assoc_placement = “adunit0”;
amzn_assoc_search_bar = “true”;
amzn_assoc_tracking_id = “pitstoforkid-20”;
amzn_assoc_ad_mode = “manual”;
amzn_assoc_ad_type = “smart”;
amzn_assoc_marketplace = “amazon”;
amzn_assoc_region = “US”;
amzn_assoc_title = “My Amazon Picks”;
amzn_assoc_linkid = “87cfb6f6de58c95d5111725a5c4ebbe0”;
amzn_assoc_asins = “B00MUTWLW4,B00NJ1M3J8,B00WVM0JAQ,B014WJTHTO”;

How do you tackle work while on vacation? 

As we disclose whenever applicable, Pit Stops for Kids received the products above for the purpose of review. Not all products we looked at made the cut. All opinion is our own.

Travel Gear We Use: best overnight backpack brands for kids and youth

As an editor at Practical Travel Gear and a gear reviewer for OutdoorsNW, I test a lot of travel products and outdoor gear. Some of this gear we keep and continue to use as a family, and some of it gets pushed to the wayside. Some of the most-frequent questions I’m asked on Pit Stops for Kids is related to what to pack, what to bring, and what to wear. Our Travel Gear We Use series will address our most commonly requested gear recommendations.

best overnight backpack

Quality, backpack trip-worthy packs are hard to find that fit young kids and youth (tweens and teens). Many so-called kids’ packs are flimsy, or simply not designed for multi-day, serious hiking and trekking. It’s very important to find a pack for your kids that takes the weight off their shoulders and onto their hips, just like the grown-up models do. As with all travel-related activities, your kids will have better success and more fun when backpacking with the right gear. Here’s what we use when it comes to best overnight backpack picks for kids:

For young kids (ages 6-11):

Kelty Junior Tioga External Frame Pack

jr tioga
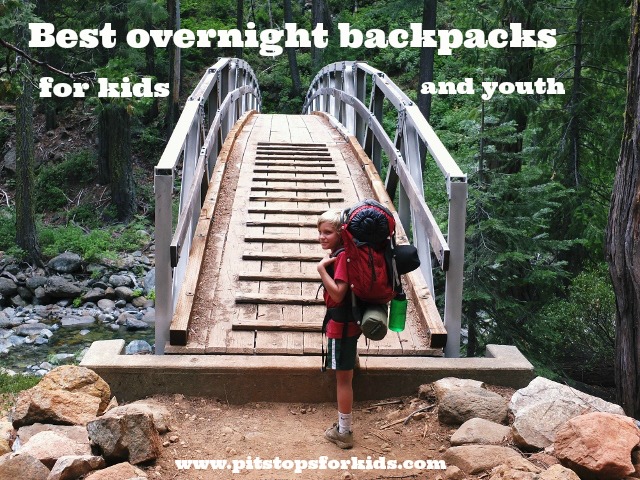
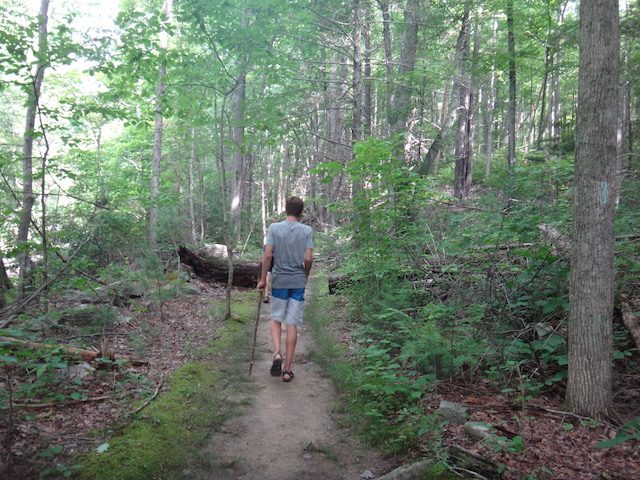
Why we use this pack: firstly, Kelty is a brand we trust to be of quality design at a reasonable price. Kids grow out of gear quickly and pack styles are improved upon often…no need to spend top dollar to hand-down something obsolete. The Kelty Jr. Tioga (shown in the photo above, worn by Toby, age 8) is 34L, which offers a large enough capacity to be helpful, but not so large that the child is over-burdened with too much weight. (Tip: our young kids carry only their own clothing, their own sleeping bag and pad, and lightweight food items, such as freeze-dried meals). 

While the Jr. Tioga isn’t too large, it still offers a secure waist belt and sternum straps, allowing weight to be carried on the hips. The external frame is nice at this age, because the pack is more highly adjustable than most with internal frames. Not only can the waist belt and shoulder straps be adjusted to size, but the frame can be made larger or smaller. This pack has grown with our kids from age 6-11. Buy at sale price on Amazon.

Deuter Fox 40

deuter-fox
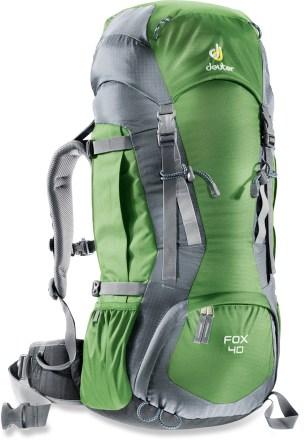
Why this pack: once kids have outgrown the external frame pack above, enter the Deuter Fox. We tried many internal frame packs for kids in the 40-45L range, and found the Deuter to provide the best ‘adult’ features in a kid-friendly package. There’s a dedicated sleeping bag compartment and an adjustable torso, and good ventilation on the back panel and hip belt. We kind of wish it wasn’t top-loading, and kids tend to toss everything out of the bag to find that one thing at the bottom, but this is a feature we can live with. Buy on Amazon for $109.

Note: if you find you simply can’t find a narrow enough hip belt for a thin child, try the REI brand Passage 38. It was the only pack to properly fit our narrow-hipped child!

For tweens and teens (ages 12-17):

Mountainsmith Youth Pursuit

youth pursuit
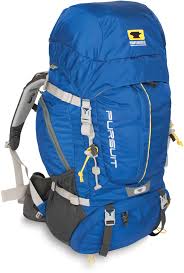
Why we use this pack: It is so hard to correctly size tweens and teens! They may be ready to carry the load of many adults, but for most teens, adult packs are still too large-framed, either in torso length or sternum/waist belt width or both. The Youth Pursuit is 45L (a nice in-between capacity) and offers an internal frame that’s fully customizable by velcro adjustment (for torso length). The waist belt fits our 12-year-old and our 14-year-old, and there are plenty of organizational pockets so older kids can be in charge of packing and using their own tools and gear. Kids get adult-pack quality ventilation on the pack pads, and pack material is equal to that of mom’s and dad’s. Read a full review here. Buy at sale price on Amazon.

Granite Gear Leopard

Why this pack: the Granite Gear Leopard is our older teen son’s all-time favorite pack. Yes, he’s in a height category that opens up his options to include any men’s pack, but with a thin waist, it can still be hard to find a proper fit. The Granite Gear Leopard fits perfectly, isn’t too big  at 58L (most men’s packs are 65 L or more), and doesn’t break the bank. It also comes in a minimalist 46 liters! He loves all the pockets and included loops for his accessories like an axe and a collapsible shovel, and how easily it can be cinched down or expanded. Buy on Amazon for under $150.

Top youth backpacking packs at a glance:

amzn_assoc_placement = “adunit0”;
amzn_assoc_search_bar = “true”;
amzn_assoc_tracking_id = “pitstoforkid-20”;
amzn_assoc_ad_mode = “manual”;
amzn_assoc_ad_type = “smart”;
amzn_assoc_marketplace = “amazon”;
amzn_assoc_region = “US”;
amzn_assoc_title = “My Amazon Picks”;
amzn_assoc_linkid = “2b3ff3efebcf632ee007032e7c7a5424”;
amzn_assoc_asins = “B00CQ9L2X2,B013FUTBAG,B009407Y60,B00BU96YIM”;

Oboz Sundog review: hiking shoes that please the teen

I have a 13-year-old who loves hiking, but hates hiking boots. We’ve tried just about everything, from rugged backpacking boots that I hoped would look ‘cool’ to very simple Columbia low-cut hiking shoes that practically slid onto his feet. It didn’t matter: he always preferred to hike in his Keen sandals.

nicholson-hollow-hike

I’m a huge fan of Keens for outdoor adventure and travel: we believe about 80% of all outdoor activities can be done in Keens. But for the other 20%, we needed to find this kid some hiking shoes that he’d wear without argument.

As an Oboz ambassador, I learned about the full line of men’s Oboz shoes, which now include a Trailsport category in addition to low and high hiking shoes and backpacking boots. Trailsport shoes include Oboz’ lightest, most agile, and most versatile shoes, so I ordered my teen the Oboz Sundog and crossed my fingers. Maybe he wouldn’t notice they’re trail shoes…

He did. The rugged tread gives that away. But, after weighing the Sundog in his hand like a melon in a grocery store, and realizing they weighed the same as his beloved Keens (and his Nike school shoes, for that matter), he gave them a chance.

oboz-sundog

Right out of the box, the Sundog feels like a sneaker, though with more stability. It’s made of single-piece mesh, with only the seams and support that’s absolutely necessary. In fact, it’s described as ‘only-what-you-need protection’. You get leather heel, toe, and mid-foot overlays, but even these are minimalistic. The Sundog is incredibly breathable, and while the shoes are not waterproof, this wasn’t a deal-breaker for us. This is the kid who prefers to wear sandals, remember?

He gave the Sundog a test drive on a local trail near our home in Southern Oregon. We encountered some mud, per usual in spring, but otherwise contended with dry trails. He got the support he needed (he’d recently had an ankle injury), without being weighed down by clunky boots. He loved the color of the Sundog (you can get them in a bright ‘Woodbine’ green) and when they got wet, they dried out reasonably fast. At the end of the hike, the teen gave his reluctant approval. Yes, the Sundogs could accompany him on our seven-day PCT hike this summer. When we go on our five-day rafting trip, however, he’s brining his Keens.

What to look for in hiking shoes for kids who hate hiking shoes:

Turn your ankle a few times, and you’ll understand why the support of hiking shoes–not just on the ankle but also on the arch and sole–is crucial. Slip on rocks or logs, and you’ll know why you need the traction afforded by hiking shoes. The challenge is imparting this message to kids and teens who don’t want to listen, of course. Here are a few characteristics we look for in a hiking shoe:

  • Lightweight: The lighter the weight, the less like a hiking shoe the shoe will feel. Kids who can jump and run in their shoes will be willing to wear them.
  • Low-cut: Forget about full ankle support for kids who don’t like the restrictive feeling of high-tops. High-quality low-cut hiking shoes will still provide enough stability, mostly because they cradle the arch well.
  • Lots of mesh: Breathable hiking shoes are more popular around here than any other. Enough said.
  • Well-fitting arch: Know if your kid or teen has a high or low arch, and make sure his or her shoes fit accordingly. Look for a quality insole if needed.

Want to try the Sundog? They’re $100 on the Oboz site. Need Keens for the other 80% of outdoor activities? Get a deal on the men’s Newport on Amazon.


Spring travel wear picks and 60% off Aventura Clothing

I’m an ambassador for Aventura Clothing because I believe this brand is one of the absolute best in women’s travel clothing. Their clothing is affordable, comfortable, stylish, and high-quality, plus can easily be mixed-and-matched on travel days. Many items are made of organic cotton, which I find packs well and doesn’t wrinkle. Every spring and fall, Aventura Clothing comes out with a new line. Here are my favorite picks from this spring.

aventura-clothing

The first 20 readers to like the Pit Stops for Kids Facebook page or follow us on Instagram will receive 60% off Aventura Clothing in their next order! Details below.

Rory dress:

We’ll start with my absolute favorite. Aventura has many cute summer dresses on offer this spring, but if you can only buy one, make it the Rory. This organic cotton blend is stretchy, soft, and so flattering! It’s very simple, too, which makes it a great travel piece. The Rory can be paired with a cardigan or even a hoodie on cooler days, or worn solo in summer. It’s meant to be active, so go ahead and run to catch that train. You can dress it up with a scarf and nice shoes and it’ll be ready to go out at night, too. I’m going to need one in at least two colors!

Hartley hoodie:

Layering is key when selecting travel clothes, so you need at least one good hoodie in your suitcase. I usually have two. The Hartley hoodie doesn’t look like an afterthought: it’s bright, cheerful, and high quality, so it looks like part of your ensemble. It comes in really pretty jewel tones with a stretchy, flattering fit, with nice detailing on the arms. Oh, and it’s organic cotton, too.

Rowan capri:

I like to be comfortable when I travel, and the Rowan capri lets me feel like I’m wearing my favorite sweat pants on the plane or in the car, not a cute pair of capris. Thanks for the travel hack, Aventura! The Rowan also comes in a short, and has a stretchy drawstring waistband. I’ve found the Rowan runs big, so order down a size if you want it to be fitted. Comes in five neutral colors so one pair will go with several tees or hoodies.

Tillie top:

The Tillie top was kind of a departure for me. It’s an organic cotton tee, so you get the softness and comfort, but also has an interesting back detail: a polyester Georgette back panel. This detail adds interest to the tee, and dresses it up a bit, so it can easily go from day outing to a nice brunch or cocktail hour. There’s a cute front pocket and floral detail on the neckline, too. Basically, the Tillie is the tee that isn’t. Comes in gray or flamingo, which is actually more like a tangerine. I definitely recommend the latter.

Add a few basics like tees and a pair of jeans, and you have the makings here for a weekend away. All the above was packed in my carry-on for a recent review trip to Texas, and served me well!

aventura-clothing

Don’t forget about accessories!

It’s easy to pack a scarf or two, a belt, or a strappy pair of sandals, and these details go a long way toward changing up any outfit for a second wear or evening attire. Wear a hat on the plane to save room in your luggage!

Monica fedora:

Oh my. This fedora is so adorable, even if you’re not the hat type (I totally am). It’s colorful and cheerful while still remaining understated enough to go with multiple outfits. I wouldn’t pack a fedora in luggage (will hat boxes ever make a comeback?) but if you can wear it to and from a destination, do so! It looks great on any causal outdoor excursion while traveling, and saves you from potential bad hair days, too.

Saphira infinity scarf:

I am a huge fan of infinity scarves. Even I, the least fashion-forward person I know, can figure out how to wear one! And infinity scarves make any outfit, even a tee and jeans, look classier. Plus they take next to no room in your bag. The Saphira is lightweight, with a burnout floral design that’s very understated. I got the white, which doesn’t show the floral at all unless you look closely.

Studded belt:

A belt, much like a scarf, can make any outfit look more complete, and therefore, makes you look more pulled together on a travel day. The Aventura studded belt has just enough detail to make it interesting, but not so much that it’s a focal point of your outfit. I pair mine with jeans and khaki pants.

Bienne capri leggings:

Here’s another travel hack, ladies: when you really want to wear that cute sun dress but it’s too cold outside, pair it with Bienne capri leggings. Like all Aventura leggings, the Bienne is super warm and very comfortable (they never sag…I promise!), but made to be worn in spring with a pair of ballet flats or sandals. The shirring at the bottom really completes the look. I am in love with these leggings, since every other spring day in Oregon is more like winter.

Want to take 60% off your next Aventura order (including sale items)? Be among the first 20 readers to like our Facebook page or follow us on Instagram. Simply follow, then leave a comment below with your user name. I’ll send you an unique coupon code good for 60% off one order!