Renting vs buying an RV: Which is right for you?

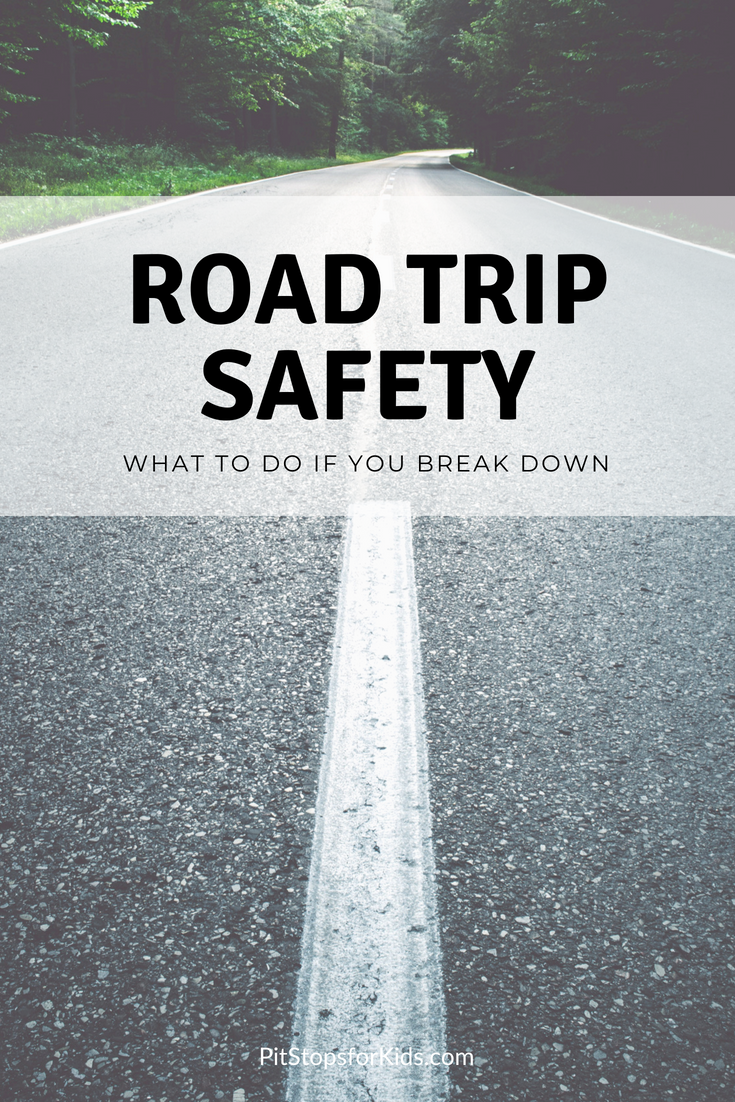
So many people are taking to the roadways to travel right now. With COVID cases rising not just in the U.S. but throughout the world, many people don’t want to hop on planes like they once did. Thinking of buying an RV? Read this first!

The safety of a long car drive is probably pretty compelling if you don’t want to be in crowded places with other people, and particularly on a plane or even in a hotel. You might then think you’re going to drive anyway; why not do so in an RV?

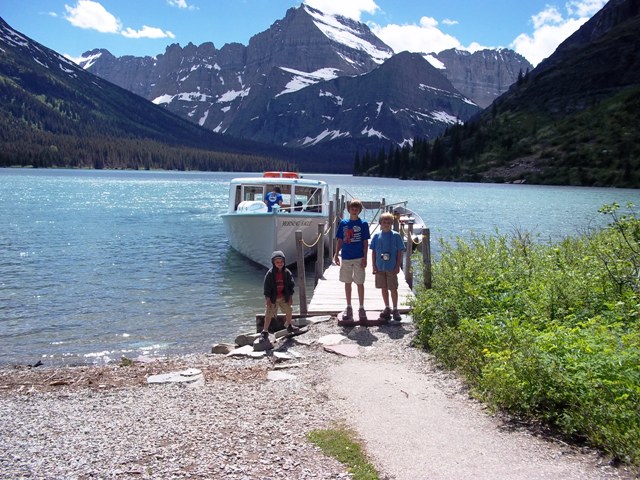
Traveling in an RV is the perfect socially distancing means of traveling with your family. 

If you’ve never traveled by RV before, should you rent or should you buy? Even if you have traveled by RV before, but you think you might like to do it again more in the future, is renting or buying better?

Rent First If You’ve Never Traveled by RV

If you’ve never been in an RV, the best advice is to rent one first. 

Traveling by RV can be something that people love. Once they do it, they’re hooked, and they don’t envision every doing it differently. 

At the same time, there are people who romanticize the idea of RV travel, and then when they do it, it doesn’t mean their expectations. 

You certainly don’t want to have started the process of buying an RV just to discover you don’t like it. 

There’s a lot of work that goes into traveling by RV, which many people underestimate. 

If you haven’t traveled by an RV before, luckily, there are rental sites that operate similarly to Airbnb that make it easy to try it out. Go for a short trip initially, because again, there are likely to be many unexpected things that come up that you may or may not like. 

Along with generally getting a feel for it, specific benefits of renting an RV before buying include:

  • You can figure out the configuration you like best. For example, some people like having a kitchen that faces the door, while other people want their sofa facing the door. 
  • You get to drive an RV and understand more about how they handle. 
  • You can start to get a hands-on understanding of how RVs work. 

How Much Does it Cost to Rent an RV?

Of course renting is not an investment the way buying an RV is, but if you already know that you like traveling this way and you’re regularly renting, the costs can add up quickly. 

An RV rental price can depend on a lot of factors but is usually on par with staying in a moderately-priced hotel. 

For example, it can be $100 up to several hundred dollars a night. 

There might also be a lot of extras added on, depending on where you rent from. Extra costs may include extra mile surcharges, and of course you have to pay for gas. 

Maintenance 

If you buy an RV, you have to think about the initial costs of making any big purchase. 

Then, you need to factor in everything else that goes with ownership, such as maintenance costs. 

If You Buy, You Can Rent It Out

In contrast to some of the downsides of buying an RV, there are pros. If you buy an RV, it might be a lucrative investment. Just like you could be considering renting, many other people are as well. When you’re not using your RV, you can rent it out and make some money that will help cover the costs of ownership. 

What to Know About Renting an RV

If you do decide to rent an RV, what should you know in general?

First, renting an RV can be a bit intimidating for a first-timer, so take as many of the unknowns out of it as you can. 

For example, plan your route, budget, and activities you’re interested in along the way. 

Make sure you’re familiar with the types of available RVs so that you pick one that’s going to suit your needs. You need to think about space, and just because you see an RV listing that says it will sleep six, for example, it doesn’t mean this will be comfortable. 

You also need to learn more about the types of campgrounds available and what hookups and amenities they have. 

Overall, if you have no or very limited RV experience, the best recommendation is probably to give yourself at least a few chances to get to know what it’s like with a rental.

Travel Gear We Use: All-time favorite healthy travel snacks

Today’s Travel Gear We Use segment isn’t exactly gear, but does help us as we travel: we’re rounding up our favorite healthy travel snacks. There are many, many products out there that claim to be wholesome, organic, and tasty. We’ve tried almost all of them. Yet, this list is short. Very short. Why? Let’s be real: most so-called healthy travel snacks are gross. Even my kids, who know their way around a natural foods store, go to schools that are GMO-free, and live in hippie-friendly Oregon, have their limits. Here are the winners that are kid-tested and kid-approved in our house. Buy these snacks for your next road trip or air travel day, and you won’t be wasting your money.

road-trip-snacks

SunRidge Farms mixes:

sunridge-farms
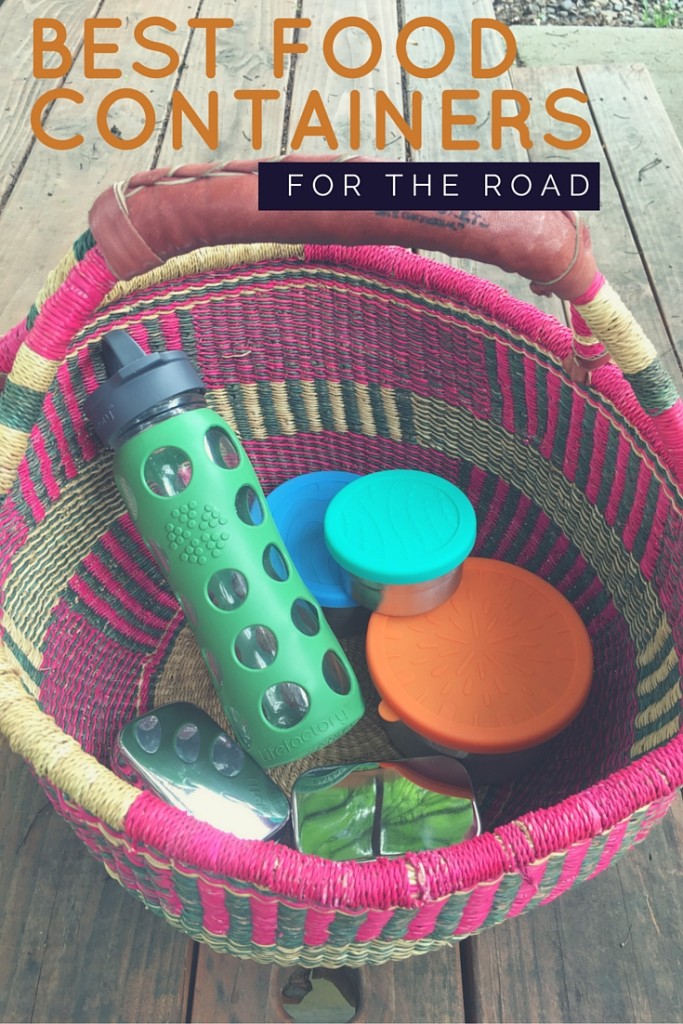
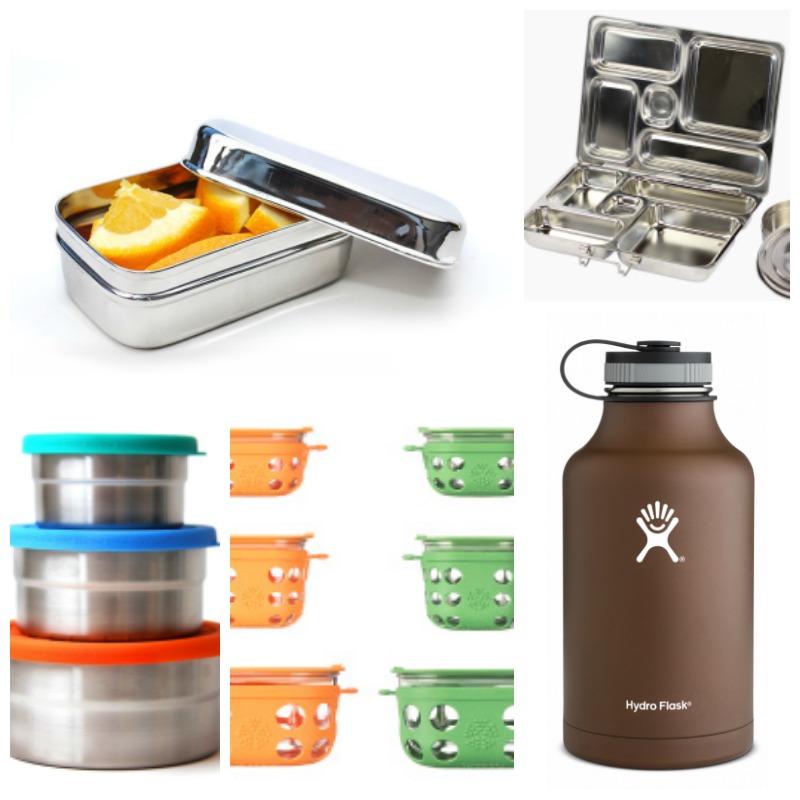
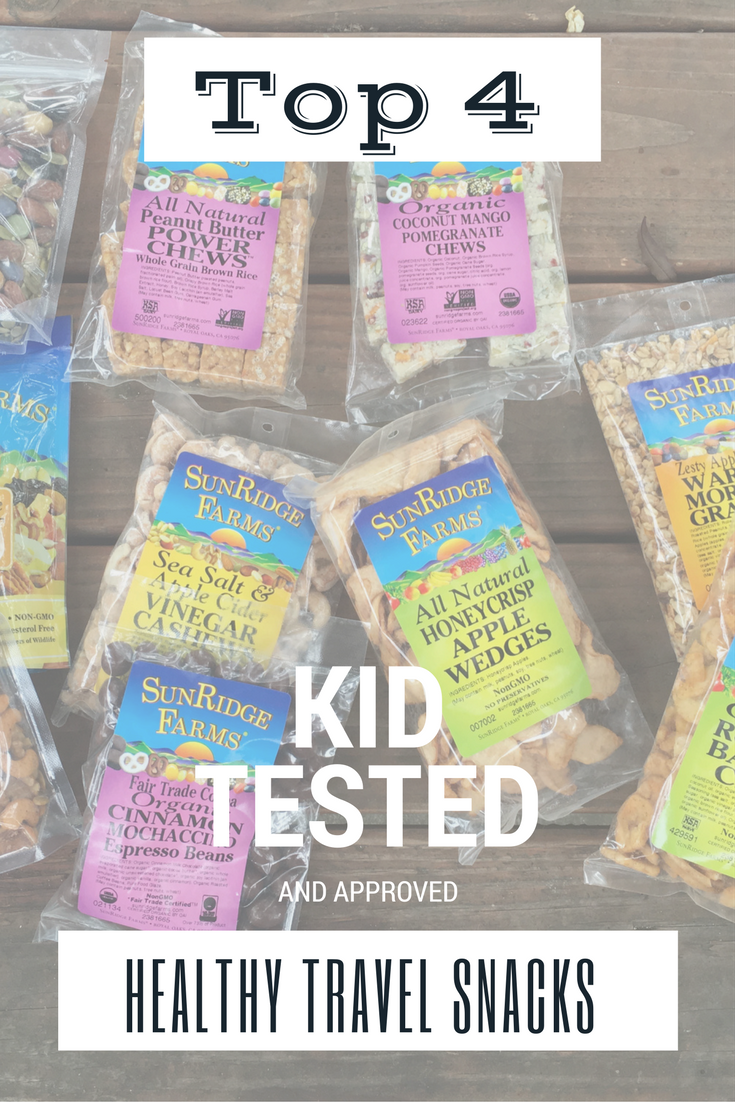
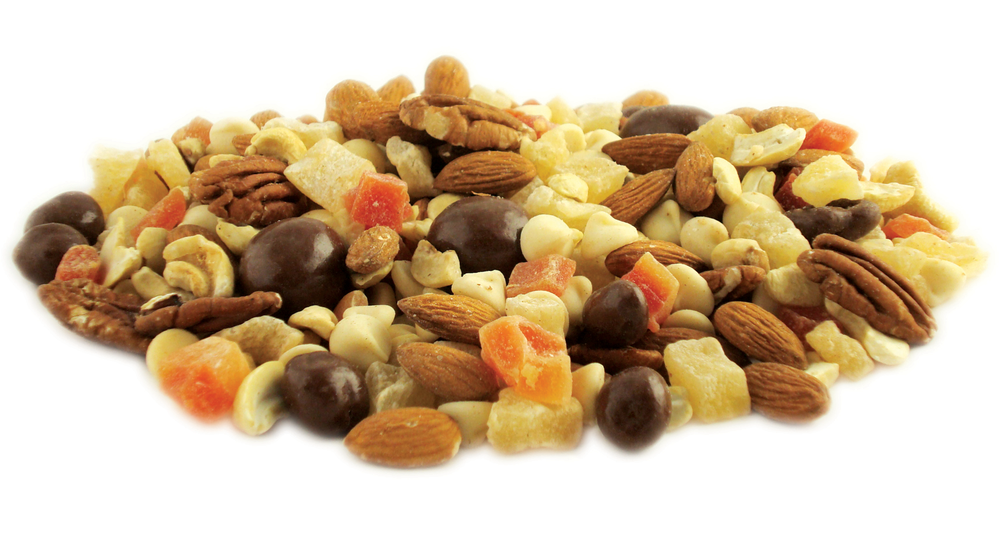
OMG, you guys. If you want to ensure everyone in the family has a healthy, delicious and dare I say, downright exciting trail mix to call their own for your next trip, check out SunRidge Farms. Their many, many trail mix varieties can be bought in 6-8 ounce bags, but also come in bulk. I love this option, as we bring our own containers and bento boxes when we travel to cut down on waste. You can create your own trail mixes by looking through their many nut, seed, dried fruit, and organic chocolate offerings, but save yourself some time and check out their pre-packaged ones. We love the Berries and Chocolate. You can also get square protein chews that my kids gave a thumbs up: the peanut butter power chews are a favorite. I love that SunRidge Farm’s production facility is powered by solar energy and that their foods are GMO-free, organic, and much of the chocolate and coffee offerings are Fair Trade. Yes, SunRidge Farms’ trail mixes are more expensive than average, but we found them on Amazon and if you buy in bulk, you’ll get high quality snack food for a reasonable price! You can even get gummies for a treat on the road you don’t have to feel guilty about!

Kate’s Real Food:

kates-real-food

Haven’t heard of Kate’s Real Food bars? I love these all-natural, organic creations originating in Jackson Hole, WY. Kate’s bars have been embraced by serious hikers, mountain bikers, climbers, and skiers all over the West, so you know it’s good enough for road trip noshing, too. We love that these bars are made from locally-sourced ingredients whenever applicable, and they never freeze…even when skiing or in the cold car. My kids quickly tire of the usual protein bars and granola bars, but Kate’s are just wholesome enough that they taste like, well, real food, instead of chalk or powder. And bonus: they’re on Amazon in bulk, too!

Nut butters from PB Crave

This high energy, high protein food is perfect for road trips because it can survive just fine without refrigeration and doesn’t melt (too much) in a hot car. Kids find peanut butter to be boring? They won’t if you try PB Crave. These peanupb-crave
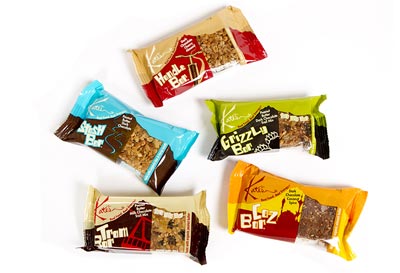
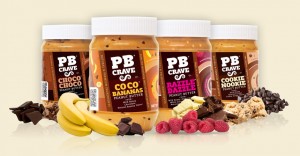
t butters come in super fun flavors, like Cookie Nookie (chocolate chips and cookie dough flavor) and Razzle Dazzle (dark chocolate, white cocoa butter drops, and natural raspberry flavor). They taste very sweet (maybe too sweet for grown ups), but all PB Crave flavors are sweetened with wild honey, and their more affordable than ‘gourmet’ nut butters. We put a jar in the car and toss in crackers, bread, or apple slices to eat with it.

Matt’s Munchiesmatts-munchies

Forget about any other fruit leather or fruit roll-up, and definitely forget about those artificial fruit snacks. My kids LOVED Matt’s Munchies dried fruit strips, and I loved that each package could feed two hungry kids…no skimping here! We love the tropical flavors with real strips of coconut blended in, but get a variety pack to start with and discover your favorites. For picky eaters used to basic flavors, try the Apple-licious.

As a peanut butter alternative, you can also try an almond butter. It could also be used as a good travel snack. Here’s a review on the best almond butter from Kitchenistic.

Bottom line: can you supply your family with travel snacks for less money? Sure, we know that. And our family can’t realistically buy these types of snacks every day. But eating healthy, wholesome, naturally sweetened snacks while traveling can enhance every part of your vacation. Kids will feel better, be better behaved, and have more energy to play and explore. And the truth is, so will you!

Subscribe to our Pit Stops for Kids seasonal newsletter, and get an exclusive travel ‘cheat sheet’, free! Click here!

Top 4 healthy snacks for travel

Travel Gear We Use: 30 Road Trip Products

I know, your car is already packed to the gills for your family road trip. But trust us, you need these 30 road trip products and ideas to make your travel day run smoothly. We travel every month of the year, and test new road trip products every time we hit the road. Check out our list of road trip gear, updated to include new gear for 2017, and see what you’re missing!

road-trip-products

Road trip safety gear:

1. My Bucklemate: This innovative little piece of plastic makes it easy for young kids to buckle themselves into their seats more easily…without mom or dad needing to crawl into the back seat to dig the seat belt clip out of the seat crease! Pick up Bucklemate on Amazon.

2. Cardiff Booster Seat Headrest: By far, the best headrest we’ve seen for toddlers and preschoolers. No more floppy heads when kids are trying to nap!

3. Bubblebum: This portable booster seat goes everywhere, from your own car to taxis to theaters. We guarantee you’ll use it in at least three ways on any road trip!

4. Adventure Medical Kit: There are several pre-made first aid kits to choose from when you browse the offerings at Adventure Medical Kits. Our favorites are listed here!

5. AAA Emergency Road Assistance Kit: Pick out a pre-made kit like this one, or design your own, ensuring you have flares, chains, and the gear you need to change a tire.

bucklemate

Car organizational gear:

6. Seatback car organizer: Every family needs at least one of these organizers that fit on the seat back, for storing books, DVDs, games, and cups. Don’t want to spend much money? Check for a hanging shoe organizer at your local dollar store. Pictured above: Prince Lionheart Backseat Organizer.

7. Trash bags: Yep, good old-fashioned trash bags. Don’t forget them! You’ll need them for the obvious purpose, but trash bags also pull double-duty as wet storage for swimsuits or soggy gloves and hats, storage for muddy shoes, and, unfortunately, as a much-needed receptacle if someone gets car sick.

8. Packing cubes: Used by our family for so much more than packing, packing cubes are ideal during road trips as carry-alls for kids’ gear. Give each child a large packing cube to fill up with his or her items for the ride. Packing cubes are easier to stow under the seat than backpacks, take up less room, and are easy to open and close. Here are our favorites.

9. Mesh laundry bagsGo ahead and use these cheap, lightweight laundry bags for their intended purpose once you arrive at your destination, but while on your road trip, use them to store boots and jackets the family will want at pit stops in winter and sandals or swimsuits in summer. Grab one bag when you reach your pit stop, and off you go.

10. KIDS ‘N’ PETS All Purpose Stain & Odor remover: You might need it. Ok, you’ll probably need it. Fine. We always need it. If you want something more portable than the liquid version, try their new Stain and Odor Remover wipes! We keep a tube of these in one of the car’s drink holders.

11. Refresh your Car: These car freshener products are the only ones my kids will tolerate. Plus, you can use these products to clean your dashboard, too. Here’s our full review.

In-car and rest stop entertainment:

12. SOL REPUBLIC headphones: These are the only headphones we use now, because they’re nearly indestructible. Kids can twist them, step on them, or toss them into a bag, and they keep on delivering high-quality sound. Check out more info in our best electronics picks for travel.

13. Splitter for headphones: Don’t forget one of these! When kids want to listen to a DVD or CD together, they need a splicer for their headphones. Forget it, and you’ll be listening to the entire soundtrack of Frozen too, Mom and Dad. Pair with the screen of your choice. Don’t forget about Kindles!

14. Brunton Revolt: This power cube is worth the investment. Even with in-car chargers and USB ports, everyone needs more power at some point. The Brunton can go from the car to your hotel room, offering an extra place to plug in. Plus, it comes with lots of built-in cables, so there’s no need to bring a tangle of your own.

15. Family puzzle and coloring books: Guess what? It turns out you’re never too old for Where’s Waldo. Candlewick Press’ Where’s Waldo: The Totally Essential Travel Collection includes hundreds of pages of Waldo illustrations, all in a compact, durable book. Like to color instead? ColorIt sells adult coloring books also ideal for kids. Try the Greatest Adventure Adult Coloring Book…it’s packed with pages suitable for kids or adults, and is in a durable spiral-bound notebook ideal for the road. Keep it in the car…you won’t be sorry!

16. Redbox movies: Don’t want to (or can’t) stream movies en route? Get the Redbox movie app, and find Redbox kiosks en route via your car’s entertainment system or a portable DVD player. We like to utilize Redbox because we never have to pay late fees (we find another Redbox to turn movies into down the road) and we have a constant supply of new movies without needing 4G.

17. SOL REPUBLIC Punk SpeakerWant to listen to audio books or podcasts as a family on the road, but don’t have the capability of plugging a smart phone into the car’s audio system? Use a Punk speaker! This little portable speaker packs a big punch. It’s also good for small kids who don’t like to use headphones.

18. Outside Inside Adventure Games: Have you ever stopped at a rest stop so the kids could stretch their legs, only to find nothing to do? We absolutely love these portable games for kids! Some are best for the campsite or fire pit, but others are ideal for grassy spaces, playgrounds, and even hotel rooms. Plus, they all pack down for easy transport. The magnetic darts are our favorite for the hotel room, and the bocce ball set and ladder ball/cornhole games are our favorite for rest stops.

bocce-ball

19. Wipe board and dry erase marker: Don’t underestimate the power of a simple board and marker. Kids can play classic games like ‘hangman’ or ‘tic tac toe’. No need to invest in expensive versions of these games!

20. Magnetic Fun: Can’t go wrong with these tried-and-true car entertainment kits! Magnetic Fun is ideal for the toddler and preschool set, but older kids will play too.

Road trip snacks and food:

21. Yeti cooler: A Yeti is a big investment, but if you road trip often, it’s well worth it to have this top-of-the-line cooler. Foods will stay cold in a Yeti far longer than in standard coolers, allowing families to stop and drain it less often and eat more meals on the road. We have the Tundra 45. Can’t swing the cost of a Yeti? Try Mountain Khakis’ new rugged Compass Cooler.

22. BooginHead Pack ‘Ems snack bags: We only use reusable snack bags. BooginHead are our current favorite, because they wipe down easily, are washable, and stand up on their own when packed. Plus, they velcro open and closed, making it easy for little hands to open them. They’re very affordable, too.

23. Sea to Summit Seal ‘n Go: We’ve long been fans of Sea to Summit’s bowls and cups for backcountry camping, and now they have a product perfect for families on the go, whether you’re on a road trip or simply serving kids a snack in the car on the way to school. The Seal ‘n Go comes in multiple sizes, and is a collapsible container with a threaded lid for secure food carrying. They pack down small when you don’t need them, and are virtually accident-proof.  Of  course, you can take them camping, too! Each piece is around $20.

patagonia-provisions

24. Patagonia Provisions: Bet you haven’t heard of this! Patagonia (yes, the brand that brings you ski wear and down vests) also makes road trip-ready food. You can buy their energy bars, or better yet, get their breakfast grains to make in hotel rooms for an easy and healthy breakfast (just add hot water from a coffee maker). They also make healthy soup mixes for in-room dinners.

25. GSI Outdoors macro camp table: Made with camping in mind, the GSI Outdoors Macro Table is also excellent for road trips. It collapses completely for easy transport, is lightweight, and opens up for an instant table anywhere. We love it on road trips for pit stops at parks where we’re setting out a snack or lunch, in addition to a meal prep space at campsites. It comes in a micro size, too!

26. Jelly Belly candies: You have to have some candy on your road trip, and Jelly Belly candies entertain with their many flavor options while kids (and adults) snack on them. If you’re driving through California, take a Jelly Belly tour at the factory in the San Francisco Bay Area!

rumpl

Miscellaneous items:

27. Water bottles: Everyone needs to stay hydrated on a road trip, and personal water bottles help families save money when they stop for food, too. We love HydroFlask bottles, because they’re insulated and stainless steel. For a lighter weight bottle, go with Camelbak Eddy or Chute.

28. Duct tape: We won’t judge parents on how duct tape is used, especially at the end of a road trip, but here are our ideas: use it to designate ‘territory’ within the car, to keep kids in their own space, or allow kids to create art with it. Ours like to make their own wallets or frisbees.

29. Paper maps: Go old-school when you stop at gas stations or welcome centers, and pick up paper maps of the region you’re road tripping. Allow kids to follow your route by themselves, or enlist their help navigating. Older kids can pick out pit stops en route, or calculate distance.

30. Pillows and blankets: Make your road trip a slumber party with small pillows and lap blankets to make the drive more comfortable. If you don’t have room for full-sized pillows, opt for travel pillows. We love Rumpl’s travel blanket, which packs down small and is waterproof against spills.

Need kids’ gear for the road and want to shop online? Find great deals on essential baby and child gear.

SaveSave

Five pet-friendly road trip ideas

If you’re planning a road trip with the kids, you won’t want to leave your furry family members behind! It just wouldn’t be a vacation without them. Yet just like travelling with the little ones, a bit of advance planning can make a world of difference once you’re on the road. To get started, you’ll want to choose road trip destinations that are ideal for both kids and pets. Here are five of the best!

See also: pet friendly road trip tips!

Five pet-friendly road trip ideas:

dog-friendly road trip

1. The Grand Canyon

Some of America’s top destinations are more pet-friendly than others. National Parks like Yellowstone are always a hit for the kids, but they’re not so great for dogs who aren’t allowed in many campgrounds. The Grand Canyon in Arizona is a notable exception. Your pooch will be allowed to tackle the trails along with the kids, making this a great road trip pit stop for the whole family. Remember to bring plenty of snacks and water for everyone, as temperatures can soar and the trails go on for miles.

2. Nevada and Las Vegas 

Las Vegas may not be the first road trip stop to come to mind when you’re thinking about where to take the kids and pets. While you can’t take Fido into the casinos, there are plenty of dog-friendly stops along the strip including many restaurants and shops. Many of the larger hotel chains also offer pet beds and food bowls upon request. The kids will be entertained by live shows and swimming pools, and outside of the city there are plenty of attractions to drive to. Don’t miss Red Rock Canyon, only a 30-minute drive away.

3. Upstate New York

Explore New York State with a drive away from Manhattan towards the Adirondacks. Road trip destinations like Mirror Lake are family and pet-friendly. A prime example is Lake Placid Lodge, which offers cabins fully stocked with homemade doggie treats and pet beds. The children will love wandering around the numerous hiking trails in the area, while upstate NY’s charming villages are filled with boutiques and organic cafes for the grownups.

4. North Carolina

North Carolina’s scenic highways are tailor-made for family fun. Get away to sandy beaches where the kids and pets can run free, or head to Jockey Ridge State Park to tackle the impressive sand dunes. Dogs are allowed on the boardwalk, which offers sweeping views and plenty of ice cream stands for the kids.

5. The California Coast 

Finally, a classic road trip idea is to wind your way up or down California’s scenic coastline. Whether or not you have a Mustang convertible to feel the wind in your hair, you’ll be able to soak in Pacific views and plenty of sunshine. California’s a particularly pet-loving state, with dog friendly restaurants and local festivals ready to welcome your furry friend. Pet-friendly beaches are clearly marked, particularly in the San Francisco Bay Area.

Make the most of your family road trip by including destinations like these, which are capable of accommodating everyone.

SaveSave

Three best road trip itineraries for active families


best-road-trips

No matter how much we vacation, road trips remain one of our favorite modes of travel. Why? Road trips offer a sense of adventure and freedom that’s hard to beat. Plus, they’re often more affordable, more flexible, and allow us to see the country up-close and personally. I’m offering up our three best road trip itineraries for active families in the western US and Canada:

1. Northern California Coastal Road Trip

Think a road trip down California’s fabled Highway 1 is only for romantic getaways, ideally in a convertible? Well sure, that’d be nice, but a Highway 1 road trip is excellent with kids in tow, too. Our trip started in San Francisco and ended in San Simeon, with both city and country stops.

monterey bike path

Highlights for active families:

  • Hiking along Big Sur
  • Biking along Monterey Bay
  • Kayaking and seal watching
  • city exploration in San Francisco

Read our full Highway 1 itinerary.

2. Vancouver Island Road Trip

Head over the border to Canada, and explore all the rugged beauty of Vancouver Island, BC. We started in the city of Vancouver, then took a BC ferry at Horseshoe Bay. Once we were on Vancouver Island, we explored the east coast of the shore (known for its sunny weather), then crossed the island for breathtaking views and wildlife spotting on the western side.

remote passages

Highlights for active families:

  • Kayaking in Ucluelet
  • Whale watching via zephyr boat in Tofino
  • Exploring Pacific Rim National Park
  • Ferrying to old growth forests in Meares Island

Read our full Vancouver Island itinerary. Want to add a bit more Pacific Northwest south of the border?  Explore San Juan Islands, WA as well.

3. Western National Parks road trip: Montana, Wyoming, and Utah

Want to see Glacier, Yellowstone, Grand Teton, and Zion, but can’t decide which epic national park to visit? Neither could we! For this national park-focused road trip, we started in Spokane, WA, and drove to Montana to see Glacier, then dropped down Big Sky for some outdoor playtime before driving to Wyoming to see Yellowstone and Grand Teton. Next, we headed to Park City, Utah for a breather before driving south to Zion.

swiftcurrent cruise Many Glacier

Highlights for active families:

  • Exploring 4 national parks in about 3 weeks
  • Camping in yurts and tents
  • Playing on ropes courses and zip lines in Park City and Big Sky
  • Boating on Glacier lakes
  • horseback riding in view of the Tetons

Read our full Western National Parks itinerary. Need a great detour? Drive to Cody, Wyoming after visiting Grand Teton to learn about Buffalo Bill and explore cowboy country.

Additional picks:

Pin it for later!


Travel Gear We Use: The Seventy2 Survival System bug-out bag

You may not be a doomsday prepper or preparing for a zombie apocalypse (or maybe you are), but every family should have a car bug-out bag, ideally for each family member and certainly for road trips and emergencies.

emergency-bug-out-bag

Opt for the Seventy2 Survival System from Uncharted.

Preppers define bug-out bags as gear they can grab quickly in case of emergency, that’s ready to go when they are. The folks at Uncharted simplify this even further: their Seventy2 bag are designed with the premise that 95 percent of emergencies are rectified within 72 hours, so they make sure you have everything you might need for those crucial hours, nothing more, nothing less. The result? A streamlined system in an easy-to-carry, high-quality backpack that you can gift to family members or buy for yourself.

The ‘shell’ of the Seventy2 bag is a 48 liter backpack that’s waterproof and very clearly organized. This backpack alone is worthy of a review. It has pockets and features galore. Inside, clearly marked ‘survival pouches’ make it easy to find essentials, plus know what to do with them. The ‘tools’ pouch is thus labeled, for instance, with all the contents listed underneath, including paracord, shovel, axe, duct tape, knife, and fire starter. In the ‘warmth’ pouch is a tent, blanket, hat, gloves, and hand warmers. For a full list of everything in the Seventy2 bag, including USB chargers, radios, and more, check here. 

Can you put together your own survival go bag? Of course. Will you, to this extent? I can almost guarantee you won’t. At least, I won’t, which is why I gifted my college-aged son with a Seventy2 bag and now need more for my household. This bag could be essential on a camping or road trip, but it might also save your life when you’re not traveling.

Pick one up this holiday season as a very special gift for $349. You will have purchased peace of mind along with essentials you needed any way.

Want to design a less extensive, road trip bug-out bag?

For families who like to road trip or car camp, a car bug-out bag can be any kit that contains supplies and extras, such as MOLLE gear, that may be needed in an emergency while away from home.

Whatever type of bug out bag you create, be sure to stock it regularly for minor injuries, sickness, or weather conditions. We’ve never needed ours for a serious emergency, and hope we never do.

Start with any large backpack or duffel. We keep our basic bag, which we use in addition to our Seventy2 bag now, in our primary vehicle. You don’t want to put it anywhere it will need to be frequently moved. Ours is in the back, near the space reserved for the car jack and jumper cables.

What to put in your more basic road trip bug-out bag:

2-4 emergency blankets: These blankets are made of vacuum-metalized polyethylene and reflect 90% of your body heat, allowing you to stay warm despite their thin shape and low weight. They are the size of your palm when still folded, and can also be used as shelter or a ground cloth. We use SOL emergency blankets, which are less than $5 on Amazon.

1 small first aid kit: Ideally, you already have a family-sized first-aid kit in your car (if not, check out our recommendations). However, since your car bug-out bag is meant to be portable, opt for a smaller sized one. We use Adventure Medical Kits’ .5, which is housed in a lightweight, waterproof pouch and includes all the essentials (and not much else). At $15, you can’t make a cheaper one at this weight. Place some extra easy-access bandages in there, too. These nifty band-aids require only one hand to unpeel and place on a cut.

Gloves and winter hats for everyone: Reuse or buy a cheap pair of fleece or knit gloves for everyone in your family, and place them in the bag. Ditto for winter ‘beanie’ hats. These don’t need to be anything fancy; after all, you’ll want to wear your good ones regularly, and you’ll likely never use these. But in case of bad weather or the need to put chains on your tires, you’ll be glad to have some protection for your hands and heads. In winter months, we also add a lightweight jacket for everyone, which just stays in the bag until summer. Remember, you’ll have extra seasonally-appropriate clothing for everyone in your car already if you’re on a road trip or camping trip.

Pocket survival pack: These neat packs fit into your pocket, and include only the barest of essentials for outdoor survival. We have a pack in our backpacking gear, in the ‘just in case’ category, and one more in the car. In the case that someone needed to leave the shelter of the car to seek help, I’d want him or her to have this kit on them. Included is a whistle, mirror, sparker and tinder for an easy flame, and tiny portions of helpful items such as duct tape, safety pins, wire, and foil. It doesn’t seem like much now, but as a former Search and Rescue volunteer, I’ve seen people do amazing things with these items. We like the SOL pocket survival pack, because it comes with a waterproof card of instructions. Pick one up for under $30.

motorola-talkabout
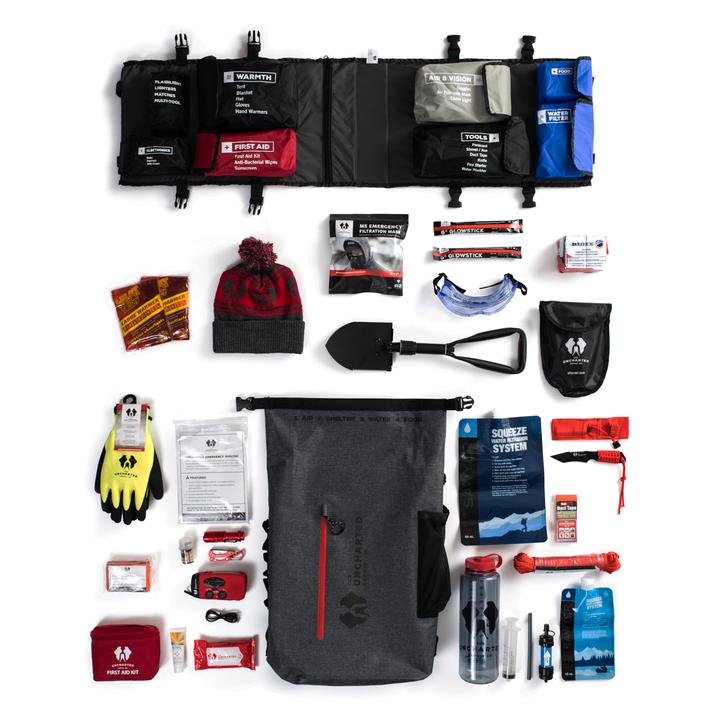
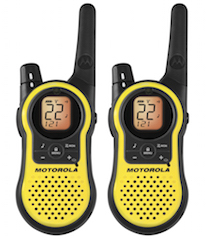
2-way radios: Sure, you have mobile phones, but as we all know, they can be unreliable. If you’re out of coverage area, low on battery power, or–unlikely but possible–if cellular service is down, you’ll want another way to communicate. We recently tried out the Motorola Talkabout 2-Way Radios (in other words, walkie-talkies), and they’ve now been added to our bug-out bag. Why we like them: they’re easy to juice up, they have a long range, and you can receive NOAA weather alerts through them. The Talkabout runs on either alkaline or rechargeable batteries (or can be charged using a mini-USB port, if you have access to that). They work in a 23 mile range, and has a scan feature which allows you to search a programmed list of channels. In the past, we’ve found that walkie-talkies can be useless if too many people are using them, but the Talkabout filters interference from non-Motorola units. They’re not toys, by any means, but still under $50 on Amazon.

Supplies for your car: Hopefully you already know where your car’s extra tire and jack are housed, but in addition, most families should carry chains for winter weather (depending on where you live), and jumper cables. We also store a small, collapsible shovel in our bag, which can (and has been) used to dig out of snow or mud.

Matches and firestarter: If you need to, you want to be able to make a fire for signaling help, warmth, or cooking. If you’re on a camping trip, you’ll have these supplies anyway, but we keep a waterproof case of matches and fire cubes in our bug-out bag all the time, so we don’t have to remember to grab them on each trip. What are fire cubes, you ask? These sugar-cube sized fire starters burn at 1300 F in any conditions…even a downpour. Use them to start a campfire or even boil water. Speaking of which…

Water: This is the only item we do not store in our bug-out bag, because we all carry personal water bottles with us in the car for any trip, so we already have them at the ready. For longer trips, however, we buy a case of water and place it in the back by the bag. If we don’t need it, we use this water on our travels, and buy more.

Want to be even more prepared? Have a water filter handy, or do what we do: pack your bug out bag with a LifeStraw or LifeStraw Go. This award-winning personal filtration system uses a filtering straw, so you have safe water to drink anywhere, anytime. We use ours on international travel days, too, so we get use of it regularly, not just during emergencies. After our son Nate lost his on a trip to Costa Rica, we replaced it immediately!

Basic foods: We don’t go overboard on this, which would probably dismay true preppers. But our bug-out bag is only meant for short term emergencies and even car-ride inconveniences, so we pack snacks with a long shelf life, like beef jerky and Nature Made granola bars. We change these snacks out every 2-3 months. I simply like knowing they’re in our bag should we get stuck in traffic for a very long time or need to leave our car for any reason.

amzn_assoc_placement = “adunit0”;
amzn_assoc_search_bar = “true”;
amzn_assoc_tracking_id = “pitstoforkid-20”;
amzn_assoc_ad_mode = “manual”;
amzn_assoc_ad_type = “smart”;
amzn_assoc_marketplace = “amazon”;
amzn_assoc_region = “US”;
amzn_assoc_title = “My Amazon Picks”;
amzn_assoc_linkid = “2b3ff3efebcf632ee007032e7c7a5424”;
amzn_assoc_asins = “B00EVGD2JK,B000G7YIL4,B001UE6MIO,B00H90PFOK”;

Find more Travel Gear We Use!

Do you have a car emergency bug-out bag? What’s in it?

Photo credit: Richard Riley

Auto Travel with your Pets: 10 approaches for safety and security

We can all agree that pets are part of the family for most people. They are always there curled up or trotting next to us when taking morning walks. They greet us happily in the morning or when we get back home at the end of a long work workday. That’s why when a holiday season approaches, we can’t bear the thought of leaving them behind. It can be stressful for many pet owners to travel with them without making travel plans.

You need to take safety and security precautions so that you can have a relaxing and fun time for both you and your friend.

Here are the best safety tips for auto travel with your pets:

1. Go for a Test Drive

It is vital to prepare your pet in advance, especially if they are not accustomed to riding in the car. Give them time to adjust to the motion and see how they react. Some of them act just fine while others suffer from anxiety. Take them with you when running short errands a month in advance leading up to your departure. Start with short trips and then slowly stretch to longer rides.

2. Know the Laws of Travelling With Your Pet

Before you set out to travel, you should acquaint yourself with the laws of traveling with your pet. They may vary in different places, so you need to do a proper research. After all, you don’t want to get stuck with a hefty fine.

Ensure they have the right identification tags. Also get them microchipped as it can help you get reunited with them in case they get lost. You might be required to show your pet’s vaccination records or a certificate of health from your veterinarian. You can schedule a checkup a week before your planned trip. It will give you ample time to obtain copies of any paperwork you might be missing.

3. Build an Emergency Kit

Be prepared for anything when traveling with your pets. The emergency kit should include:

  • First aid supplies
  • Necessary paperwork
  • Extra water
  • Extra food
  • Medications your pets might be taking
  • A leash for your pets
  • Treats or toys

4. Proper Restraints

If you have time to wear a safety belt, why don’t you give your pet the same respect? They can create a safety risk for both of you if they cause a distraction while you’re driving, resulting in an accident. They should be on their leash when you stop for potty breaks. There are places with strict leash laws, so you don’t want to get in trouble.

5. Avoid Locking Your Dog in the Car

Never leave your pet unattended under no circumstances in the vehicle. You might find your window smashed by a Good Samaritan trying to rescue your pet. Other reasons might be because of the different seasons. It can get scorching in the interior of the vehicle during summer which can suffocate your pet. Temperatures can drop during winter hence making them freeze.

6. Prevent Tummy Troubles

Just like humans, pets do get carsick, especially if they travel right after a meal. You can feed them say 4 hours before going. Carry their water before hitting the road as unfamiliar water might upset their tummies.

7. Reserve Pet-Friendly Accommodations

If you plan on staying overnight, research on pet-friendly places on your route. You don’t want to get charged with extra fees or denied entry.

8. Keep Your Pets Entertained

Your pets might wind up getting restless if it’s a long journey. You should bring along their favorite toys and objects to keep them busy and entertained. You can stop at various points to let them out to stretch, but they should be on their leash.

9. Water, Food and Bathroom Breaks

If going on a long journey, it is essential to take breaks along the way. Stop and let your companions out to stretch. Never try feeding or giving water to them while in a moving vehicle. If it’s feeding time, give them time to digest.

10. Prepare for Carsickness

If your pet, especially a dog, is not used to road trips, it can get carsick. Therefore, consult your veterinarian to get the proper medication to help calm nausea.

It is a big responsibility to follow your pet’s safety tips, but at the end of it all, they are worth it.  It can be fun with our four-legged members around. So, follow the above steps to have a comfortable and safe journey for everyone.

Do you have more information you think we should include in the list? Feel free to share in the comment box below.

Best food containers and bento boxes for the road

One of the best ways to save money and stay healthier on road trips is to pack your own food. Almost every road trip we take, we pack lunches and drinks, whether we’ll be on the road a few hours or a few weeks. Since we banned plastic baggies and disposable plastic containers in our house years ago, the best food containers for our car include the following. Bonus: For a list of road trip friendly snacks, check here.

food-containers

Bento boxes for the road:

Seal Cup Trio: This trio of round stainless steel containers come with soft rubber lids and are made by ECOLunchBox. We love that they nest together when not in use, so they take up less room in the cupboard, and that they’re not very heavy. If you’ve toted around glass containers, you know what I mean (see below). The Seal Cup Trio are perfect for snacks like pretzels, cut fruit, and granola. You can put wet items in, but not liquids. They’re $29, which is a good deal for three pieces.

ECOLunch Pod: These little 5 ounce rectangular containers are complete stainless steel, with stainless steel lids. We love them because they’re very versatile: you can use them for snacks, or as accessories to your lunch, storing wet wipes or even crayons or other crafty games for the car. They’re only around $8 each.

PlanetBox food tray: No doubt about it, PlanetBox food systems are expensive. However, we use one every day for our son’s lunch for school, then again on the road. What I love: it’s all one unit, so it’s easy to transport and not lose pieces, and the included dip containers never leak. For what it’s worth, we never use the included cover…just one more thing to lose in the car! Pick one up for $64.

Life Factory: For bigger food items, such as prepared salads and sandwich rolls, we use Life Factory 2-cup and 4-cup containers. Beware: these glass containers are heavy to lug around (so they’re best for road tripping where food transport is at a minimum). However, we love them because they’re encased in rubber to prevent breakage and seal very well. Pick up the 2-cup version for $17.

HydroFlask growler: We love everything HydroFlask (hey, it’s an Oregon company, and we’re Oregonians!) but many families don’t think of buying a growler for road trips. Usually used for beer, growlers are ideal for keeping drinks cold on the road: we fill our growler with water, tea, and fruit juices to dole out along the way. Plus, if the adults in the family come across local brews, they can easily fill up! They’re under $50 on Amazon. We also use HydroFlask water bottles and food containers, but note: in our experience, the food containers do not keep liquids like soup hot for more than five hours.

road-trip-containers

What to carry road trip snacks in:

For short term road trips and outdoor pit stops, we love to use our bulga basket. We picked ours up for under $25. I use bulga baskets more than soft-sided coolers because I can easily access everything and see all the items I’ve packed, which I find very convenient. However, I cannot keep foods very cold in a basket. When we need to transport foods longer than a few hours, I turn to my Yeti cooler. No, buying a Yeti isn’t overkill: this high end cooler may have been designed for hunters and explorers out in the wilderness for days and weeks at a time, but trust me, after using one, you’ll never go back to a regular plastic cooler again. Our Yeti Tundra keeps our food cold and fresh for days!

amzn_assoc_placement = “adunit0”;
amzn_assoc_search_bar = “true”;
amzn_assoc_tracking_id = “pitstoforkid-20”;
amzn_assoc_ad_mode = “manual”;
amzn_assoc_ad_type = “smart”;
amzn_assoc_marketplace = “amazon”;
amzn_assoc_region = “US”;
amzn_assoc_title = “My Amazon Picks”;
amzn_assoc_linkid = “ff091f71741a3fbc1be67b0816ea564b”;
amzn_assoc_asins = “B0040MH642,B006IVM9VS,B01ACASP8G,B01C0Q974Q”;

Family camping hack: Dispersed camping tips

Have you ever been on a road trip, paid around $100 a night to stay at a basic motel, and thought to yourself that you’d rather pay less and see more nature along the way? Or have you ever camped in a campground amid loud neighbors and wished you could find a place to pitch your tent away from the masses? If either question has crossed your family’s minds while traveling, dispersed camping might be a good option for you. If dispersed camping sounds intimidating, we have dispersed camping tips ready for you.

What is dispersed camping?

Dispersed camping simply means camping anywhere in the National Forest outside of a designated campground. No services will be available. such as trash removal, and little or no facilities will be at your disposal, such as tables and fire pits, or bathrooms or showers. However, dispersed camping is free, and you can usually count on finding a campsite where you can be alone in the wilderness, via car instead of hike-in.

You’ll be responsible for packing out everything you pack in (follow Leave No Trace principles), and you’ll need to remember to bring basics you might not think about when camping in campgrounds, such as potable water, toilet paper (and a shovel), and portable chargers for phones, lanterns and the like. Store all your food items in your car or in a bear canister at night, as food storage lockers will not be present. Think of dispersed camping as backpacking, but with your car: you need to be completely self-contained.

So how do you find dispersed camping locations?

This is the tricky part. You can use any road map to locate National Forest Service land in the vicinity in which you want to camp, but the best way to find out what areas are open to dispersed camping is to contact the nearest Forest Service office to the area you wish to visit. Many people drive out on forest service roads into the woods and find a clearing or a spot near a stream or with a view of the mountains. Use maps to find water sources near your desired camp area (but remember it will not be potable).

Only drive on existing roads to prevent resource damage. Dispersed camping is allowed in a one-mile perimeter away from campgrounds and 100 feet from any stream. To prevent resource damage please keep your campsite within 150 feet from a roadway.

Sometimes, though, it’s hard to identify exactly what is forest service land and what is private land. When we’re unsure, we’ve found its sometimes worth spending a few dollars to use Hipcamp.

Hipcamp is a website that mimics AirBnb, but for campsites. Private owners (hosts) post their camping options, which families can search for by location and date. Essentially, Hipcamp sites are dispersed camping on private land with permission. We have paid about $20 per Hipcamp site, paid via the website much as you’d do for AirBnb. The host then contacts you with exact directions to the site. Like when using AirBnb, it’s important to read reviews before booking, to make sure the host will be a good communicator and offer solid directions. And just like when disperse camping on forest service land, it’s crucial to pack everything out and leave the site as nice as when you found it (or better).

Hipcamp is popular with young adults looking to camp in groups (think festival-goers) but is a great option for families as well. Look for options with plenty of space in which to find a private area to camp. On a recent road trip through Nevada, we found a completely isolated Hipcamp location, and enjoyed a night to ourselves amid antelope and a perfectly starry sky. We brought a small stove, potable water, headlamps, food and a tent, and were completely cozy and self-contained for $20 instead of the $100 we would have spent on a not-so-great hotel room in a nearby town.

Have you disperse camped or used Hipcamp? Let us know in the comments!

Road Trip Safety: What to do if your car breaks down

A few years ago, we were ten minutes into a six-hour road trip when we ran over a nail in the road and got a flat tire. Yep, only ten minutes in…and while it was a bummer to be sidelined so quickly, at least we were close to home. Within a few hours, we were back on the road. But what if you were further afield?

Any time your car breaks down, it’s natural for panic to set in—but what if you’re miles and miles into a road trip? What if you’re in unfamiliar territory and have no cell phone signal? As difficult as it is, don’t panic. Here are a few things to do if you have to take that gut-wrenching park on the side of the highway:

1. Move away from the car if you see smoke. It’s very unlikely for modern cars to catch fire, but it does happen. If you see smoke or otherwise suspect staying in or near the car is dangerous, move away. Your safety is the top priority.

2. Put on your hazards and set out flares if you have them. Flares should be part of any roadside emergency kit. However, if you don’t have them, at the bare minimum put on the hazards. This will minimize your risk (and the risk of a car accidentally hitting yours).

3. Call for help if you have a signal. Most insurance companies include roadside assistance with policies. However, the waits can be long. If you do have a roadside assistance program, call them first so you can get help as soon as possible. Next, call someone nearby who may be able to help. If that isn’t an option, call someone you trust to let them know what happened and where you are.

4. Start walking if you have no cell service but know a store is nearby. Maybe you recently passed an interstate gas station or saw signs for a small town within a couple of miles. Only start walking if you’re confident that you can safely and quickly get to a business where you can then call for help. If possible, walk against traffic so you can see cars as they approach.

5. Make a sign for jumper cables and wait by your car if you know your battery is dead. It’s rare that a car will stop working suddenly on the highway because of a dead battery, but it can happen—especially if you recently turned the car off. If you’re certain that’s the issue and have jumper cables, hold them up to passing cars. If you don’t, make a “jumper cables” sign with your hands to let passing cars know what you need. It shouldn’t take long for someone to stop.

The best way to avoid getting stranded is to take precautions. Make sure you’ve ticked off these tasks before taking your next road trip:

1. Get your car serviced. Regular maintenance is the best way to stay safe and spot any troubling signs before they get out of control. Maintenance checks are fast, affordable, and save you money in the long run. Aim for at least one car service per year.

2. Make a roadside kit and always keep it with you. This should include jumper cables, safety items such as pepper spray, solar-powered chargers, a wind-up radio, road flares, and a first-aid kit. Hopefully you’ll never need it, but you’ll be glad to have it if you do.

3. Choose a wireless plan with good coverage. It’s tempting to save money on a bargain carrier, but you’ll regret it if you travel to a more rural area without coverage. The best way to get help is simply to make a phone call. Don’t opt to take that away from yourself.

 In the worst-case scenario, you might have to sell your car if it breaks down. If you must, you can find a company near you. For example, a company like Junk That Car in Temecula will purchase your car and tow it away getting rid of the hassles associated with a broken-down car.

Another way to increase safety on a road trip? Don’t go alone. There’s safety and power in numbers.