Ski school guide: How to choose the right ski lessons

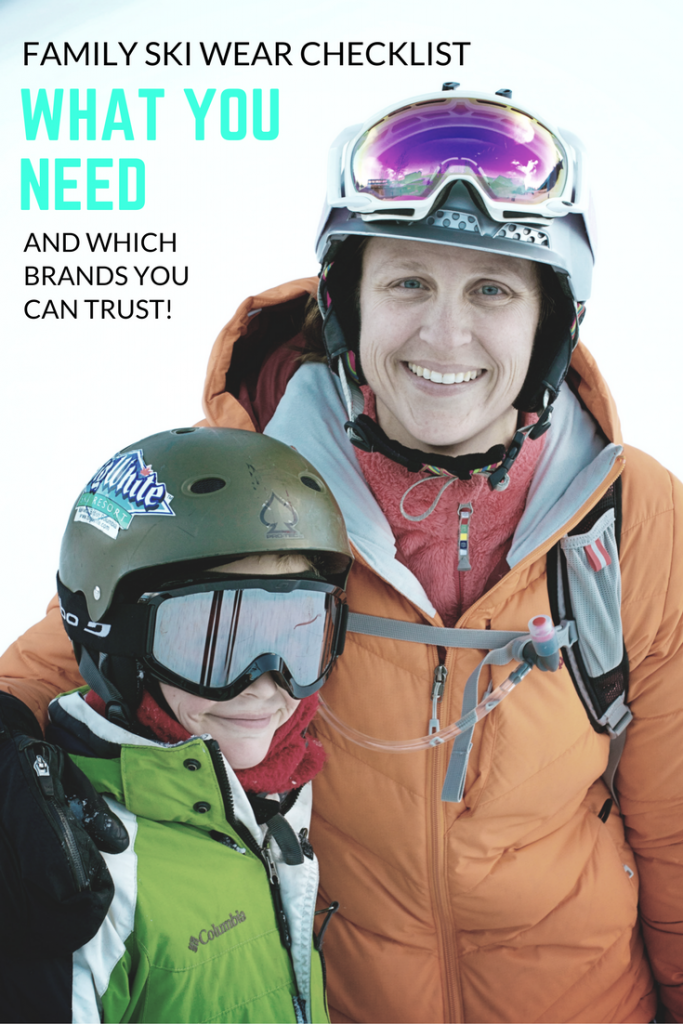
Ski school can really add to the success and enjoyment of your family ski vacation, but lessons are usually more expensive than your ski lift tickets. Before making such an investment, know what type of ski school is right for your kids (or you!) and be smart about choosing the right ski lessons. We’ve tried just about every type, and break it down for you here:

smuggs adult lessons

Group ski lessons:

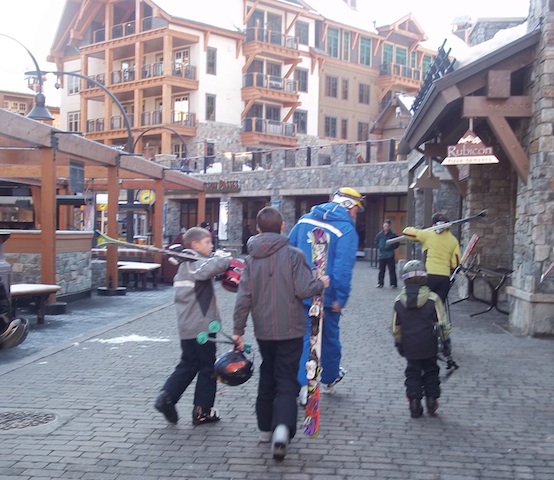
A group lesson is the most common type of ski school experience. Kids or adults are grouped by ability level (best as instructors can guess) in groups of up to 8-10. Ski instructor to student ratios vary, but you’ll want to find group lessons in the 1:4 or 1:6 ratio level. Group lessons are the most affordable, but you get what you pay for, in most cases. The larger group size means less individualized attention for your kids, and therefore a slower learning curve. However, some kids enjoy being with a larger group. The best group lessons we’ve experienced have been at Big White Ski Resort, British Columbia, where ability levels are clearly defined.

Cost: Expect to pay $90-$250 for full-day group lessons, lunch included.

Small group ski lessons:

Small group lessons are often restricted to four or fewer students, and otherwise mimic group lessons. Booking a small group lesson can be just the boost you or your child needs to improve skills. The best small group lessons we’ve found are at Northstar California, called Ultimate 4.

Cost: Expect to pay $250-$350 for full-day small group lessons, lunch included.

northstar

Specialty lessons:

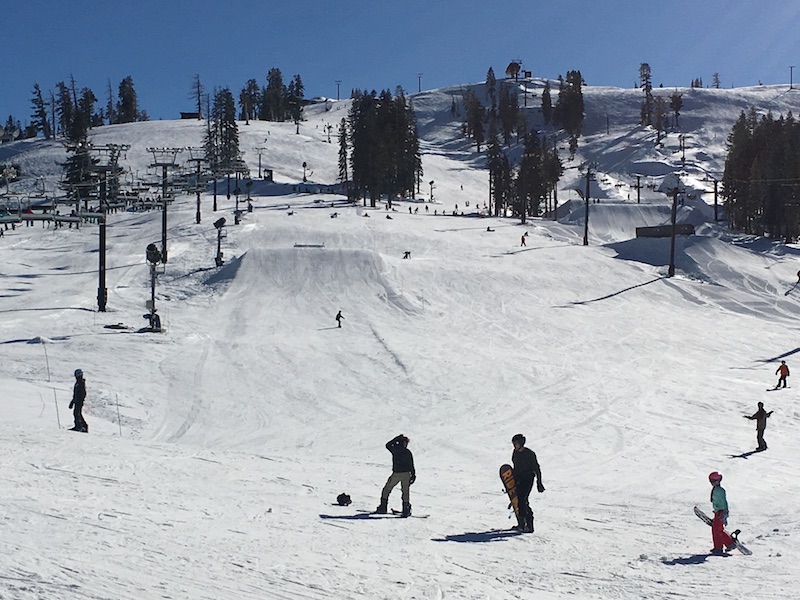
Specialty lessons can include adaptive lessons, snowboard-specific lessons, and any lessons utilizing the new ‘terrain-based learning’ style, where new skiers and snowboarders learn on various snow terrain elements on a largely flat surface. Our favorite speciality lesson is the Burton Snowboard Academy, offered at select Vail Resorts. After just one day with the academy, our son Tobias was linking up to 100 turns on green and blue terrain, and after two lessons, he became a solidly intermediate snowboarder. Burton Snowboard Academy is available as a private lesson experience, or an Ultimate 4 experience. Sierra-at-Tahoe also offers a specialty snowboard experienced, called Burton Star Wars.

Cost: Expect to pay between $160-$335 for full-day specialty lessons, lunch and rentals included.

burton-academy


Private lessons or guides:

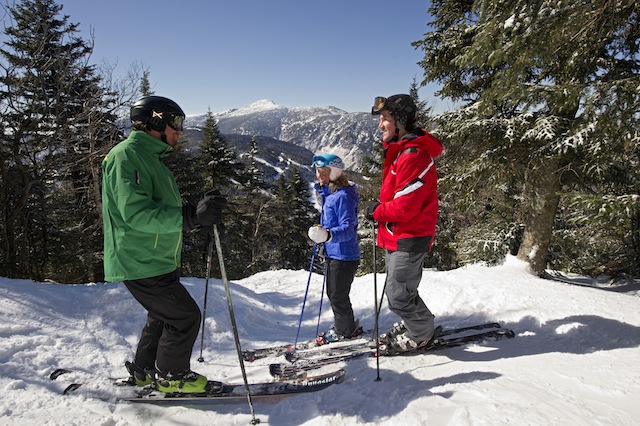
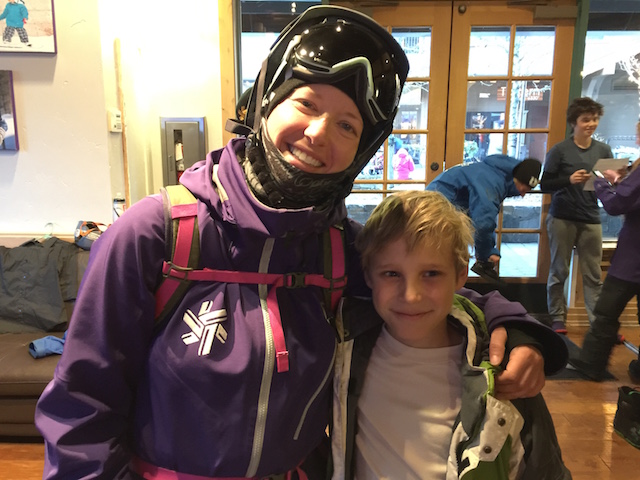
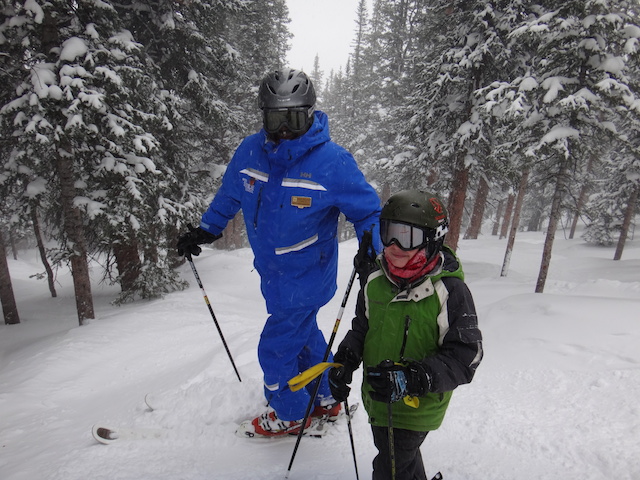
Most people assume private lessons are too costly. They are expensive, but what many don’t realize is that depending on the program, 3-6 people can be booked on one private lesson. This means the whole family (or all the kids) may be able to spend the day together, with a personal instructor. Some families choose to make this day a learning experience, while others simply enjoy having a private guide for the day. Either way, having a private lesson means front-of-the-line access at chair lifts and expert navigation of the mountain. The best private lesson we’ve experienced was at Keystone Mountain, where our guide Mack took Tobias and me to gladed runs, kat-accessed terrain, and hidden stashes. 

Cost: Expect to pay between $550-$850, excluding lift tickets and rentals.

keystone-private-lesson

Season-long lessons:

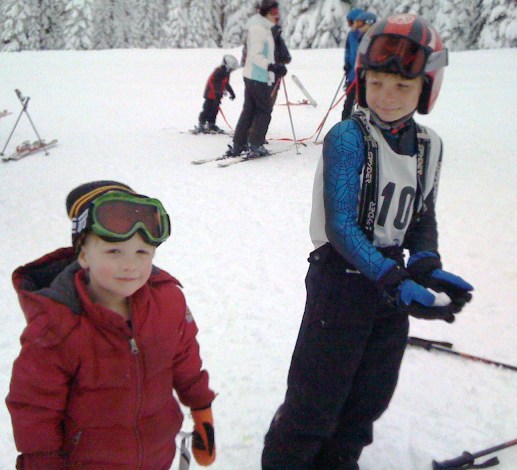
The absolute best way to learn to ski or snowboard is also the most affordable. Multi-day lesson packages range from just 3-4 Saturdays in a row to 6-8 weekends spanning the ski season, and offer consistency and unparalleled skill development. How to find them: at big mountain resorts, you’ll find multi-day lessons under ‘specialty’ (confusing, I think). At smaller resorts, season-long lessons are usually more prominently advertised, as ‘learn to ski’ packages. Not sure where to go? Start with regional ski associations, such as Ski PA in the Poconos. All packages and deals are listed there in the same place. Pair season-long lessons with a season pass for the best value. Tip: Our kids learned to ski expertly in an alpine racing program. Racing is fun for kids, and teaches valuable ski skills that go beyond racing days.

Cost: Expect to pay between $350-$800 per season, depending greatly on the size of resort.

Mt. Shasta Ski Park

For the other ski experts out there: where did you learn to ski? How about your kids?

Ways to elevate your ski day: backcountry ski excursions, clinics and more

If you generally ski lift-served terrain (hopefully with your family!) but find yourself routinely wanting to elevate your ski day with a little more adventure, there are some very obtainable and accessible ways to do so! Whether you’ve already skied everything you can in the front-country (on-piste terrain) at your favorite ski resort or simply want to learn more about ways to maximize your ski experience,  backcountry ski excursions, clinics and resort programs can get you into the side-country for new challenges.

Sidecountry and Backcountry ski excursions:

If you find yourself looking with longing at Warren Miller (RIP) films or drooling over brochures featuring fresh tracks cutting through powery landscapes, look into backcountry ski excursions. It’s important to start with guided programs, so you can learn what you need to know about avalanche and snow safety (if you get hooked, you’ll need to invest in your own gear and take an avalanche safety course at home).

Start with sidecountry trips, which simply means skiing the off-piste but still ski-patrolled areas of a resort. A few great ways to do this: try a Homewood Snowcat Adventure with the folks at this Tahoe ski resort with a hometown feel, or pay a few bucks to access Keystone Mountain’s cat-accessed terrain.

If you’re visiting a new-to-you resort, see if they have a Hidden Tracks program, like Solitude Mountain Resort’s: this private, guided program grants you access to the best side country and gated terrain the resort has to offer, and you get a lesson in skiing off-piste while you’re at it. Read more about my Hidden Tracks experience.

If you feel ready for an all-day backcountry adventure, check out Ski Utah’s Interconnect. The backcountry ski excursions the Interconnect offers are quite truly amazing. While you need to be an advanced skier to participate, you don’t have to be experienced in the backcountry. The trained guides will carry all the avi gear you need and will provide the expertise.

Depending on the excursion you choose, you ski up to six Utah ski resorts in one day, connecting them via backcountry. Along the way, you’ll ski side and backcountry, boot pack a few times, and side slip (side step on your skis) at a few key points, too. While challenging physically, the Interconnect offers some of the back fresh powder in the Wasatach, takes you to points you might have only seen on postcards, and will get you hooked on skiing off the beaten path. A day with the Interconnect folks includes lunch and access to all the resorts you’ll be passing through.

Know before you book: As noted, you’ll need to be an advanced skier. Because several of the resorts on the tour do not permit snowboards, it’s a skier-only excursion. While it’s important to be able to ski a variety of terrain, it’s equally important to be fit enough to hike through snow (carrying your skis) and side slip. It also helps to not fear moderate heights. You’ll need to bring a small backpack (a hydration pack size is perfect) to stow extra gloves, a face mask, some snacks, and water.

In California, try at backcountry experience with Alpenglow Expeditions. Alpenglow operates out of Squaw Valley Alpine Meadows and tours in the backcountry past Granite Chief lift to access out-of-boundary terrain via boot packing and skinning. Alpenglow will outfit you in AT (Alpine Touring) skis, boots, skins and backpack with avi gear if you need it. Tours are all day, and can include up to 2-3 laps of National Geographic Bowl.

Read more about my experiences with both Ski Utah Interconnect and Alpenglow Expeditions here.

Ongoing ski clinics ski camps:

If you’re lucky enough to live near a ski resort, consider signing yourself up for an ongoing adult ski clinic. You probably already have the kids in ski lessons, too! Ski clinics are often gender-specific (nice for women who want to learn without pressure from their husbands and vice versa) and the regular nature of them means you can improve over the season. Look for a clinic that utilizes the same instructor for the entire session for consistency of instruction, and it helps to have a later start time (like 9:30 or 10 am) so you have time to drop off kids at their own lessons (or at school) beforehand. Look for clinic options under ‘specialty lessons’ on most resort websites. Solitude’s Women on Wednesdays are an excellent example.

Ski camps are a great way to feel like a kid again while enjoying some adult time and improving your ski ability by leaps and bounds. Alta Lodge’s women’s camps are a great example: bunk with a ski buddy, enjoy meals at the lodge and nice long ski days filled with instruction, then relax each evening in the hot tub and at the bar with new friends. Yes, please!

If you can’t quite carve out a whole week, Northstar California plays host to Her Mountain retreats, a two-day event held several times per ski season (then again several times per summer for mountain bike enthusiasts). During Her Mountain, women receive two days of specialized lessons by a female instructor, guided yoga, apres-ski events, and even the Platinum tōst experience on the mountain. This experience is an elevated version of the 2 pm tōst (where every Northstar guest can enjoy complimentary champagne or sparkling cider). Platinum Tōst is at 1 pm and includes a dedicated seating area with fire pit, a s’mores kit, a bottle of Veuve Clicquot, and a picnic of charcuterie that is hearty enough to be a full lunch. Her Mountain doesn’t include lodging, so you can pick your level of luxury to economic accommodations.

First Tracks programs:

Ditch the family sleeping soundly at the ski condo and head out for first tracks! These programs are offered at many resorts and allow you to hop on the first chair at 8:15 am instead of 9 am. Often, First Tracks is free to guests staying at certain resort properties or come with a low cost. The key is to sign up early, because there are only a few spots each day offered. You’ll get to track up that perfect corduroy first, and enjoy a nice breakfast afterward.

How do you like to elevate your ski day experience?


On being a skiing family: From the first green run to a family ski vacation

Recently, I read a Facebook update from a friend and fellow travel writer that declared something along the lines of, “Third time’s a charm! On our third ski vacation, we finally fell in love with skiing.”

This happy statement made me reflect on my own family’s ski ‘journey’, which started perhaps a bit differently than most. Unlike many parents, we considered ourselves a ‘skiing family’ even before our kids could ski. My husband and I had both grown up with the sport in the Tahoe area, myself racing slalom at the state level through high school. There was nothing I loved more than skiing, and we couldn’t wait to share this winter pastime with our boys.

ski-family


We started each son on skis at age three, which turned out to be a worthwhile yet exhausting endeavor. By the time our third son was born, we were a full-fledged preschool-and-toddler ski family, with tiny Rossis, boots, snowsuits, goggles, mittens, and other paraphanilia littering the back of our car. We hauled all our gear up to our local ski lodge at Mt. Ashland, Oregon, in a huge duffel bag, with stumbling children (usually with runny noses and lost gloves) trailing in our wake. We set up a port-a-crib in the lodge for our baby, and my husband and I took turns taking laps.

Those early years were fun, but rough. My mom, the boys’ grandma, was actually in the trenches the most, as the most patient ski instructor of our group. Without her, I’m not sure my kids would have mastered the ‘pizza wedge’. As they grew, we continued to teach them on our own during the preschool years, and they followed us like ducklings around our local mountain. We signed the boys up for weekly lessons with our local ski racing club when they hit the required age, and the consistent, dedicated instruction took them from competent intermediate skiers to experts.

skiing with kids

Perhaps because we’ve been on the mountain almost every weekend of every winter of our boys’ young lives, we never had that ‘aha moment’. We never experienced that single day in which we said, ‘This is it! We get it now.’ Instead, it just seemed to happen without our noticing, until one season, we were all skiing blacks together and I realized I wasn’t wiping anyone’s nose or helping anyone take off their snowsuit to go potty or sweating in my jacket as I  knocked the snow off someone’s little boot and guided it into their binding. After years in the trenches, we could all, as a family, ski any run of any resort…together.

squaw valley for expert skiers

Sometimes, I’m asked whether it was ‘worth it’ to teach my kids to ski so young, when the process was still more like hefting sacks of potatoes than a rewarding day in the outdoors. My answer: absolutely. By declaring ourselves ‘a skiing family’ before we actually were one, I fulfilled the prophecy. And there’s always more to learn. Now, we take family lessons at major resorts from Tahoe to Colorado to learn more skills, my 5th grader is trying to perfect his 360, and my teen skiers are considering backcountry skiing and avalanche courses. I imagine when they have kids, they’ll start as ‘skiing families’ too.

Is your family still working up to that first blue run? Read this account of a family finding that ‘aha moment’ during a private lesson at Vail.

Guide to skiing Breckenridge with teens (by teens)

Breckenridge Mountain is a huge ski resort with something for absolutely every type of skier and rider. On our latest trip, we went with our teens and pre-teen, who are all expert skiers and riders. I thought I’d let them tell readers their favorite places on the mountain from their perspective. If you have older kids and teens who like steeps and deeps, this is the post to read!

guide-to-skiing-breck

Note to parents with beginning skiers and riders: Breckenridge’s ski school is among the best we’ve seen, and entire sections of the resort are devoted to green and blue (beginner and intermediate) runs. While this is not the ‘Breck’ we’re covering in this post, learners will be right at home!

Guide to skiing Breckenridge, according to kids who like moguls, trees, and bowls:

The bowls above the tree line are amazing, but only if conditions are right. On windy days or when they’re not open, due to avalanche control, head into the trees! Our favorite tree skiing at Breck is probably the Windows off Peak 9. From the Mercury SuperChair or the E Chair, take the trail to Window 1 and 2, and ski through trees into our favorite place in all of Breck: the ravine bordering a creek! There are winding trails, jumps, and bumps here and it goes on for ages!

breckenridge-bowls

There is a lot of out-of-boundary terrain at Breck, and there are gates to access these areas in designated spots. Don’t duck the rope! At the top of Peak 9, there’s a gate where you can hike for about 20 minutes to access some fun stuff, but remember: you have to have a pack, beacon, and shovel with you (and a friend). Our parents’ rule is that we have to take an avalanche safety course before they’ll buy us beacons, so we had to skip this spot.

But: if you still want to hike to great terrain, there are places to do this without leaving the resort boundary. If Imperial chair is not running, we like to hike from Peak 9 at the top of E Chair to the Back 9. The hike is long and hard (about 20 minutes, but it feels longer and you’ll get sweaty) but then you get to ski down your choice of double blacks that haven’t been skied out. After the open bowls, you’ll end up in the same creek run from above.

For lots of steep, mogul runs, head to Peak 10. This was our mom’s favorite peak. Go left at the top of Falcon SuperChair, and try Black Hawk or Dark Rider (double black diamonds).

Breck-skiing

Peak 7 is an intermediate hill, but at the top is lots of good stuff you can access if Imperial is open. We also liked 6 Chair, which had more moguls and above-tree stuff, on the side of Peak 8.

There are several terrain parks, but be warned: the large and medium ones are HUGE! We like terrain parks but had to stay on the small one…which was like our medium one at home! You can find the small one on Peak 9, called the Highway.

If you like bowls with plenty of spots to find trees to run through, get yourself to the T Bar. Riding the T Bar can be tricky at first, but just watch the people ahead of you, and don’t forget to stay standing…you don’t sit on the T. It’s harder to ride for snowboarders than skiers. When snowboarding, we place the T closer to our hip than our behinds. Riding the T Bar is entertaining, too, because about 1 in 10 people fall off.

breckenridge

Even if you are a very good skier, Breck’s kid zones are a lot of fun. Look for the small terrain trails throughout the family zones and intermediate runs. We found one with a mock mine tunnel to ski through and one with an ore bucket. It’s just lots of fun.

Disclosure: We skied and rode Breck as guests of the resort, in order to report back on where to go for the best runs. All opinions are our own! 

Ski Vacation Hack: How to tune and wax your own skis

Winter outdoors enthusiasts gearing up for ski and snowboard season know how expensive snow sports can be, and how important it is to take care of skiing equipment. But if you don’t have $40 to $50 to spend on every professional tuning and waxing session, you can easily do it yourself! This is one of our favorite ski vacation hack ideas! For about the same one-time investment, skiers and snowboarders can tune and wax their own gear all season long.

smuggs for teens

What You’ll Need

The items below can be picked up individually (some you’ll already have on hand at home) or bought in a ski and snowboard tuning kit.

  • Wax: pick up a stick of all-purpose (all-weather) wax at your local ski shop or outdoor store.
  • Iron: use an old iron at home, or buy a ski-tuning iron.
  • Means of securing skis or board: most tuners use a wooden table and vise, but any workbench will do, and a two-person team can hold skis securely without a vise.
  • Metal scraper: found in ski shops, a metal scraper is for scraping P-Tex only.
  • Plastic scraper: any plastic scraper with an edge will do! Pick one up for just a few dollars at any ski shop.
  • File and file guide: a metal file specifically made for edging skis and boards can be found in ski shops or outdoor stores; pair it with a file guide.
  • Edge tool (alternative or in addition to the file): included in most ski-tuning kits, edge tools make finding the correct file angle easy.
  • Brush and cloth: a soft brush is important for wiping away wax shavings, and a damp cloth will remove dirt and dust from bases.
  • Stone: ski stones are useful for removing rust from edges.
  • P-Tex: a must for filling deep scrapes or gouges in ski and snowboard bases, found at ski shops and in tuning kits.
  • Lighter or matches: for lighting your P-Tex.

Preparation

Once you have the necessary tools assembled, it’s time to get started! To prepare your skis or board for tuning and waxing, it’s important to prep the bases. Start by securing your ski brakes, so they’re out of the way. Simply pull them back with a large rubber band. Next, wipe down the bases with your damp cloth. You’ll want to remove any dirt, dust, or grime that may remain from last season or from “summering” in your garage. Finally, remove any rust from your edges using your stone. Hold the stone horizontally (like a harmonica) and pass it across the edges at a 90-degree angle, working from tip to tail. Prep both bases before moving on.

Base Repair

Now that your base is prepped, it’s time to fix any major scrapes or gouges. Light the end of your stick of P-Tex with a match or lighter, then touch the lighted end to the scrape, allowing the melted P-Tex to fill it. Be careful not to drip the P-Tex in from a height, as this will burn the base. Once the scrape is filled, remove the P-Tex stick and blow it out gently. Let the base cool for approximately 10 minutes, then scrape away any excess P-Tex with your metal scraper until the base is smooth. You’ll want to hold your scraper horizontally, with your thumbs behind it. Push the scraper along the gouge until the P-Tex is flat and smooth. Alternatively, you can pull the scraper toward you, “cutting” the P-Tex until smooth. Repeat for both ski bases, as needed.

See the rest at our fix.com article, or follow the illustration below:


Source: Fix.com

Photo source: Smuggler’s Notch, VT

Back to Ski: Smugglers Notch Resort for teens and advanced skiers

We covered Smugglers’ Notch amenities for young kids and babies last winter, but Vermont-based Smuggs has older kids, teens, and advanced skiers covered as well. In fact, this combination makes Smuggs an excellent resort pick for multigenerational family travel, so bring Grandma and Grandpa along, too. If you have expert skiers and older kids or teens in your midst, here’s what you need to know about Smugglers Notch Resort for teens:

smuggs for teens

Two-hour lessons appeal to older kids:  

My kids—all of whom are expert skiers—balk at all-day lesson programs. They long to explore the mountain on their own, but we insist they continue to work on their skills. At Smuggs, advanced skiers can opt for two-hour lessons (ages 6-17), giving kids plenty of time for free skiing. Tip: book the afternoon session instead of morning for a less crowded lesson. You may even luck out with a private experience! 

Mountain configuration is teen-friendly:

Smuggs is comprised of three interconnected mountains. Morse Mountain is where all the action is: you’ll find the childcare and ski school at its base, along with the entire Village Center, and a network of trails primarily for beginners, with a sprinkling of blues for intermediate levels. Madonna and Sterling mountains are further afield, and offer a solid helping of intermediate runs, plus the resort’s black diamond, double-black diamond, and even triple-black diamond runs. To get there, skiers need to ride the chairlift up Morse Mountain, ski the access trail, then catch the double chairlifts at Madonna and Sterling. What this means for parents of teens: to get back down the mountain, runs funnel back down to Morse, ensuring there’s only one place your kids will end up. It’s easy to plan meeting places for tweens and teens, and if you have kids in advanced ski school while you’re hitting the slopes solo, you can meet them at the Madonna/Sterling base lodge.

smuggs adult lessons

Adult lessons are not just for beginners:

Practice what you preach to your kids, and take a lesson yourself! If you’re an expert skier, consider your time to be a lesson on Smuggs as well as a lesson on ski form. Madonna and Sterling mountains are chock full of secret stashes, hike-only terrain, backcountry tree runs, and hidden powder pockets. Newbies to the mountain cannot hope to find many of them on their own, and ski instructors act as mountain guides, showing you where all the fun stuff is. (Tip: be a hero and show your kids the best tree runs after your lesson.)

No need to sweat about snow conditions:

Families can plan their entire ski vacation carefully, but no one has control over the weather. Smuggs takes care of this worry as well with advanced—and ever-increasing—snowmaking abilities. With 150 new snowmaking guns last season and another 100 in place for this winter, families can book late or early in the season with confidence, taking advantage of school holidays and long weekends. (Though the resort’s traditional 300 inches from Mother Nature per year certainly help!)

Don’t forget about cross-country terrain:

Included in the vacation packages, the resort’s Nordic terrain includes 30 km of cross-country trails and 24 km of snowshoe terrain.  Lessons are available if you’re new to the sports, and ice skating is on-site as well (we find our kids prefer skating while we enjoy the tranquility of the trails). Rent equipment at the center or bring your own.

Teen clubs:

Teens and tweens are usually forgotten when it comes to kids’ clubs (most end at age 12), but Smuggs offers not one, but two! Kids ages 13-15 have their own space at Teen Alley, and 16-17-year-olds have access to Outer Limits. Both clubs are open for après ski fun without parents, and programming includes organized games, video game tournaments, movie nights, and dance jams. How teens have the energy for all this after a day of skiing, I’ll never know, but they do!

Photo credit: Smuggler’s Notch


Ski trip planning hack: Using GetOutfitted to rent ski wear

Ski and snowboard wear is expensive–very expensive, in fact–and for some families, the cost to outfit everyone for one or two ski trips per season is simply not worth it. Our family skis much more often than that, but with the rate my teens are growing, I never know what will still fit them, even from month to month! Enter an interesting solution: GetOutfitted.

What is GetOutfitted?

It’s a new service that rents outer wear, plus ski gear ranging from ski packages to Go Pros. You select the items you need online, picking your jacket and snow pants a la carte based on the styles you like, or selecting a pre-determined package. I’m very familiar with the latest outdoor wear brands, and they’re all here. Once you’ve made your selections, you input your vacation dates and destination, and GetOutfitted will FedEx your ski wear directly to your hotel, condo, or vacation home. If you opt to rent skis and/or snowboards, too, they’ll be delivered to your door via a local ski rental partner. When you’re done with you vacation, you just put the ski wear in their pre-paid, included package and drop it off at any USPS mail center. You get free shipping both ways.

What can I get?

rent-ski-wear

Premium outerwear packages for women or men include a top-brand jacket, pants, gloves, and googles and rent for approximately $45/day. Standard packages include the same items, with slightly less trendy brands, and cost $30/day. Kids’ packages are $18/day, which is a true deal. As mentioned, you can also shop a la carte, plus can add base layers and socks, which you buy instead of rent. If you don’t have base layers, we highly recommend getting them. They’re listed for approximately the same prices you’ll pay anywhere else.

In the ski gear category, you can rent full ski or snowboard rental packages, starting at just $25/day for adults and $15/day for kids. Rental packages come with helmets as an optional addition (recommended). All ski wear and gear has a three-day minimum rental period outside of Colorado Rockies resorts.

Where is it offered?

Just about everywhere you might go for a destination ski vacation. The company is based on Colorado, but we used the service for a ski trip to Lake Tahoe, California.

Our experience with GetOutfitted, start to finish:

We didn’t need to rent full outerwear packages from GetOutfitted, which is the most affordable way to do it. We still got a good value, however, renting pants for our Pit Stops for Kids’ dad. His pants were $48/3 days. Buying him a pair of pants for the trip would cost $150 at the minimum, assuming we found a good deal on quality pants, and buying the exact pants he rented would have been $299.

getoutfitted ski gear

Pit Stops for Kids’ dad in GetOutfitted ski pants.

While we were renting pants, we decided it would be fun to rent a Go Pro for the teens to use on the mountain. Merry Christmas to them! The Go Pro rented for $40/3 days, and the chest mount to wear it cost $12/3 days. Is this $52 critical to our ski trip? No, of course not. But it’s a vast savings on buying action camera equipment we’ll only use occasionally, and the kids really loved it.

While on the site, I initiated a chat with a GetOutfitted expert, who answered my questions promptly. What I asked: ‘Can I reserve for fewer than three days?’ and ‘Do you rent helmets’. The latter is not obvious until you select the ski resort or town you’ll be visiting, which pairs you with a local rental company. When I placed items in my shopping cart, I selected the exact dates of rental, and when I checked out, I entered our vacation rental home address. The ski wear and gear were sent directly to our rental.

When we arrived at our vacation rental, the box from GetOutfitted was waiting for us by the front door. Inside, we found the ski pants and Go Pro, plus a large, prepaid return envelope. Included with the Go Pro was a set of instructions, which, combined with a Google search for the Go Pro website, proved adequate for figuring it all out. We were provided with a memory card, USB cable, and the chest mount equipment (which we paid for), plus a few more mounts, which we could use to mount the Go Pro onto our helmets (after buying disposable adhesive mount stickers, which are found at any ski gear store at most ski resorts).

GetOutfitted

The kids had fun taking video on the mountain, which we downloaded to our computer at the vacation home (use the USB cable). You’ll want to make sure to download all your videos before returning the Go Pro (or pay a fee for GetOutfitted to download it all for you).

The ski pants worked perfectly, and we returned everything at the end of our trip by dropping off the package at a USPS store. Easy-peasy. To rent your own ski gear, start at GetOutfitted.com and go from there!

We tried out GetOutfitted free of charge, for the purpose of review.

Boreal Mountain Resort with the M.A.X. Pass

If you read Pit Stops for Kids’ ski coverage regularly, you know we’re big fans of Lake Tahoe, CA skiing. I grew up in the area, skiing at resorts throughout Tahoe, and we try to visit our favorite resorts at least once a season. However, until our visit last month, it had been YEARS since I’d been at Boreal Mountain Resort.

Boreal Mountain Resort

One of the oldest and most established ski resorts in the Tahoe region, Boreal has always been known for its terrain parks, affordability, and easy access from I-80. I remember it best as the first Tahoe resort (to my knowledge) to allow snowboarding. Ever since, it’s been snowboard-centric. Because I’ve never been an avid snowboarder or lover of big jumps, Boreal hasn’t been on my radar for some time.

However, I now have three kids who love terrain parks (one of whom exclusively snowboards). I knew they’d love Boreal’s five terrain parks and half-pipe. But as one of the most affordable resorts in Tahoe, Boreal is on the small side. Before we arrived, I wondered whether its acreage would keep us occupied for a full day.

Enter Woodward Tahoe, located directly at the base of Boreal. This indoor action sport training facility is every kid’s dream: it’s filled with indoor trampolines, foam pits, skate parks, ramps, and more. With a Boreal OnePass, you get access to Woodward in addition to the slopes at Boreal (and nearby Soda Springs ski area if you’re interested). We got our tickets through The M.A.X. Pass, which is a 39-mountain season pass that includes Boreal (more on that below).

How Boreal and Woodward work together:

When you arrive at Boreal and get your Boreal OnePass, you have access to both Woodward and Boreal. Woodward is used in several ways: extreme action sport athletes use it for serious training, classes and camps are offered, and single use sessions are available to the public. To use Woodward during your ski day, you’ll want to make a reservation. Your OnePass gets you a three-hour session, which we found to be more than enough time. We opted to make a Woodward reservation for after lunch, then skied and snowboarded all morning, switching to indoors in the afternoon. Of course, you could do the reverse.

Woodward Tahoe

First-timers at Woodward need to take a 30 minute orientation session, in which instructors explain the equipment and show you the proper way to jump (and fall) safely. It’s easy and really helpful. After that, you’re let loose on all the trampolines, foam pits, ramps, and ropes. If you want to use a scooter (to jump off ramps into a pit), you can rent one by the hour. I believe it was $15/hour. Kids can also bring their own, as well as their own BMX bikes or skateboards. To skateboard and ride, helmets are required. We simply used our ski helmets. Check out our favorite Woodward video!

You’ll want to bring a change of clothes for anyone playing in Woodward before or after skiing or snowboarding; there are bathrooms to change in at Woodward, and cubbies in which to store your ski stuff. There’s a nice counter-service lunch and drink place upstairs, where there’s also a nice viewing and lounging area for anyone not participating.

What to expect on the slopes at Boreal:

As noted above, Boreal is known for its terrain parks, and it definitely delivers. We were there in late December, and not every terrain park was up and running yet, but there were still about four to pick from. As a parent, I appreciated the option of an extra-small park, where the jumps and ramps were beginner-sized. Sometimes, beginners and young kids can get in the way or even hurt on large terrain parks. From there, it goes up all the way to expert level. There’s a half pipe, and an additional park called Neff Land, which is sponsored by Neff and includes fun elements like tunnels and side walls.

Boreal

For those not into terrain parks (like me), Boreal has a surprising amount of glade and off-piste skiing, which I found on the extreme far sides of the resort. The Cedar Ridge chair was especially lovely, with a ride up the mountain amid deep forests. While the overall ambiance at Boreal is still snowboarder-centric, I did find my own place there.

Using The M.A.X. Pass:

As noted above, I visited Boreal after so many years because it is one of the 39 resorts included in our M.A.X. Pass, which our family is trying out this year. Yes, you read that right: the M.A.X. Pass includes 39 different resorts across the US. Many are on the east coast, with a handful in Utah, Colorado, California, and the Pacific Northwest. I’ll be reviewing additional M.A.X. Pass resorts later this winter. For $749, M.A.X. Pass users get five days at each of the resorts, with no blackout dates. I buy a season pass at our local mountain annually, and I can tell you it’s not far off that $749 price just for one property. If your family plans to spend five days at a single M.A.X. Pass resort on vacation this winter, plus could use the pass for a day here and there throughout the rest of the season, the value is definitely there. Check out all the resorts offered on the MAX Pass.

I visited Boreal in partnership with the M.A.X. Pass, for the purpose of review. All opinion remains my own.


Family ski wear checklist: What you need and which brands are best

Ski season is upon us, and if you’re a skiing family, you’re busy cataloguing your gear and checking to see what fits each family member. If you don’t ski often, you may not be outfitted yet at all. If you only ski once a year or so, we highly recommend using a ski wear rental service like Get Outfitted (see our full review), but if you plan to go several times this winter, it’s worth investing in the basics. In this post, I’m not going to list exact items, since that can change in a season or two. Instead, I’ll list quality brands you can trust for each category. Here’s what everyone in the family needs:

Best ski wear for families


Family ski wear checklist

Ski pants: 

Each family member’s ski pants should be waterproof (of course), and ideally, they should grow with your kid. To that end, we love Obermeyer’s ‘I-Grow’ system, which integrates cuffs and hems that are designed to be taken in and then let out to give you more life out of your pants. Young kids will appreciate ski ‘bib’ style pants, which do a great job of keeping cold and snow out, especially if they may spend a significant amount of time on the snow, and older kids will like the ‘cool factor’ of pants with suspenders or strap-free waistlines. Make sure your kid’s ski pants come down over his or her boots, with an inner lining to keep out slush. No matter which style you prefer, these are the brands we love best, based on affordability, value, and quality:

amzn_assoc_placement = “adunit0”;
amzn_assoc_search_bar = “true”;
amzn_assoc_tracking_id = “pitstoforkid-20”;
amzn_assoc_ad_mode = “manual”;
amzn_assoc_ad_type = “smart”;
amzn_assoc_marketplace = “amazon”;
amzn_assoc_region = “US”;
amzn_assoc_title = “My Amazon Picks”;
amzn_assoc_linkid = “ff6bed00d9f521159bee92ae31c3e5d1”;
amzn_assoc_asins = “B00RHSJ720,B0187XXU7Q,B00QHNWWM8,B006E886NU”;

Ski jackets: 

Picking the right ski jacket for your kid is a bit more complex than picking a pair of pants. Style comes into play even more, and since it’s nice to try to get at least two seasons out of a jacket, be sure to go with the style your child prefers. You can opt for a two-part jacket that features an inner fleece layer that zips out for solo use and an outer waterproof shell, or you can get an all-in-one. If you’re only getting one jacket, be sure it’s a waterproof shell with some insulation; otherwise, I prefer to outfit my kids with a ‘puffy’, which is what we call a down jacket or sweater layer, covered with a thin but waterproof shell. That way, they can go with just the puffy on cold but dry days, and have the shell to go over on wet days. If you have advanced extreme skiers or riders, I suggest getting a jacket with a built-in Recco avalanche beacon system. You’ll see the Recco logo displayed on these jackets, which are, as you might guess, more expensive.

Favorite brands for puffy jackets and shells:

Favorite all-in-ones or two-part system jackets:

  • Columbia: The Snowcation is a great value
  • High Sierra: The Frankie is fleece-lined
  • Craghoppers: We love the NatGeo Oliver Pro shell for our teens, paired with the Liston Half Zip
  • Free Country: The boys’ Helium is extra warm

amzn_assoc_placement = “adunit0”;
amzn_assoc_search_bar = “true”;
amzn_assoc_tracking_id = “pitstoforkid-20”;
amzn_assoc_ad_mode = “manual”;
amzn_assoc_ad_type = “smart”;
amzn_assoc_marketplace = “amazon”;
amzn_assoc_region = “US”;
amzn_assoc_title = “My Amazon Picks”;
amzn_assoc_linkid = “bdfd8deddb28085ddcb3d18f1046347e”;
amzn_assoc_asins = “B00HZHBAQO,B00PDHWFGM,B018RHAMVO,B00XRE764E”;

Base layers:

Base layers are so crucial, and so many people neglect to get high quality Merino wool or synthetic base layers! They can get expensive, but in our experience, good base layers will last through a few seasons for each kid, and can be passed down. Look for wool, as it wicks away moisture from the body, but most importantly, find a brand and material that your kids can tolerate. Some kids don’t like the feel of wool. Here’s where to shop:

amzn_assoc_placement = “adunit0”;
amzn_assoc_search_bar = “true”;
amzn_assoc_tracking_id = “pitstoforkid-20”;
amzn_assoc_ad_mode = “manual”;
amzn_assoc_ad_type = “smart”;
amzn_assoc_marketplace = “amazon”;
amzn_assoc_region = “US”;
amzn_assoc_title = “My Amazon Picks”;
amzn_assoc_linkid = “ff6bed00d9f521159bee92ae31c3e5d1”;
amzn_assoc_asins = “B000V5C7J6,B00DDYLY1Y,B009Y7M5CQ,B000V5ABSA”;

Gloves or mittens:

This is another ski wear category that centers around personal preference. I love mittens, as they keep my hands warmer (since your fingers are together and share body heat). My kids like gloves. Whichever you prefer, think QUALITY when it comes to hand protection. The last thing you want are soggy gloves. You can always buy a back up pair on the cheap, just in case. Best brands:

  • Head: Their kids’ ski mittens are colorful…you won’t lose them
  • Spyder: Try the Mini Cubbies
  • Outdoor Research: We like Revolution gloves for high quality for a great price for teens
  • Whatever Costco is selling (we’ve always found them to be good quality!)

amzn_assoc_placement = “adunit0”;
amzn_assoc_search_bar = “true”;
amzn_assoc_tracking_id = “pitstoforkid-20”;
amzn_assoc_ad_mode = “manual”;
amzn_assoc_ad_type = “smart”;
amzn_assoc_marketplace = “amazon”;
amzn_assoc_region = “US”;
amzn_assoc_title = “My Amazon Picks”;
amzn_assoc_linkid = “ff6bed00d9f521159bee92ae31c3e5d1”;
amzn_assoc_asins = “B000V5C7J6,B01A67XOHC,B014WSLPZE,B00RW5JV4W,B002U0COHA”;

Socks:

This is another highly important category…we always want to make sure feet stay dry and toasty warm! Sorry to be repetitive, but go with wool, folks. Make sure you select a ski/snowboard dedicated sock, which will come up to the knee. Otherwise, your kid will be complaining about pain in their shins in no time. Top sock brands for ski days:

amzn_assoc_placement = “adunit0”;
amzn_assoc_search_bar = “true”;
amzn_assoc_tracking_id = “pitstoforkid-20”;
amzn_assoc_ad_mode = “manual”;
amzn_assoc_ad_type = “smart”;
amzn_assoc_marketplace = “amazon”;
amzn_assoc_region = “US”;
amzn_assoc_title = “My Amazon Picks”;
amzn_assoc_linkid = “ff6bed00d9f521159bee92ae31c3e5d1”;
amzn_assoc_asins = “B0100LX8G6,B0100LXRTY,B00KNRC1RA,B00CSGMUYS”;

Goggles:

Don’t forget goggles! This is a category of gear that can vary greatly in terms of both quality and price. For newbies to the sport, no need to spend a lot of money for top-of-the-line goggles. Instead, look for used gear at your local ski swap or ski store. But if you’re an experienced skier or snowboarder, you’ll definitely notice a difference wearing quality goggles. What we recommend:

  • Native Eyewear Upslope: Native goggles have a great anti-fog coating, which really makes a difference in most weather conditions.  The lenses also have multi-mirror, hydrophobic, and oleophobic coatings to repel oils and water. The Upslope works well for women because they fit a smaller face.
  • Native Eyewear Backbowl: The Backbowl has all the same features as above, with a wider frame and wider field of vision. I love the mirror lenses…they just look so cool! These are perfect for the men in your family.
  • K2 Captura: These women’s goggles are a good mid-price option, with spherical lenses and a smaller frame.
  • Smith Optics Sidekick: Great for kids, these goggles are a solid choice that won’t set you back!

amzn_assoc_placement = “adunit0”;
amzn_assoc_search_bar = “true”;
amzn_assoc_tracking_id = “pitstoforkid-20”;
amzn_assoc_ad_mode = “manual”;
amzn_assoc_ad_type = “smart”;
amzn_assoc_marketplace = “amazon”;
amzn_assoc_region = “US”;
amzn_assoc_title = “My Amazon Picks”;
amzn_assoc_linkid = “c99d4f9749c59462a3ead5d80fc06f45”;
amzn_assoc_asins = “B00U7XP7HG,B00EO1IIH8,B01BQ2EJE8,B01BQ2EZSI”;

Ok, you’re outfitted! All you need now are your ski rentals, a helmet, and a face mask or bandana in case of wind and cold! Have a great ski season!


Why First Tracks ski tickets are worth the splurge

More and more family ski resorts are now offering First Tracks ski tickets. What is First Tracks? It’s a ski ticket add-on that allows the bearer to access the slopes earlier than the general public. Usually, First Tracks programs start at 7:30 am, allowing skiers first access at groomed and powder terrain before the lifts begin turning at 9 am. First Tracks tickets are fairly spendy at approximately $75 per person (lift ticket not included), and are usually limited to a small number of skiers and snowboarders. Some First Tracks programs set an age limit (usually 13), while others welcome kids of any age, provided they are intermediate to expert skiers, and accompanied by an adult. When (and why) are First Tracks tickets worth the money? Read on!

First Tracks

Upgrade to First Tracks when your time on the mountain is tight.

Last season, I skied First Tracks at Canyons Resort in Park City, Utah, and from 7:30 to 9 am, I skied seven long runs…over twice what I could accomplish during public hours. If you’re skiing a resort for only a day or so, or visiting during a peak season, such as spring break or Christmas, First Tracks allows you to get a significant amount of quality skiing in early in the day. We always remind travelers that time is money at Pit Stops for Kids, and First Tracks is a perfect example of maximizing your time with a moderate investment.

Upgrade to First Tracks when extra perks are included.

Nearly all First Tracks programs include breakfast at an on-mountain restaurant included with your ticket price, but First Tracks at Canyons provides an unique opportunity: skiing with an Olympian. Canyons Resort pairs their Olympic Ambassador program with their First Tracks offering, which means that with every First Tracks group skies an Olympic skier or snowboarder. I had the honor of skiing with Lake Placid’s Holly Flanders, which was not only a thrill, but a great source of Canyons information: Holly was able to take us to the best runs and glades, and was a wonderful ski companion.

Upgrade to First Tracks when the rest of your ski day will be slower-paced.

If you have babies, toddlers, or small children on your ski vacation, you’ll likely be spending a fair amount of time on or near the bunny slopes (or at least signing kids in and out of childcare and ski school). A First Tracks upgrade is a great way to give the adults what they crave: great skiing, even when skiing with young kids. On a trip to Jiminy Peak, MA, our east coast editor Kate Lepore skied First Tracks while her kids were in childcare…which allowed her to experience more of the mountain before taking over preschool ski duties.

Before you go: Not all ski resorts offer First Tracks, and those that do are on a limited schedule (most offer it two times per week). First Tracks age limitations and pricing varies, and most require reservations. If you do take the spurge, enjoy!