Squaw Valley CA with school-aged kids and teens: where to stay, dine, and ski

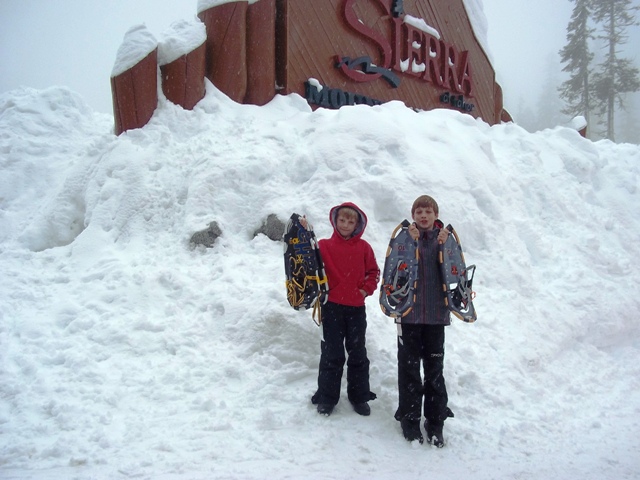
A ski vacation is the perfect socially-distanced getaway, in the outdoors! Every ski resort experience is different this season, so visit Squaw Alpine’s website for the latest COVID updates and regulations..Squaw Valley CA has long enjoyed a reputation for challenging ski terrain for advanced and expert skiers. In the last several years–most recently after their merge with neighbor Alpine Meadows ski resort–Squaw has also been working hard to earn the reputation of family ski destination. While the resort has made great strides toward this goal during their 5 Year $70 Million Plan (partway through in 2013), for us, it remains the go-to Tahoe ski resort location for steep, varied, and challenging mountain terrain. Does this mean it’s not a family resort? Not at all: it’s an ideal ski resort for families of advanced to expert skiers.

Squaw Valley USA

Skiing Squaw with advanced skiers and snowboarding kids:

While Squaw has a great beginner’s area at mid-mountain (which makes for more interesting skiing for newbies than being delegated to slopes adjacent to the parking lot), the ski boundary boasts so much great bowl, tree, and cornice skiing that it would be a shame to waste. Put another way: beginners will find what they need here, but they won’t get to experience the best of the mountain.

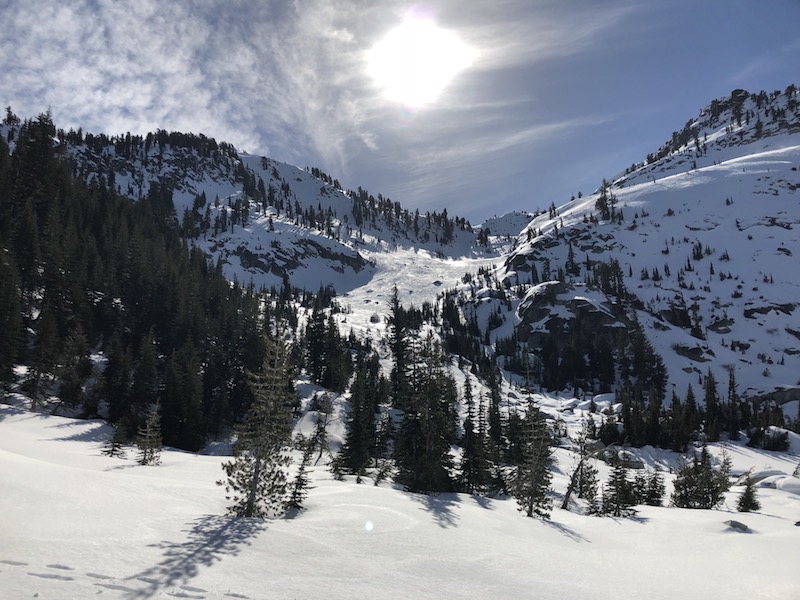
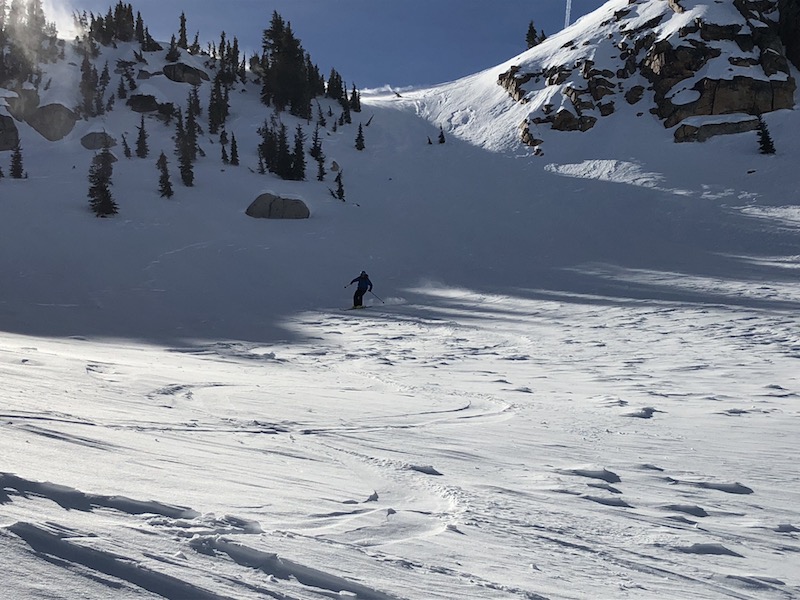
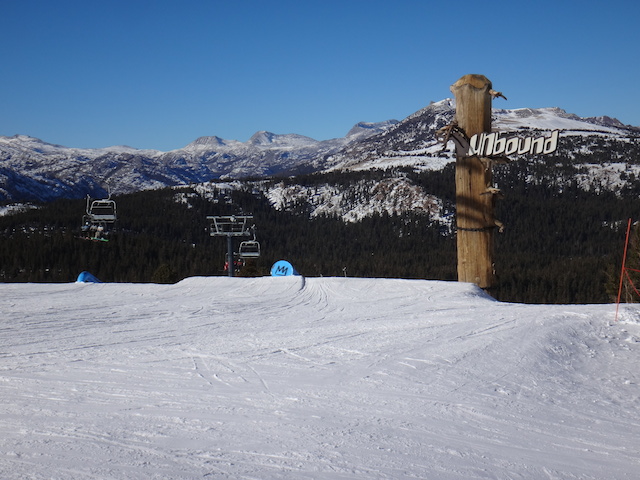
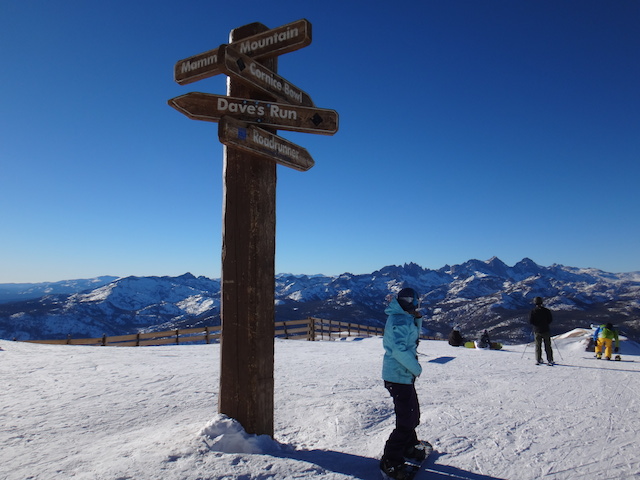
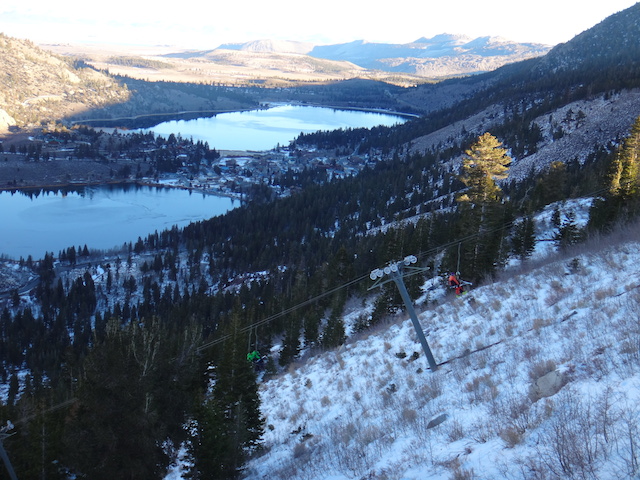
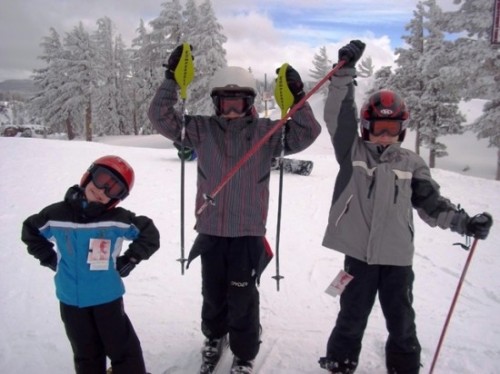
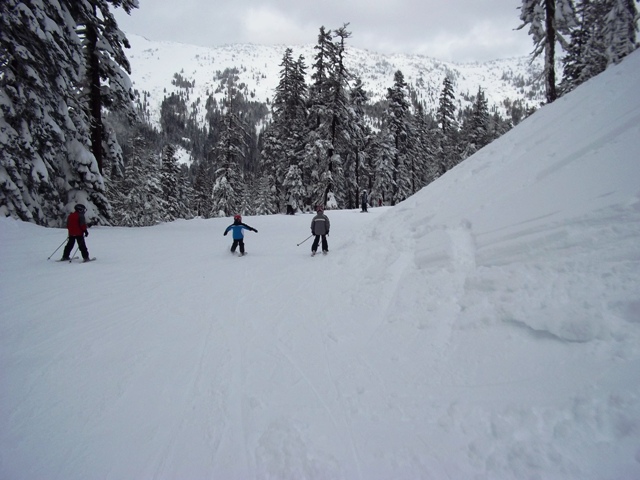
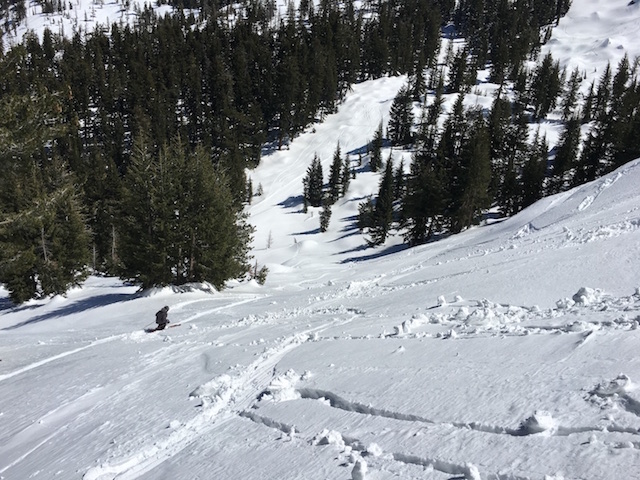
So what is the best of Squaw Valley with school-aged kids and teens? The varied, multiple ways to get your black diamond skiing and snowboarding on. From the village base, skiers and riders can head straight up KT-22 chair, made famous in the 1960 Olympics, and spend the day exploring all the nooks and crannies around its bowls and ridges. Just as satisfying is the Granite Chief region at the other end of the resort, where powder and trees reign. Headwall chair takes skiers to the top and great moguls, whereas Siberia offers steep groomers and access to the terrain park and half pipe. If the phase ‘something for everyone’ has crossed your mind, you’d be right.

squaw valley for expert skiers

There’s plenty of blue square intermediate runs in-between, and the aforementioned beginner areas, but after spending four ski days at Squaw in the 2013 season, its steeps and deeps impressed us more than anything else…unless you count the views, which are some of the best in the Sierras.

Squaw Valley lodging:

squaw village lodging

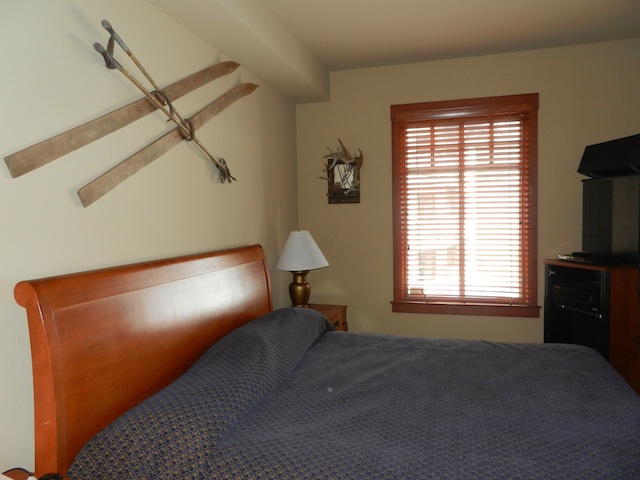
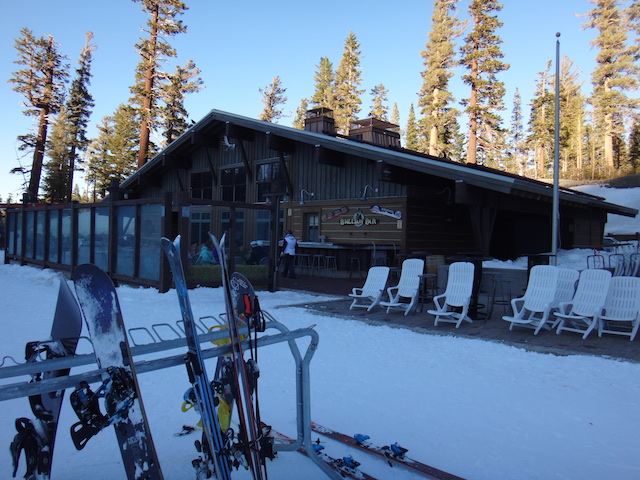
Squaw Valley Village Lodging is ideal for families wanting to hit the slopes early and hard. In Village 1, we were steps from the Funitel Gondola and even closer to dining, tickets, and the Olympic House base lodge. After working hard on the slopes, it’s very welcome to skip a car or shuttle ride and deposit skis and boards directly into in-house ski lockers before hitting the hot tub. Village housing includes 1-3 bedroom units, all of which include a fireplace, full kitchen, and tubs as well as showers. Hot tubs are in Buildings 2-5, so if you opt for Building 1, you’ll be closer to the lifts and enjoy arguably better views, but will have to walk outside and back in to access the hot tub and fitness center.

Squaw valley village

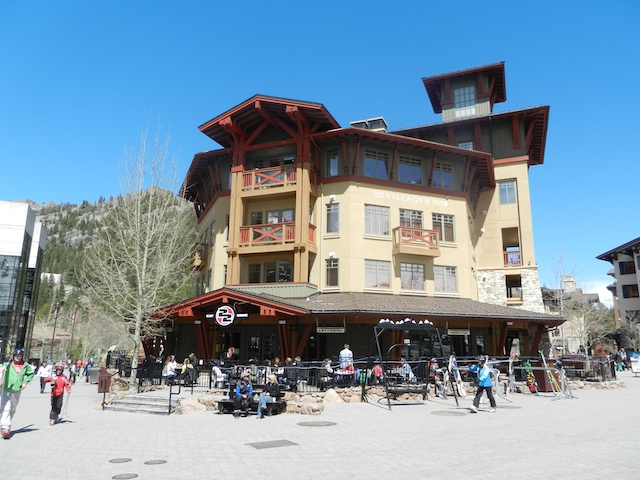
Squaw Village dining:

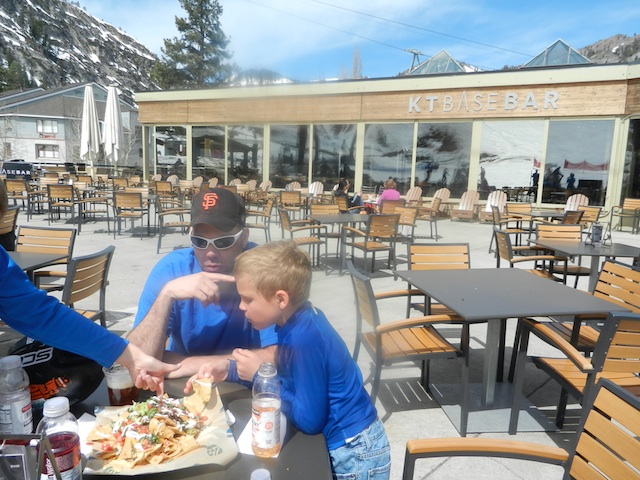
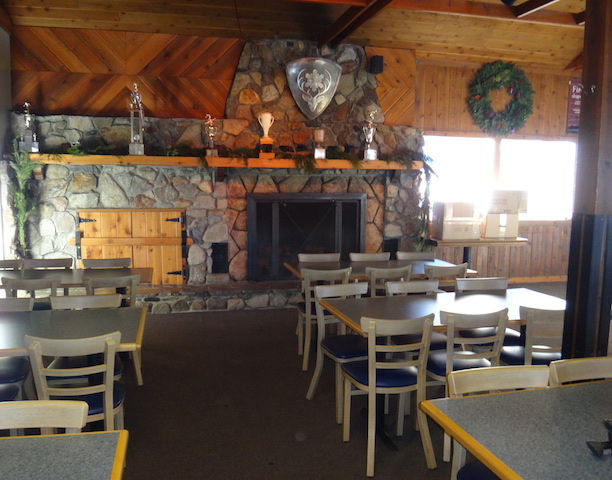
We only stay in ski lodging with kitchens, so we can make some meals in-room to save money. Plus, we’re often just too tired in the evenings to go out! If you do venture out, you won’t need a car: the Village offers everything from burgers to bistro fare to sushi. We had a great meal at MamaSake sushi and a al fresco lunch at KT Base Bar. A small grocery will have whatever you forgot at home to make meals in, though you’ll want to do the bulk of your grocery shopping in Truckee or Reno before arriving.

Lunch is available at mid-mountain at the Arc and at High Camp (more on this destination below), or at the base cafeteria-style, deli-style, or sit-down service style at Olympic House. Another perk of village lodging: we ate several lunches in the comfort of our condo, where we made sandwiches, put our feet up, and hung out on the balcony overlooking the village. Plan on a 15 minute ski down to the base from mid-mountain, and longer to get back up via lifts or gondola after eating.

KT base bar squaw valley

Village and High Camp activities:

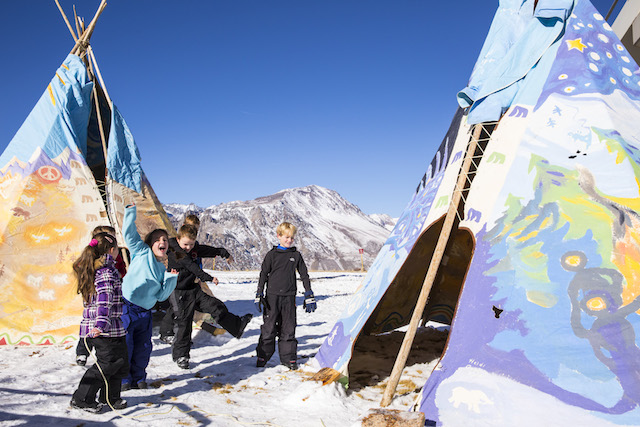
If you have energy left after skiing Squaw’s expert terrain (or more likely, if the kids still have energy), the village offers a fun SkyJump (bungee trampoline) for $12 for 5 minutes that’s worth doing once, as well as an indoor climbing wall. If you have lift tickets, they’ll also get you up the Tram to High Camp, where you can ice skate while watching skiers on the slopes, or in spring and summer, swim in the High Camp pool and hot tub. (In summer, the ice skating rink converts to roller skating.) You’ll find a small Olympic museum at High Camp which is worth a short visit (it could use work, but is free and paints a general picture of the 1960 games), and the trip is worth it for the views alone.

High Camp pool

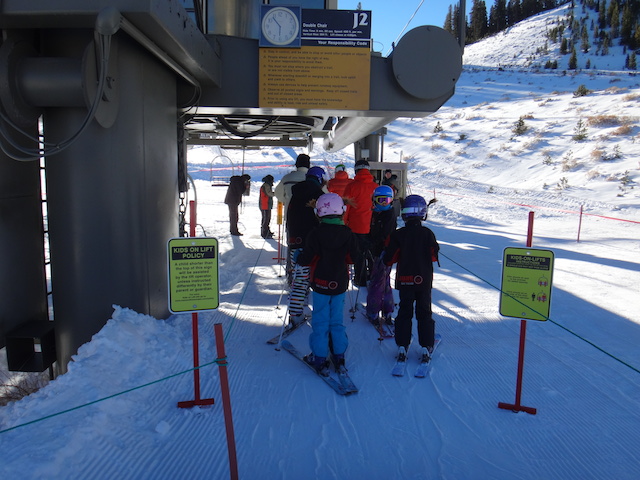
If you have beginners or very young kids:

Squaw Kids features group and private ski lessons, though we have not experienced them firsthand. By High Camp are no fewer than three lifts dedicated to beginners, and even our advanced and expert kids really enjoyed the small/medium terrain park located off Belmont Chair in the beginner area. By the end of our visit, they had graduated to the large terrain park off Gold Coast Chair (which also offers lots of nice intermediate groomers).

As I disclose whenever applicable, we experienced Squaw Valley as guests of the resort, for the purpose of review. All opinions are my own.

Two ways to ski backcountry terrain on your next ski trip

If you’re one of those skiers or snowboarders who looks up at the most distant peak from the chairlift and says, “How do I get up there?” or notes tracks in fresh powder and wishes you’d put them there, you may want to elevate your next ski trip to include a day of backcountry terrain. Or, if you have teens (16 or older) who are yearning to learn what AT or touring skiing is all about, it might be time to try a backcountry experience as a family.

Backcountry skiing off-piste and outside ski resort boundaries can expand your ski horizons exponentially, but it’s crucial to go with a guide until you’ve become trained in reading snow conditions and have the right gear (which often includes an avalanche beacon, shovel, probe, and AT or Alpine Touring skis and boots with skins and a backpack to put it all in). I explored two gorgeous backcountry regions with two fantastic guide services, and highly recommend them both.

Two ways to ski backcountry terrain on your next ski trip

Alpenglow Expeditions, North Lake Tahoe:

Alpenglow Expeditions operates out of Squaw Valley Alpine Meadows in California, and offers both backcountry tours and a variety of snow safety courses. I joined them for a full day in the Squaw Valley backcountry, where we did two laps of the National Geographic Bowl.

I arrived at their office in the Village at Squaw Valley at 8:30 am, ready to ski…minus the gear. Alpenglow can outfit you, which is nice if you don’t already own AT gear. It allows you to try a full backcountry experience before committing to the equipment. The guides at Alpenglow set me up with a ski pack with all the necessities, plus AT skis and boots. I brought my own helmet, goggles, lunch, water, and ski apparel.

The nice thing about Alpenglow’s location is that you can ride the Squaw lifts to where you need to start, saving time and effort. We headed out by 9 am on the Squaw lifts and reached the top of Granite Chief lift by 9:30 am. From here, we boot packed to the top of Granite Chief Peak (approximately a 20 minute, fairly strenuous hike) with our skis strapped on our backs. At the ridge, the snow was fabulous (despite fairly challenging conditions on the lift-served areas). We transitioned into our skis (the guides will help you do this if you haven’t skied AT before). We skied down the bowl, and at the bottom, transitioned again to skin up the trail that led to a side ridge, where we could ski back down to the Granite Chief lift. The skinning uphill took longer…probably an hour or so, and if you haven’t used skins on your skis before, there is a learning curve here. Your heel is freed and the skins on your skis give you traction, so the climb feels similar to cross-country skiing (but a bit more difficult).

When we reached the ridge, we skied down to the chair and did it again! This time, we boot packed a bit farther to explore a different descent, and at the bottom, we enjoyed our packed lunch in the sunshine. We achieved two laps by 1:30 pm, and were back at the village by 2:30 pm. We probably had time for one more lap, but my legs didn’t have the power!

The day proved to be an excellent introduction to Squaw’s backcountry, and since my teenage boys are interested in exploring terrain outside ski area boundaries, I’d definitely sign them up next time. All tours are individual (with either just yourself or just your group) so you can customize as needed. All guides are highly trained in avalanche certification and first aid, and carry radios. I was given an avi beacon and shown how to use it.

Ski Utah Interconnect, Cottonwood Canyons

Headed to Utah instead of Tahoe? I also tried out Ski Utah’s Interconnect tour, which allows you to check out backcountry terrain on your downhill (Alpine) skis. You can read about the Ski Utah Interconnect here, and watch a helpful video starring Deb Lovci, lead guide, but even after doing your research, the Interconnect is hard to explain. It really needs to be experienced. It’s part backcountry adventure, part (permitted) rope ducking, part on-piste hidden tracks, and part off-piste (as in way, way off). No matter what way you look at it, you’re in for seven hours of breathtaking views of the Wasatch Front Range and Heber Valley. Along the way, you get a ski resort sampler platter, with 1-3 runs in each of Deer Valley, Park City, Snowbird, Alta, Brighton and Solitude.

You start your day at Deer Valley Ski Resort, where you meet up in a base lodge and are briefed by your guides. As noted, you can use your own downhill gear, but you’re given a beacon to use for the day. In contrast with my Alpenglow trip, I didn’t need a shovel or probe of my own, so I could use my own small backpack, and I didn’t need to carry a lunch, as it’s provided on the trip.

We started out by skiing a few Deer Valley groomers to get warmed up, then ducked the rope (with permission) and traversed through the backcountry to Park City resort, where we rode another chair up before skiing off-piste through pristine powder toward our next resort on our itinerary. We boot packed a few short times (holding our skis) before making it to Solitude for a delicious lunch at their Roundhouse mid-mountain lodge, which serves up Himalayan mountain cuisine (included). We rode the lifts here to access a backside bowl to Brighton, then rode up again to take the most beautiful traverse, the Highway to Heaven trail toward Alta and Snowbird.


This part of the journey definitely proved most strenuous, but we were rewarded with more gorgeous backcountry on the descent. We skied through Alta and reached Snowbird by 3:30 pm. Skiing six resorts in one day definitely made for a long ski tour, but it didn’t feel that long, thanks to some lift access along the way.

What to know before you book:

For both of these tours, it’s important to be a strong skier, able to ski ungroomed runs with confidence (intermediate or advanced). Perhaps even more importantly, you do need to be fit. The uphill boot packing, skinning, and/or sidestepping will work up a sweat and leave you legs like jell-o! For the Interconnect, you need to be a skier, not a snowboarder, due to restrictions on snowboarding in several of the resorts.

If you’re used to getting plenty of exercise and are a decent (don’t need to be great) skier, don’t hesitate to try one of these tours! It will open your eyes to new skiing possibilities, and greatly enhance your ski trip. Take a day to enjoy the backcountry, then return on-piste with more confidence.

Call the office of either tour to ask any specific questions; they’re eager to help walk you through the process and explain what gear you’ll need and what lift tickets might be required. Let them know of any limitations of your group and be honest with them about capabilities, and they can answer any doubts you may have.

Want a taste of non-lift-served terrain by exploring some side country (within ski area boundaries)? You can expand your limits on downhill skis by signing up for a Hidden Tracks guided day. I checked this out at Solitude Mountain Resort and had a blast with my private guide, who could show me all the hidden stashes and boot-pack trails to (mostly) uncharted terrain. He showed me Solitude’s many gated areas, and we hiked to several pitches of fresh powder. The rest of the time, we traversed and side-slipped to new-to-me slopes within boundary. At Solitude, you can opt for a full day or half day tour; I went half-day, which gave me a nice balance of challenging terrain and some nice groomers after my legs got tired.

Mammoth ski trip tips: Overview of Mammoth Mountain

If you’ve been to Mammoth Mountain, you know that this California ski resort in the Eastern Sierras is bigger than life. Massive in size at 3,500 skiable acres, and with 28 lifts and 150 runs, this world-renown ski resort can be overwhelming to families. Read on for Mammoth ski trip tips gleaned from a first-time visit to Mammoth:

mammoth-mountain-ski-tips

Plan where to stay carefully:

Given the sheer size of Mammoth, it’s very important for families to decide on lodging location with their needs in mind. Stay in the ‘wrong’ section of Mammoth for your needs, and you’ll be spending precious time you should be on the snow in the shuttle or gondolas. Most families stay in the Mammoth Village and Canyon Lodge area, because the majority of services are here, but this means the majority of congestion is also present. If you want ski school for your kids, it is also available at the far less crowded Main Lodge area, to the far side of the resort. Our pick is the Mammoth Mountain Inn, located directly across the street from the lifts at Main Lodge. There are fewer restaurants here, but what there is is great, and far less crowded. The Main Lodge is old-school—you’ll be reminded of ski lodges of your youth if you’re in your 30s or 40s—but has all the essentials without the crowds: lift ticket sales, rentals, ski school, cafeteria, and gear.

terrain-park-mammoth

Break for lunch before or after the noon hour:

Mammoth gets crowded, and even with three main lodges spanning the base of the resort, plus mid-mountain options like McCoy, families will want to steer clear of dining services from 12 pm to 1 pm. We like to hit the slopes early (you have them practically to yourself in the first hour of operation…a fact that hold true at all resorts) then eat lunch around 11 am. Our pick: The Mill which sits at the base of Chair 2. The Mill is small, but oh-so quaint, and offers amble deck seating. It is accessible via car, so that’s a negative, but if you arrive before noon, you can grab food fairly easily.

the-mill-mammoth

Use the shuttle service:

No matter where you stay in Mammoth lodging, the shuttle service runs regularly and, we found, on time. Trust me, you do not want to hunt for parking constantly at Mammoth! When heading to lift areas (again, we recommend starting all the way over at Main Lodge), families who drive and park—with the exception of very early risers—will often walk blocks with their gear. Shuttles will drop you off right at the front, and have plenty of space for skis and boards. Shuttles also run in the evenings for area dining and entertainment.

Ski or ride the mountain in sections:

With three main sections, based around Eagle Lodge, Canyon Lodge, and Main Lodge, skiers and riders can spend significant time transitioning between sections. Instead, pick one for the first few hours on the snow, working your way around. We suggest transferring (via shuttle or lift) to Main Lodge area first, where the crowds are smallest, then tackle Canyon area after an early lunch at The Mill.

Don’t try to cover the entire terrain of Mammoth in one day! If you only have a few days, concentrate on the area that appeals to you most instead of attempting to transverse the hill multiple times. Keep an eye on the Mammoth Mountain app (available for iOS or Android) for the most recently groomed runs.

top-of-california-mammoth

Head to June Mountain for ski school lessons and family-friendly skiing:

Many people don’t realize that Mammoth Mountain lift tickets are good at nearby June Mountain. Only 20 minutes away, June offers manageable terrain with a low-key, family friendly atmosphere with the fraction of the crowds (and with ski school prices at a fraction of the cost of Mammoth). Spend a few days here (kids ski free!) if your kids are learning. If you opt for ski school lessons at Mammoth, definitely take advantage of the discount for multiple days.

June-Mountain

Prepare for the altitude:

Mammoth Mountain’s village sits at 7,953 feet elevation…a significant change if you’re coming from sea level. The ‘top of California’ peak (at the top of the Panorama gondola) is 11,053. Signs of altitude sickness include headaches, stomach aches or thirst. Be sure to give your kids plenty of water during and before their ski day (start hydrating on your travel day) and take it easy your first morning on the slopes.

Rates:
Regular adult ticket price (non-holiday or early season) bought online pre-trip is $94. Kids are $35.

Lodging:
Families have every possible lodging option at Mammoth, from single family vacation homes to village condos to hotel rooms. Start with Mammoth lodging, narrowing down the options by which area you want to base yourself in, what type of lodging you need, and what services you want (shuttle, hot tubs, rental services in-lodging).

Directions:
From Southern California, take I-5 north to State Route 14 north to US 395 north to State Route 203 (300-375 miles). From San Francisco, take Interstate 80 to Hwy 50 to Kingsbury Grade cutoff to US 395 south to State Route 203 (320 miles).

Disclosure: I experienced Mammoth Mountain as the guest of the resort, for the purpose of review. All opinions are my own.

June Mountain skiing for families: the best kept secret of the Sierras

Skiing families have heard of Mammoth Mountain, one of the largest ski resorts in the western US. But are your familiar with Mammoth’s little sister, June? June Mountain Ski Area is located less than 20 minutes from Mammoth, tucked into a blissfully serene corner of the Eastern Sierras adjacent to pretty June Lake. Arrive at June—which cozies up to the boundary of Yosemite National Park—and you’d swear you’re a world away from busy, often crowded Mammoth.

June-Mountain-skiing

June Mountain closed its doors for the 2012-2013 season, much to the dismay of the local community and its loyal patrons, and re-opened this season (2013-2014) with new energy, new ideas, and a new focus: families.

June Mountain skiing for families:

The potential as a family-focused ski area has been present in June’s foundation all along: arriving at June, families find just one parking lot (as opposed to half a dozen), one chair over the face of the mountain to the main lodge, and plenty of greeters to help with all that ski equipment. The ‘Chalet’ lodge is beautiful, peaceful, and offers breathtaking views of the Sierras, and provides families with all they need (and not more): dining services, lockers, rentals, and a roaring fireplace.

June-Mountain-face

The terrain at June is 45% intermediate and 35% beginner, making it an ideal place to focus on making those first turns without crowds or distractions, but the 20% of advanced terrain is nothing to scoff at: I practically drooled looking at the black diamond chutes at June, and the ski area is known for its excellent backcountry. In this manner, June offers skiers and snowboarders two extremes: intense off-trail glade and tree skiing and easy groomers. Note: the only less-than-young-kid-friendly aspect of June Mountain is the initial J1 chair, required to access the lodge and ski terrain. This double chair rises up and over the June face, and can be more difficult to load than most chairs (due to the bar in the center). Families with backpacks or other gear and young kids will want to ask the lifties to slow the chair until they’re well-versed, and you’ll want to use the safety bar on the ascent. This chair can be downloaded as well, for families not wishing to ski to the bottom at the end of the day.

June-Mountain

Families’ ski vacation dollars will stretch much farther at June than Mammoth. Lessons are roughly half the cost, and kids 12 and under ski free at June any and every day of the year. No blackout dates. No restrictions. What this means to me: I can afford to pay for multiple-day lessons for my school-aged kids!

Youth (ages 13-17) pay just $48 for a regular one-day lift ticket, and adults $72, but if you’ll be there more than four days in a season, June season passes offer even steeper savings. With 1,400 skiable acres, June is far more manageable for families; parents can allow kids free reign to explore, and with only one lodge, there’s no fear of school-aged kids getting lost on the hill. You get seven lifts and 35 named trails, with plenty more in the trees.

The nature nut in me loves that fact that June appreciates its location on National Forest Service land and incorporates nature walks and interpretive programs into its kids’ programming. Expect to see scheduled nature walks during the day, and check out signage pointing out animal tracks to be observed in the snow. Pretty different from your average ski resort, right?

June-Mountain-Chalet-lodge

Still not sure? If you’re skiing at Mammoth Mountain, you can try June risk-free: your Mammoth lift ticket is good here. Our recommendation: start at June for lessons for the kids (or yourself) and work your way up to Mammoth. We’re fans of both mountains, but our ultimate goal at Pit Stops for Kids is to help families make the most of their vacations and spend their ski trip budget wisely. Try June and see the value of a relaxed, friendly, low-key ski community!

Lodging:

There are several options in June Lake, just minutes from the ski area. However, if you’re staying at Mammoth, rest assured: you’re only 20 minutes away.

Dining:

You’ll find good ski hill fare at the Chalet lodge at June, but this resort is ‘sack lunch friendly’ as well. In the town of June Lake, apres or dinner options can be found along the main drag from the ski area.

june-mountain-teepee

Directions:

June Mountain, Ca. is located about 20 miles north of Mammoth Lakes in June Lake. From US 395, take Hwy. 158 west at the June Lake Loop. Drive approx. 4 miles to the ski area.

Knowing your ski ability level: how to interpret ski slope ratings for your family

This fun infographic says it all, and if you go on a family ski vacation, you’ll see these universal ski slope ratings no matter where you go:


How to know your (and your kids’) ski ability level:

Get out there and ski! There are many ways to gauge a skier’s level (we recommending taking family lessons when visiting major ski resorts), but if you find yourself free-skiing with your kids, start with beginner runs but don’t be afraid to push yourself to steeper terrain.

Green means go: Green circle beginner runs are great for everyone, from the new skiers in your family to the little shredders. Green runs are always groomed, and often take the form of ‘cat tracks’ or ‘roads’ that kids find very fun to navigate. Kids with higher ability levels will enjoy veering off the trail to find fresh powder or small jumps, but keep the speed down: green runs are meant for beginners and more cautious skiers and snowboarders.

Blue means explore: We say that blue square intermediate runs foster exploration because once you’ve graduated beyond green runs, the terrain gets more exciting! Blue runs can take many forms, including long groomers, more cat tracks, and even some gladed (tree-lined) skiing. Blue runs are almost always available from the top of even the highest chairs, meaning you or your kids can now navigate the whole peak!

Black means expert: No doubt about it, black diamond runs should be respected. Like blue runs, black runs can take many forms, and vary in difficulty. They can contain moguls, bowls, powder, and deep ruts, and can be harder to navigate in poor conditions, such as ice or fog. Don’t be afraid to try them, however; my kids all remember their first black diamond runs!

More than one factor goes into a ski slope rating:

Bear in mind that steepness is not the only criteria that goes into a ski slope rating. Bumps and moguls (which can alter overnight), sharp turns, and bowls with ever-changing conditions also constitute higher ratings. Even once a run has been labeled, look twice before attempting it: visibility, snow conditions, and weather all effect a run’s difficulty on any given day.

Study the resort trail map before hitting the slopes:

My kids love looking over the trail map, and I admit I’m guilty of pouring over it pre-vacation, too. While families are not going to memorize every run, it’s nice to find the lifts that offer the most selection of runs in the level of your choice, or identify lifts that offer a green and blue run adjacent to one another, should you have a beginner and an intermediate skier cruising along together.

This post was written in conjunction with my partnership with Mountain Reservations as a Mountain Ambassador.

Timberline Lodge and ski resort

If you’re looking for a Pacific Northwest ski resort experience that will really impress while remaining kid and family-friendly, you’ll want to book an overnight ski package at Timberline Lodge, a ski-in and ski-out resort nestled on the slopes of Timberline in Oregon’s Mt. Hood area.

We love Timberline Lodge’s historic beauty, cozy rooms, and majestic views, but the best thing is, guests don’t have to sacrifice any of these features for family-friendly prices. Kids under age 11 eat free in the dining room (off the children’s menu), ski and stay packages are always on offer, and rooms are reasonably priced (kids stay free in the same room as parents, or add an extra room for the kids with two twin beds for only $105 a night!).

During ski season, families love the convenience of the lodge’s ski-in and out location, the cavernous ski locker and storage area on the main lobby level, and the wonderful (and filling) ski morning breakfasts in the main dining room. Visitors in the off-season can fill their days hiking, biking, and wildflower spotting on the high mountain peaks. And all year round, Timberline’s heated outdoor pool and hot tub ease the muscle aches of a busy day. Kids love swimming under the stars at night, and adults will appreciate the free coffee, comfortable couches, and games and reading material on-hand in the beautiful lobby.

Main lobby of Timberline Lodge. The stone fire...

Image via Wikipedia

The ski resort itself is perfect for beginners and families representing multiple ski and riding levels. The ride up the top chair offers plenty of challenging terrain, but much of the lower mountain sports wide, groomed trails and expanses. We love that the Wy’East ski lodge is just across the parking lot from the Timberline Lodge for quick snacks, ski rental equipment, and other ski resort fare.

Distance from the interstate: Timberline is located just over an hour from Portland, OR just off Hwy 26 past Government Camp.

Room rates: $155 for a queen room and $105 for a double twin room at time of this publication. Consider coming midweek, when your room will include ski tickets, complimentary breakfast, and a $20 dining room credit!

Dining: For a single lodge, there are a surprising number of dining options for families. The Cascade Dining Room can’t be beat for breakfast, and if you’re looking for an upscale evening meal in a no-fuss or frills atmosphere where kids are welcome (and eat free!), this is the place for dinner, too. If you’re looking for something more casual after a day of skiing or hiking, the Ram’s Head Bar, located on the second-floor landing, has great pub-type food and drinks.

Directions: From Salem, OR: Follow I-5 North to I-205, then take I-205 North to the Mt. Hood exit; turn right. Follow signs to Mt Hood/Government Camp,then follow Hwy 26 to the Timberline access road, just past Government Camp. Turn left on Timberline access road; follow the road to Timberline (6 miles).

From Portland: Take the 205 South to I-84 East (The Dalles exit), then I-84 East to exit 16 “Wood Village”. Go right at stop sign on to 238th, then follow 238th (which becomes 242nd) to Burnside (approx. 3 mi.) Take a left on Burnside, which turns into Hwy 26 East. Follow Hwy 26 East to the Timberline Road turn-off (about 40 mi.); pass through the towns of Sandy, Welches, and Rhododendron. Turn left on the Timberline access road; follow the road to Timberline (6 mi.)

Home (Away) for the Holidays: Five things to do from our front door

Taking in the view from our backyard

As you know, we loved our HomeAway vacation rental in South Tahoe. Not only is this house idyllic, comfortable, and convenient, but it sits right in the midst of Eldorado National Forest, providing acres of wilderness to explore right from the front door.

It’s not in a neighborhood of multi-million dollar mansions lining Lake Tahoe, for which we couldn’t have been happier. Instead, it’s located just minutes from Echo Summit, fifteen mountain road miles from the city. Most of the neighboring homes consist of summer cabins closed up for the season, the snowy roads free of traffic and completely peaceful. In all directions, we could find pristine snow and beautiful pine woods. We certainly weren’t lacking for entertainment, however!

Five things to do five minutes or less from our vacation home’s front door:

1. Build a snow fort! Kids become quite industrious when faced with 3-4 feet of Sierra powder to play in! This one took over an hour to build, but not once did anyone complain of boredom, cold, hunger, or any of the other usual maladies parents dread. Best of all, it stayed up for days!

Toby sets out from our back door!

2. Go snowshoeing! When you stay in a house abutting the wilderness, there’s no long drive, no hassle, and no extra planning: we literally put on our snowshoes at the bottom of our porch and set off into the backyard. Right down the road, we found a mountain meadow of pristine snow, which the kids immediately filled with snow angels. Visitors can rent snowshoes from a local outfitter, or from nearby Sierra-at-Tahoe (for use on their three miles of groomed snowshoe trails).

3. Ski for the day! We timed it: Sierra at Tahoe ski resort is four minutes away by car (probably one minute as the crow flies!). We have so much to say about this truly family-friendly ski resort that it deserves its own article; with the perfect combination of easy to difficult terrain, the affordable prices, and the added touches for kids, this is the perfect ski resort to have in your ‘backyard’.

4. Sled or tube! Sierra at Tahoe features a great tubing hill for young children (and it’s located on the other side of the resort from the busy ski center), and three miles from our vacation home is Adventure Mountain, a groomed sledding and snow playground right on Hwy 50. We also grabbed our sleds and played just feet from the house on the powdery slopes above the meadow!

5. Warm up by the fireside! Grab some hot cocoa, curl up by the beautiful fireplace, and play a board game together as a family (bring your own or borrow one from the selection already here). Or let everyone relax by watching a movie. With TVs and high speed internet (I was glad to be able to work seamlessly while on vacation), ‘down time’ is easy. If you want a treat, try what we call a ‘Mountain Snow Cone’: grab a cup of fresh snow, add maple syrup and a dash of milk, stir, and enjoy!

A note on dining: One of our favorite things about renting a vacation home from HomeAway is the ability to cook and dine at home instead of eat out. We just find it more restful (and affordable) with three kids who are always tired out by the day’s activities. During our stay, we only visited one restaurant (besides the dining venues at Sierra at Tahoe ski resort), and it was excellent. It’s called Freshies, and it’s a local Hawaiian fusion favorite. Don’t let the tucked away strip mall location deter you! (3330 Lake Tahoe Blvd.) If you do decide to eat out regularly, South Tahoe has just about any cuisine you could ask for (approximately 15-20 minutes from the house).

For summer vacationers, note that the trailhead for the Desolation Wilderness area is steps from our vacation home’s door, as well!

If you’re interested in the experience we had, the home we rented can be found here at HomeAway. As stated previously, HomeAway generously hosted us during this portion of our Tahoe Holiday. This compensation came with no expectation of a positive review. Read all our articles in our Home (Away) for the Holidays series!

Home (Away) for the Holidays: Sierra at Tahoe ski resort

We’re a family who loves to ski. We’ve visited many ski resorts, including a large sampling of what the Lake Tahoe area has to offer. During our Home (Away) for the Holidays vacation week, our rental home is right at the base of Sierra at Tahoe resort, so we checked it out. In a word:

Wow.

family ski resort

We don’t say that lightly, but Sierra at Tahoe has so much going for it, we were floored. It is, without a doubt, the most family-friendly mid-sized ski resort we’ve ever visited. What makes it so great?

It’s in the details. Sierra at Tahoe is like the host or hostess who thinks of everything to make your stay convenient and enjoyable. If you ski with young kids, you know how the experience can either be great…or terrible. And it can turn in an instant. Long treks from the car to the lodge, long lift lines, difficult terrain, expensive tickets…it can all add up to a miserable time. We know; we’ve been there. But Sierra makes the extra effort to ensure families have an easy time of it. How?

Preferred family parking and drop-off lines. For a small fee, you can enjoy parking right up front…not a lot to pay when you’re lugging not only your own ski gear but likely your toddler’s. And if that’s not in the budget, just use their drop-off zone. Let the kids and one adult unload with all the gear, go park, and meet back up!

Groomed trails and powder...the perfect combination!

Affordable ticket prices. Skiing is an expensive sport, and Sierra is cognisant of this fact. Ticket prices here are lower than the Tahoe average, and deals abound. If you plan to ski more than one day, consider buying their 3 Pak, which saves you over $20 a day for adults and $5 a day for kids. And there are no blackout dates. They’ve also bundled lift tickets with ski or board rentals and lessons for those families who need them with their $35 Learn to Ski or Ride packages.

Extra ticket options perfect for families: Sierra at Tahoe is the only resort we’ve visited to offer Parent Predicament tickets and Fast Pass tickets. How do they work? Parent Predicament: if two parents are visiting with a non-skiing child or baby, this ticket allows you to buy just one ticket to share instead of two (to waste). Just ask for it at the ticket booth, and you’ll be able to ‘tag team’ ski all day long! Fast Pass: Part of Sierra’s Vertical Plus program, families can add Fast Pass privileges to any ticket for $20. We used this feature, and let me tell you, on a busy holiday day or weekend, it’s worth its weight in gold. Instead of waiting in the regular lift lines, we accessed the Vertical Plus line (marked with a yellow banner), and didn’t wait more than one minute all day long. We more than made up for the price of the upgrade in increased ski time! Insider Tip: If you pair this upgrade with a 3 Pak, which saves you $20/day, you essentially come out even!

Professional children’s programs and features. When it came time to hire a children’s ski school staff, Sierra went looking for childcare professionals, not babysitters. Their children’s programs are run by experienced early childhood learning instructors, with an emphasis on both skiing and riding fun and education. We loved that there are several ski school areas across the mountain so that children (and adults) can learn with peers in their own age group. And if your kids aren’t taking lessons, there’s still great features on the mountain for them. Look for Sierra’s Adventure Zones, designated on the trail map by a paw print. Our kids had fun trying to spot the mine shaft, bear cave, and more…all located in various spots on the mountain.

A unique terrain. Sierra’s layout is unique in several respects. Firstly, the mountain is designed in a way that allows families to split up and meet back up easily. Lodges and restaurants are located for easy access, and runs feed into a central ‘bowl’, making it easy to ‘meet at the lodge’. The mountain’s groomers even go so far as to consider beginning skiers and riders when shaping the runs, ensuring less hiking, stopping, and frustration. More importantly to us, easy, intermediate, and advanced terrain are seamlessly intermixed, allowing family members with different ability levels to ski together. Toby (age 6) loved that he could ride the chair to the peak of the mountain with his brothers, and still find a fun, easy way down while they tackled moguls and powder.

sierra-at-tahoe

A great location. Because Sierra at Tahoe is located in Eldorado National Forest, skiers and riders are surrounded by wilderness…not condos and excess parking lots. The only area in Tahoe with an old-growth forest, the powder and tree skiing is awesome. Advanced skiers and riders will love Huckleberry Gates, a section on the far side of the mountain with back-country style access to trees, powder, cornices, and drop-offs. Experts can be highly challenged but still meet up with beginners in the lift line!

Plenty of on-mountain dining. We ate at The Pub and Aspen Cafe during our visit, both of which were delicious. We loved that nearly every on-site restaurant offers affordable kid meals, and that outside food is permitted. No one wants to spend all their vacation money on lunch!

More than just skiing: If you’re not sure whether downhill skiing is for you and your family (or if you just need a break from skiing on an off-day), Sierra also has a full tubing and snow play park and over three miles of snowshoe trails. Tubes are available on-site, and snowshoes can be rented in the ski and board rental center.

snowshoeing-with-kids

Date last visited: March 2016

Website: www.sierraattahoe.com

Distance from the Interstate: Two minutes from US Hwy 50. 15 miles from South Lake Tahoe, and 80 miles from I-5 near Sacramento, CA.

Directions: From South Lake Tahoe, just take Hwy 50 over Echo Summit to the Sierra at Tahoe entrance!

Check out the Pit Stops for Kids’ Kid Cam for a sneak peak of Sierra at Tahoe!

As I disclose with all compensated reviews, Sierra at Tahoe generously hosted us for this portion of our Tahoe Holiday review series. While we greatly appreciate their hospitality, this compensation came with no expectation of a positive review. Read all our articles in our Home (Away) for the Holidays series!


Related articles

Sunriver Resort, Oregon

Toby kicks back and relaxes in the snow at Sunriver.Located thirty minutes from Bend, Oregon along Hwy 97, Sunriver, Oregon is an outdoors-lover’s paradise four seasons out of the year. The Pit Stops for Kids family has visited in winter, spring, and summer, and had so much to do and see each time that we definitely need to go back!

Sunriver is a vibrant resort community of vacation homes and a village center of shops and restaurants centered around a main lodge, all nestled among the pines of central Oregon and in the shadow of Mt. Bachelor. The lodge often runs special packages ideal for families and weekend getaways, but if you’re looking for a magical place to spend your winter holiday vacation, Pit Stops for Kids recommends one of Sunriver’s vacation home rentals, such as these listings currently offered by HomeAway.

We were fortunate enough to spend a Christmas week here, and the kids (and I!) have never forgot it. Right in the Sunriver community, you have it all: snow outside your door (most of the time, anyway!), a sledding hill within walking distance, a year-round pool and hot tub (at the lodge, free access with most home rentals), cross-country and snow-shoe trails (doubling as walking and biking trails in the summer months), a village center with outdoor ice skating rink, award-winning restaurants, and kids’ activity clubs.

Holiday lights at the Sunriver Resort.

During the holiday season, there are tree-lighting ceremonies, cookies with Santa, The Night Before Christmas readings, bonfires, and more. We ate a delicious and festive Christmas Eve dinner at one of the lodge’s several dining rooms before returning to our cozy rental to hang the stockings and leave out cookies and milk for Santa. Christmas Day, we spent most our afternoon sledding, sipping cocoa, and playing board games. It really couldn’t be beat!

If you’re a skier, Mt. Bachelor ski resort is only twenty miles away, (arguably) offering the very best downhill experience of the area. Check for bundled ski/stay rates with Sunriver!

Distance from the nearest interstate: Right on Hwy 97 (30 minutes from OR Hwy 20).

Date Last Visited: December 2009

Rentals and Room Rates: Vary. Check the above links for room rates from the source!

Dining options: There are many, but our favorites are The Grille at Crosswater (for fine dining) in the lodge and Goody’s in the Sunriver Village. There is also a grocery store in the village, but for better prices, you might want to head into Bend, where you’ll find a Trader Joe’s, Albertson’s, and the like.

Website: Sunriver Resort

Directions: To get to the resort from Bend, take highway 97 to the exit at Cottonwood Road. Take a left at S. Imnaha Rd, then another left at E Cascade Rd. At the traffic circle, continue straight to stay on E Cascade Rd, then turn left to stay on E Cascade Rd. At the next traffic circle (yes, it’s confusing!), take the 3rd exit onto Abbot Dr, then turn left at Summit View Dr to the resort entrance.