Winter driving tips for holiday road trips

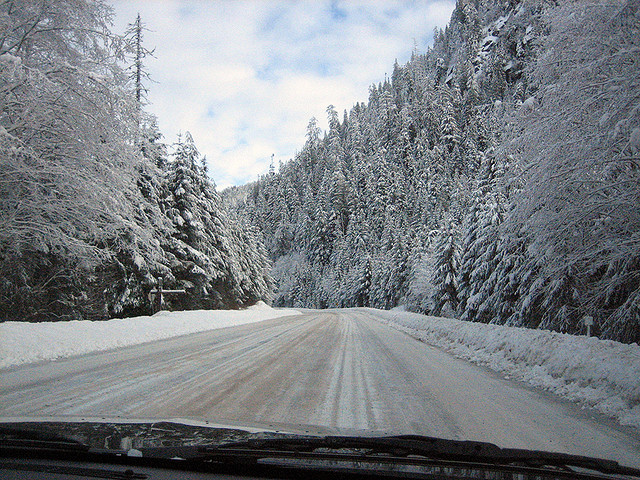
It can happen in an instant, and last February, it did: one moment, we were making the turn from an icy highway onto a ski resort access road, and the next, we were sliding into a snowbank, nose first. Luckily, everyone was ok, but our car suffered upon its impact with the wall of snow. After rolling into the parking lot, we spent valuable ski time accessing the damage and making sure our car would be able to deliver us back home safely. Our brush with the snowbank turned out to be only a minor inconvenience (and the cost of our deductible), but it served as a good reminder to always be prepared.

winter-driving-tips

Read on for winter driving tips for holiday road trips

Keep snow chains in your car at all times:

I’m embarrassed to say we had our chains with us the day we got up close and personal with the snowbank, but hadn’t taken the time to put them on. If you’re not familiar with their installation, practice at home (this can be a good activity to do with school-aged kids and teens). If you really don’t want to hassle with it, consider winter snow tires.

Travel with extra supplies:

In winter, we have two extra blankets, a few flashlights (with batteries), and a jug of drinking water in the back of the car at all times. You never know when you’ll be caught on a pass that closes or stuck roadside. If you’re not already packing these items, also pack:

  • a pair of winter boots
  • gloves
  • a small shovel

You’ll be very glad to have them if you need to get out to install chains or dig yourself out of snow.

Know your comfort level:

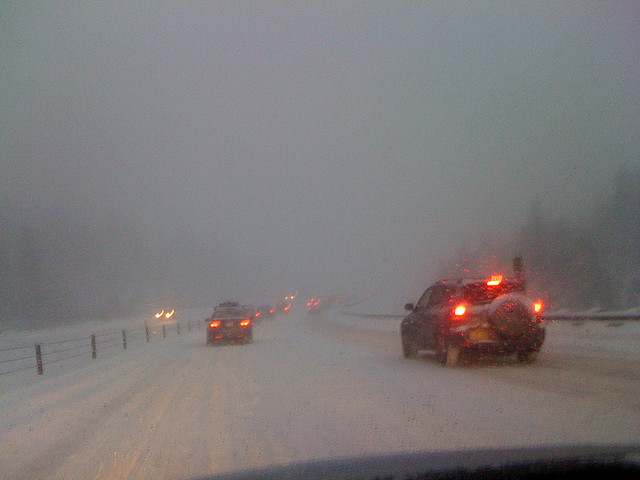
In our winter driving experiences, we’ve seen it many times: a driver slows past the point of caution and to the point of danger to others. When climbing a steep, icy hill or navigating a windy winter road, slowing too much can cause traffic behind you to lose momentum…and then traction. To avoid causing a mess behind you, only drive a road you feel comfortable navigating at a steady, safe speed, in a vehicle that’s up for the challenge. Of course, this is easier said than done. If you do feel overwhelmed in a white-out or ice situation, wait until you reach level ground, and pull over when safe. Better yet, consider paying for a shuttle from your resort to your ski area or even from the airport. The price may be worth the peace of mind.

winter driving

Check tire pressure and windshield wiper fluid levels before leaving home:

We learned this tip the hard way, when forced to search everywhere for an open garage on a holiday weekend in December, while road tripping to Canada. Tip: ask for recommendations at local gas stations. Attendants there can often point you in the direction of shops that remain open. It’s far easier to deal with mundane maintenance issues while you’re still at home. Using precious vacation time to inflate tires gets old very fast. Also make certain you replace older tires and have the proper tires for your car, in all seasons. Tyre-Shopper is a good place to start for UK readers.

Have roadside assistance at the ready:

Whether you opt for a pay-as-you-need-it service like Allstate’s Roadside Assistance, which you can learn more about in this post on road trip tips, or subscribe to AAA, have a plan in place for roadside emergencies.

Top travel apps for winter road tripping:

You’ll need plenty of pit stops during your winter road trip! In addition to utilizing the hundreds of reviews on Pit Stops for Kids (did you know your smart phone will automatically load our mobile app?), check out the following for indoor play spaces and museums, low cost gasoline, and road side help.

Trekaroo app: Leave your own reviews of the restaurants, hotels, and attractions you visit on the road and help out other parents. The Trekaroo mobile app works much like TripAdvisor, allowing you to help out others (and read real parent reviews while on the go).

Pillows and Pitstops (UK): For my UK readers, Pillows and Pitstops is like the Pit Stops for Kids of Britain! I love that parents can plug in their beginning and ending locations, and get ideas for their route.

Fuelcaster: Gas prices tend to go up during peak car travel periods, such as winter holidays. With Fuelcaster, we can check on fuel prices as we go, predicting what we’ll pay. This way, we can know whether it’s best to ‘top off’ or wait. Just don’t run out of gas trying to find the best deal!

Department of Transportation: There are plenty of traffic apps out there, but dot.gov should be your starting point for road conditions in every state. We like to check the desktop site before we leave, then have the mobile site loaded on at least one phone during any winter trip.

Do you need more winter driving tips? We have our best all-season road trip advice at the ready!

Photo by: Flickr/miguelb

Dining in Dublin with kids

Dublin, Ireland may be heralded as a pub-crawl capitol for tourists, and yes, you do want to belly up for a Guinness (or two) while in town,  but when it comes to family-friendly dining, it’s a home run. Kids are welcome in pubs and tea and coffee houses, and parents may also be surprised to find a wide variety of ethnic dining options as Dublin becomes more and more diverse.

dining-in-dublin

Dining in Dublin: where to eat with kids

Some of the best eats in Dublin with kids are found in the Temple Bar area. Yes, this section of the city is touristy, but for good reason. It’s beautiful, walkable, and if you go for breakfast instead of late night drinking, it’s relatively quiet and even tranquil. We can vouch for the hearty breakfasts at Elephant and Castle.

Even better, coming from someone with a definite sweet tooth: head to Queen of Tarts. This popular (and I do mean popular!) brunch spot appeals to tourists and locals alike. In fact, when Pit Stops for Kids’ east coast editor Kate lived here, we ate at Queen of Tarts regularly. You can find homemade pastries, breakfast menu items, and, of course tarts, as well as decadent desserts and a wide selection of coffees and teas. Come mid-morning, and expect to remain full most of the day.

temple-bar

More in the mood for traditional pub fare? Try Gallagher’s Boxty House, where the kids can sample entree items like blood pudding, corned beef, or shepherd’s pie, or stick to familiar fare such as burgers and salads.

Not far from Temple Bar near Trinity College in the South Inner City neighborhood, The Pig’s Ear serves bistro-style fare that’s simple yet inventive, making it fun for both kids and the adults in your group. Just a short walk away, Lemon Crepe and Coffee serves up quick breakfast favorites like nutella crepes and egg dishes. This is the best location to get a breakfast on the go before touring the Trinity section of the city.

As mentioned above, Dublin also boosts great ethnic restaurants, particularly Indian. We love Jewel in the Crown, located in the South Inner City. Nothing very fancy here…just good, homemade, authentic Indian cuisine, and plenty of it. Nearby on Georges Street, Jaipur vies for your attention…and is a worthy pick, though more expensive.

For more Dublin dining picks from a once-local, click to WanderMom’s Ireland with Kids travel guide.

Where to eat outside the city:

We wrote recently about best day trips from Dublin families can take by renting a car in Ireland. Here’s where to stop and grab a bite in four Irish country towns:

queen-of-tarts

Enniskerry: Get a good breakfast or lunch at Poppies, which advertises ‘country cooking’ and a very cute storefront with patio street-side seating. Poppies goes beyond sandwiches and soups to deliver on home cooked, hot meals that lean toward the heavy side. Think meat pies, roasted chicken, and the like.

Glendalough: Located in the Glendalough Hotel, the Glendalough Tavern is where to go when you’re looking for authentic Irish pub fare. Want something lighter? Try Glendalough Green, which serves vegetarian and Mediterranean dishes.

Kilkenny: Tour the Kilkenny castle, then stop to eat sandwiches at BlaaBlaaBlaa. Also consider a detour on the M9 to Tulley, Ireland, where kids can indulge at the Chocolate Garden of Ireland. Kids will love the outdoor, innovative play space, but be even more enthralled with the chocolate workshop!

kilkenny-castle

Tip while driving in Ireland: be on the lookout for Irish mini-markets. We found them to be better stocked than the US version, with quite a few healthy snack and meal options for lunches on the go.

This post was done in partnership with Enterprise Rent-a-Car but they had no input on the content. All opinions are my own.

Photo credit: Abigail Silvester and Flickr commons

Broadening Children’s Horizons Through Travel

If your kids play computer games that take them to other worlds, exploit that interest by traveling to places which inspire them. Parents and kids can broaden their horizons through exposure to another culture, its cuisine and customs, and still have a ball on vacation.

travel-with-kids

Try Ancient Greece or Egypt

Bargain holidays could allow a visit to Egypt, the land of the Pharaohs awaiting new explorers. In Greece your child could experience the mystery behind myths and legends so many movies have plundered for their plotlines. Once here, the kids will find these lands anything but ancient.

Capture the Experience

Sweltering in outdoor heat, it becomes easier to appreciate the labours of slaves or the determination of heroes to cross seas and deserts. Immerse yourself in the scene. The taste of cool, clear water, the spicy fragrance that entices hungry appetites to a welcome meal, the texture of fresh hot bread all become part of an important experience which leads to further appreciation of our easy-buy society.

Understand the Past

Hikes along the paths trodden by those long ago will show the difficulty ancient tribes had in their everyday lives. With no cars, no trains and no planes, but just camels, horses or donkeys to help carry heavy loads and transport people and goods to new locations, the efforts made by those who built fabulous palaces and monuments become even more awesome.

Find out How and Why

With exposure to foreign customs and languages your child will get a feel for how and why certain practises dominate. In hot countries where electricity and refrigeration are limited, foodstuffs are preserved in salt, oil or sugar to prevent them going off. Try some new tastes recommended by locals. Rural areas don’t have the shops and malls commonplace back home and your mind-set has to adjust to new conditions.

Bring Back Souvenirs

Every sense can experience something new. Unfamiliar sights, sounds and smells in bazaars and market places offer a treat deserving of souvenirs to remind you of them when you return home. Museums and areas of local interest will invite questions, which is always a good thing to enhance education and understanding. Off the beaten path, with a guide to keep you safe, some of the more primitive areas will encourage self-sufficiency and creative solutions to problems arising in hostile environments.

Seeing how others live in different cultures will give kids a worldly view and appreciation of their home comforts.

Image by Jimmie, used under the Creative Commons license. 

Car seat safety reminder and convertible car seat review

It’s road trip season! Early summer is a great time to make sure your kids’ car seats are installed correctly, and don’t need to be replaced. Pit Stops for Kids got the latest scoop in car seat safety and car seat requirements from Safety1st Consumer Safety Expert Julie Vallese. Even those of us who are not new parents could use some reminders as we head into road trip season!

car-seat-safety

The three most important things when choosing a car seat are:

  •  One that fits your child
  •  One that fits your car
  •  One that you will use correctly every time

You can accomplish this by:

  •  Having the car you will be using the seat in with you and try it out at the store
  •  Having your child with you at the time of purchase
  •  Following information in both the car seat manual and vehicle manual for installation
  • Attending a car seat check for assistance in proper installation and use from a certified car seat technician

Read car seat requirements from Safety1st!

New rules for car seats using LATCH require understanding of your car seat’s weight and child’s weight:

  • Car seats manufactured after February 27, 2014 are required to carry a new label with guidance on maximum weight limits for LATCH
  • The combined weight should not exceed 65lbs
  •  Look in the manual and label on the car seat to identify the weight of the seat
  • Look for a weight on the maximum weight for the child
  • Know your child’s weight
  • If the combined weight of the seat and your child exceeds 65lbs-install the car seat using the vehicle’s belt

Click to read more safety tips for car seats!

 Review of the Safety1st Advance SE 65 Air convertible car seat

car-seat-review

Car seats just keep getting more advanced! The Advance 65 Air+ Convertible Car Seat features technology designed to keep children from 5-65 pounds safer in the car. How so? The cushion system includes patented foam in hexagonal shapes for protection around the torso, allowing for better side impact protection. And the Advance 65 Air + uses a steel-reinforced frame for extra stability. You get a four position recline, which helps the seat fit optimally in your car, and color-coded belt paths take human error out of installation.

But let’s get to where to rubber meets the road: we had the Advance 65 Air + tested by a real Pit Stops for Kids mom and toddler. In addition to the safety features, our reviewer noticed the following perks while using the seat day-in and day-out:

  • Fully formed headrest, making the seat much more comfortable when the toddler falls asleep.
  • Easy buckling system, and easy to wash: our reviewer completely removed the cover and washed it (and put it back on) with no problems.
  • Carrying handle: need we say more? This car seat is heavy, and the handle makes it much easier to lug around.

Here’s the nitty-gritty: 

  • Rear-facing 5-40 pounds
  • Forward-facing 22-65 pounds
  • Featuring Air Protect +
  • 10-position headrest grows with your child
  • No re-thread harness
  • 4-position recline for optimal fit to your car
  • LATCH equipped
  • Integrated cup holder

 As we disclose whenever applicable, our reviewer received a Safety1st carseat for the purpose of review. Without review product tests, we’d be unable to provide real mom reviews on Pit Stops for Kids.

SaveSave

How to make a 5 item outdoor survival kit for $5

survival-kit-for-kidsWe love getting kids into the outdoors! At Pit Stops for Kids, we’re fans of backpacking, camping, climbing, mountain biking, geo-caching…you get the idea. But as a one-time Search and Rescue volunteer who has spent countless hours teaching school kids how to stay safe in the woods, I want families to be prepared. Kids can occasionally get lost in the wilderness, but by heeding the following advice and being prepared, almost all are found almost immediately by their parents.

The best advice to give your kids: if you get lost, stay in one place. 


The second best thing to do: make your kids this 5 item outdoor survival kit for $5. These items fit easily into a waist pack or into any day pack.

5 item outdoor survival kit for kids:

1. Whistle

Go to your local sports equipment store or dollar store, and buy a cheap whistle. Let your kids know this is an emergency whistle: not to be used for play. The sound of a whistle in the wilderness carries 10x further than a shout or scream, and doesn’t wear down with use. Instruct kids to blow their whistle in blasts of three if lost.

2. Plastic poncho

Is an expensive jacket better protection than a dollar store poncho? Sure, but chances are, your kid won’t want to bring it along on a hot summer day. A plastic poncho fits down to the size of a fist (or smaller) and weighs almost nothing. When needed, it retains body heat well.

3. Glow stick

Grab a cheap glow stick and put it in your kid’s kit. Glow sticks don’t require any batteries, and will give off light in 360 degree direction. A glow stick will last 12 hours, getting  a kid through a night if necessary.

4. Bandana

Search and Rescue volunteers are trained to look for anything out of the element when searching in the wilderness. Therefore, a bright color, such as neon green or yellow, will stand out and alert searchers to the presence of a person. Instruct kids to hang their bandana on a tree limb, wearing it on their head, or spread it out in the open. Alternative item: a used or blank music CD or DVD can be used as a cheap reflecting device, often seen by spotters in helicopters.

5. Non-perishable snack

Why not water? Because for almost any hike or outdoor excursion, parents have already thought to pack a water bottle for their child. In addition to water, a non-perishable snack is cheap and light to pack. We keep a Nature’s Valley granola bar in each of our kids’ packs. Power Bars or other energy bars last a long time, too. Alternative: a bouillon cube.

99% of the time, kids are completely safe in the wilderness. But for piece of mind, the above items in your kid’s pack will go a long way. For more information on kids’ wilderness safety, check out the Lost But Found Search and Rescue program I’ve been a part of.


How to plan your Disney Vacation with FastPass+

We have written extensively about enjoying Disney parks using FastPass. Is all this advice out the window now that Disney has introduced FastPass+ and Disney Magic Bands? The short answer: maybe. The game certainly has changed.

How to plan your Disney vacation using FastPass+ and why it will make touring Disney parks easier than ever for those who dislike planning (but harder for those who do):

fastpass-+-in-Disney-parks

Step 1: Know what’s included in your FastPass+ options

If you’ve been in a Disney park in the last year and have paid attention, you’ll have seen gradual changes to the current FastPass system, starting with FastPass options to nighttime entertainment, and the arrival of new Mickey ear-sporting Magic Band kiosks. The new Magic Bands utilized by Disney use RFID technology, and hold your park ticket, room key, dining plan, dining reservations, Fastpass + reservations and much more. Say goodbye to Key to the World (KTTW) cards. The band ‘holds’ your FastPass reservations (up to three per day, per park, per user).

More than double the current FastPass attractions are offered with FastPass+, as well as reserved seating for shows, parades, and dining reservations. FastPass+ is available for ALL Disney guests, not just those staying on-site. (Disney hotel guests can make FastPass+ reservations up to 60 days in advance, however.) What does this mean for your park touring strategy? You may want to consider making FastPass+ reservations for several attractions that have not previously been included in the traditional FastPass list. Then, hit the traditionally popular rides at the very start of your day, knowing you have reservations for those rides that fill up after park-goers cross the ‘top’ experiences off their lists.

disney-magic-band

The number of FastPass+ reservations per guest per day per park varies slightly depending on crowds and season, but is generally 3-4. While this number might mirror the number of traditional FASTPASS tickets an average guest might secure during a day, it’s less than that which a savvy guest (willing to do the legwork across the park) has gotten in the past. That said, the new FastPass+ reservations do include evening entertainment options and meet-and-greets not previously available.

Step 2: Make your FastPass reservations online before you arrive

As a Type A Disney planner, I’m giddy about the ability to pre-reserve FastPasses! If you’re not a planner, and now groaning about this development, take heart: Disney makes it easy to make FastPass+ reservations, even if you don’t like to ‘map out’ your day. When you get your park tickets (or hotel reservations), you’ll be prompted to select your Magic Bands (and colors), assign them to your family members, and start making FastPass+ reservations. As soon as you designate a park and select your attractions, the site will automatically suggest the best order in which to schedule your FastPasses, utilizing a park map and known parade and entertainment schedules. A planning nut like me would have done this anyway, but I realize I’m in the vast minority!

And if you decide to change your plans on the fly while at Disney, it’s easy to alter your FastPass+ reservations from the My Disney Experience App. You can make new reservations, opting for the ‘earliest time available’ feature, or skip it altogether. Even I realize that plans do change!

Step 3: Make sure you have the FastPass+ app downloaded on your smart phone

disney-magic-bands
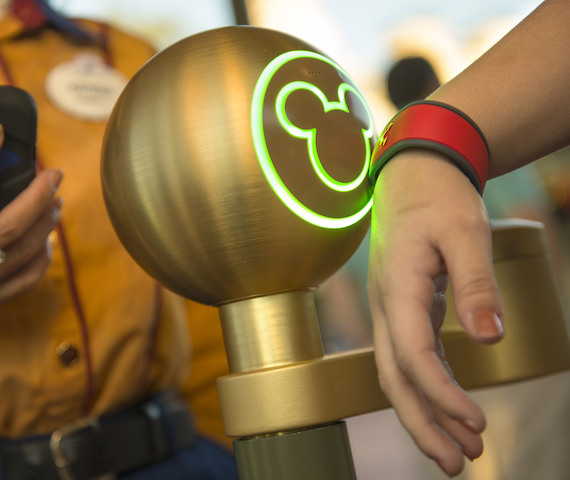
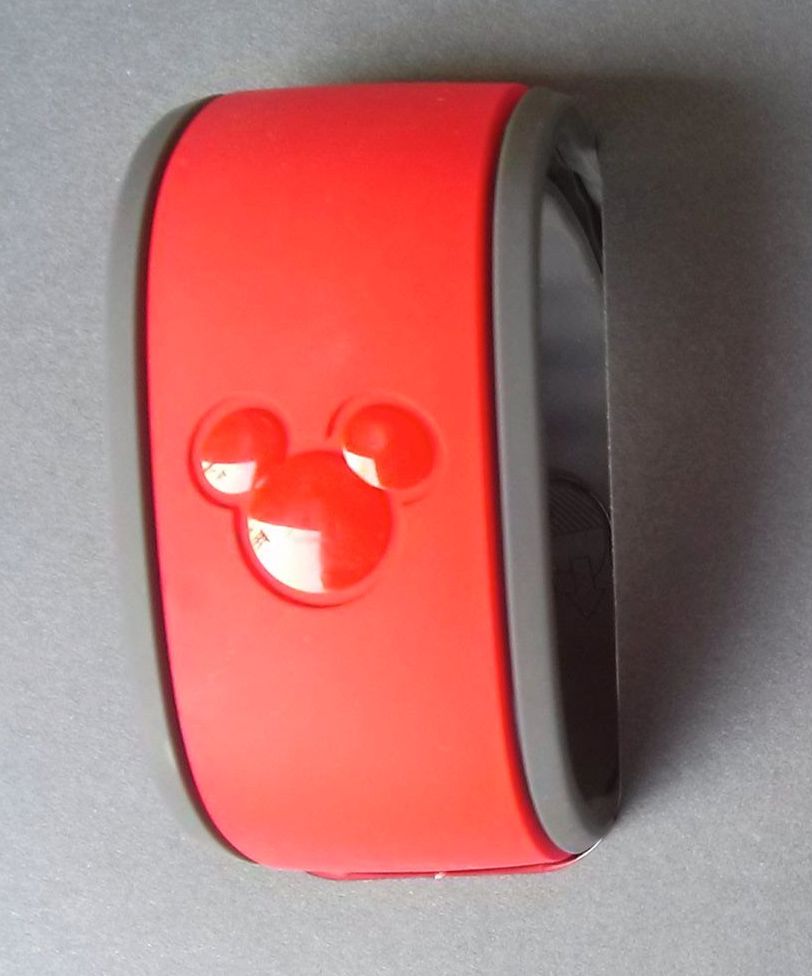
This is the easiest step, but crucial. Download the My Disney Experience App, so you’re ready to make any necessary changes to your FastPass+ schedule. If you don’t make changes, no need to check the app every time you arrive at a FastPass line: the new kiosks allow you to simply touch your Mickey ears on your Magic Band to the Mickey ears on the kiosk. Yep, it’s pretty cute.

So, how will this change the way you currently plan your Disney park day?

Here’s how I see it: extensive advanced planning will only make you more efficient in the parks and more prepared for your day. The bad news: mega planners who used to secure 6-8 FASTPASSES per day will now be limited. The good news: My old strategies for obtaining FASTPASSES throughout the day included a lot of trekking back and forth through the parks, which will now be eliminated. Families will be able to arrive at the park of their choice and virtually have three passes in their pockets, instead of the traditional none.

Because families are currently limited to three FastPass+ reservations per person (and times cannot overlap), here’s my strategy in a nutshell: 1. get to the park early, 2. ride stand-by before the park fills up, 3. have FastPass+ reservations for the afternoon, allowing for a relaxed day. Now you can use the rest of your time discovering unique things to do at DisneyWorld.

For a full play-by-play of the FastPass+ reservation process, including screen captures to illustrate the process, check out this post.

Ready to travel? Sign up for our FREE subscription list and receive an air travel and road trip ‘cheat sheet’

Questions I have been asked:

Can I still use traditional FastPass kiosks using my Key to the World card? 

The answer is, sometimes. Traditional FastPass kiosks are being phased out, and Magic Bands are replacing KTTW cards. If your Disney hotel still issues you a KTTW card (as I’ve heard some are still doing), you may have the option of using both FastPass methods. However, since the vast majority of users get 3 or fewer FastPass tickets per person per park, you’re not likely to ‘need’ both. Better to get used to the new system. If you really, really want a card or ticket to put into the kiosks, you can obtain the paper ticket type by buying admission to the parks at Downtown Disney locations or online.

Can individual members of my family reserve FastPasses to different attractions?

Of course! Just like with traditional FastPass, each Magic Band is entitled to three reservations per park, and is not tied to family members. In your park touring plan, take into account instances in which kids of various ages will want to tour separate attractions, and reserve FastPasses accordingly.

What if we’re park hopping?

Well, my answer to families wanting to park hop is usually, ‘don’t’. I advice not park hopping in most instances, the exceptions being to see a show or dine in a different park in the evening. If this is your situation, my advice is to arrive at your first park early, ride stand-by, and make your FastPass+ reservations (including the one for your entertainment or dinner) at the second park. FastPasses are at their most valuable in the afternoon, anyway.

Learn more about FastPass+ and My Magic here! And then get more DisneyWorld secrets!

How to plan your Disney vacation with FastPass+

Photo credit: Amy Whitley and Walt Disney World Resorts.


Trips to Ireland with kids: tips for exploring Dublin, Cork, and Galway

Our Pit Stops for Kids international travel tips section is growing! Have you noticed? While the bulk of our travel focus remains on US and Canadian destinations, we encourage families to expand to international travel as well. Trips to Ireland with kids is often recommended because, in our experience, Ireland is one of the most accessible countries to visit with kids, and an easy place to start your international travel journey.

ireland with kids

In this post, we offer general tips for travel through some of the most popular destinations in Ireland–Dublin, Cork, and Galway–in typical Pit Stops for Kids’ fashion…by road trip!

Whether you’re a lover of the island or you’re a complete newbie, taking your children for an Irish adventure will be incredibly rewarding. Rather than choosing to stay static in one place, consider renting a car and exploring as much as possible – that way, your kids won’t get bored with a city break and they’ll have plenty of experiences along the way.

For example, start your journey in Dublin, drive down the coast to Cork and finish off on the west coast at one of the hotels in Galway. Incorporate plenty of child-friendly activities in your itinerary as well as those that the grownups want to do – that way, everyone in your party will be happy! We love that Ireland is filled with outdoor splendor in the form of hikes, caves, and castles…kids and adults enjoy the history and beauty, and kids get plenty of exercise.

If you chose to start your road trip in Dublin, book a couple of nights in your first hotel rather than feeling like you’ve barely seen the city. While much of a city break focuses around adults and their interests, you’d be surprised at how much the Irish capital has to offer for little ones too. From exploring Dublin Castle and all its medieval delights to Dublin Zoo, located inside the massive Phoenix Park, youngsters will be happy with a couple of days here before heading off towards Cork.

The great thing about driving along the coast is there are always places to stop a while to absorb the beauty of what’s around you. Make sure you pack travel bags with plenty of goodies for your children to play with and snack on, to keep them occupied on the drive. Games consoles, coloring books and portable DVD players are ideal to keep them quiet! Think of some family games for the drive too – there’s nothing with a traditional round of I-Spy!

During your stay in Cork, stop by the Fota Wildlife Park, found on Fota Island – the only wildlife park in the country and well worth a visit to see the animals roam free.

Once you’ve made your way around the southern tip of Ireland, you’re on the home stretch towards County Galway, home to the incredible Connemara National Park and the Aran Islands, great trips with plenty of hiking for active kids. Bring your hiking or walking shoes!

While the drive between these cities will take less than three hours per leg of the journey, what can be found in between adds to the holiday even more. A week exploring as much as you can will be ideal, although if you want to see as much as possible, perhaps a fortnight would be better.

Photo credit.

How to preserve vacation memories without buying expensive souvenirs

No matter where you go on a family vacation, your kids will be tempted by expensive souvenirs. My own son’s weakness: plush animals of any sort. Every time we visit a city attraction, museum, or state landmark, he wants one. Not only are these souvenirs expensive, but they never fit in our luggage and he rarely remembers where he got them once we return home. For these reasons, we limit souvenir purchases while traveling, but do value the importance of having mementos by which to remember important and fun trips.

preserve vacation memories

The following meaningful but cheap souvenir ideas will be cherished by your kids for years following a trip, but cost far less than gift shop purchases:

Personalized photo albums:

Soft-cover, self-loading photo albums can be made quickly and easily on photo share sites, and usually cost less than $20. After major family trips, I make one for each of my kids, complete with personalized commentary and photos they took themselves on our travels. These albums sit on their bookshelves with other picture books and keepsakes, and come out regularly to be ‘read’ at bedtime.

Video logs:

As my kids have gotten older, they’ve enjoyed entertaining themselves on longer car and plane rides by recording personal video diaries on our iPad or on their iPods. Using PhotoBooth or iVideo, they simply record themselves talking about the day’s adventures. Sometimes they even interview each other. Not only do they enjoy this video process better than keeping a written journal, but they can use fun filters to make them as silly as they’d like.

Calendars and posters:

Instead of buying gift shop posters and calendars that will wrinkle and tear on the return travels home, I create our own posters and photo collages on photo sites for my kids’ rooms. Decorating their walls are posters of our national park trips, ski trips, and backpacking adventures. I also make calendars of our travel photos for grandparents and other relatives to keep them appraised of our adventures.

Stickers, magnets, and other collectible travel momentos:

You have to buy something in that shiny gift shop, right?! We have started collections of refrigerator magnets that we add to whenever we are in a new location, and I allow my kids to buy bumper sticker-style stickers of various locations to stick on their reusable water bottles. Not only do they have unique water bottles they won’t lose at sports practice later on, but they drink more water during the vacation as well.

cheap souvenir idea

If you need help getting started, great deals on Vistaprint products can be found for photo souvenirs, and video logs can be downloaded and burned to CDs or shared onto kids’ iPods or other electronic devices. Glass jars for storing collectibles can be found for cheap at craft stores locally.

Knowing your ski ability level: how to interpret ski slope ratings for your family

This fun infographic says it all, and if you go on a family ski vacation, you’ll see these universal ski slope ratings no matter where you go:


How to know your (and your kids’) ski ability level:

Get out there and ski! There are many ways to gauge a skier’s level (we recommending taking family lessons when visiting major ski resorts), but if you find yourself free-skiing with your kids, start with beginner runs but don’t be afraid to push yourself to steeper terrain.

Green means go: Green circle beginner runs are great for everyone, from the new skiers in your family to the little shredders. Green runs are always groomed, and often take the form of ‘cat tracks’ or ‘roads’ that kids find very fun to navigate. Kids with higher ability levels will enjoy veering off the trail to find fresh powder or small jumps, but keep the speed down: green runs are meant for beginners and more cautious skiers and snowboarders.

Blue means explore: We say that blue square intermediate runs foster exploration because once you’ve graduated beyond green runs, the terrain gets more exciting! Blue runs can take many forms, including long groomers, more cat tracks, and even some gladed (tree-lined) skiing. Blue runs are almost always available from the top of even the highest chairs, meaning you or your kids can now navigate the whole peak!

Black means expert: No doubt about it, black diamond runs should be respected. Like blue runs, black runs can take many forms, and vary in difficulty. They can contain moguls, bowls, powder, and deep ruts, and can be harder to navigate in poor conditions, such as ice or fog. Don’t be afraid to try them, however; my kids all remember their first black diamond runs!

More than one factor goes into a ski slope rating:

Bear in mind that steepness is not the only criteria that goes into a ski slope rating. Bumps and moguls (which can alter overnight), sharp turns, and bowls with ever-changing conditions also constitute higher ratings. Even once a run has been labeled, look twice before attempting it: visibility, snow conditions, and weather all effect a run’s difficulty on any given day.

Study the resort trail map before hitting the slopes:

My kids love looking over the trail map, and I admit I’m guilty of pouring over it pre-vacation, too. While families are not going to memorize every run, it’s nice to find the lifts that offer the most selection of runs in the level of your choice, or identify lifts that offer a green and blue run adjacent to one another, should you have a beginner and an intermediate skier cruising along together.

This post was written in conjunction with my partnership with Mountain Reservations as a Mountain Ambassador.

Dining in Whistler Village: where to eat on a budget

A walk through Whistler Village‘s famed Village Stroll will take families past plenty of dining options, but a perusal of menus will show that most fall in the mid-to fine dining category. While families vacationing in Whistler should plan for at least one culinary night out, for the rest of the time, it is possible to dine in Whistler on a budget. Below, find our top tips for saving on dining at Whistler.

Whistler Village

1. Make breakfast your meal out.

Whistler Village is full of great breakfast dining options, and prices are almost always lower during this first meal of the day. Instead of eating out for dinner, we like to splurge on breakfast at Crepes Montagne or Hot Buns Bakery, both located in the Whistler Village. If you’re anxious to hit the slopes, consider buying a First Tracks ticket for Whistler Blackcomb and dining at a mid-mountain buffet before being first to hit the powder or corduroy.

Mallard Lounge Fairmont Chateau Whistler

2. Make Apres Ski a meal.

One of my favorite parts of the ski day is actually apres ski, when my family and I relax within the fun ambiance of a ski village restaurant or bar. At many Whistler Village and Upper Village locations, a few appetizers and drinks for the family can feed everyone, for less than the cost of a sit-down dinner. Our favorite apres ski locations includes Earl’s in the village and the Mallard Lounge in the Fairmont Chateau in the Upper Village.

3. Look for family chain restaurants.

While exploring a new place, we like to patronize unique, local dining spots, but sometimes the budget simply doesn’t allow it. In Whistler Village, families can find a White Spot and an Old Spaghetti Station. We ate at the latter during our Whistler vacation for under $60 for a family of five.

4. Leave the village behind.

Outside the Whistler Village, numerous family restaurants are located within 2 km. Whether it’s worth it to you to use your car, only you can decide. For us, we loved the ease of never driving during our Whistler vacation, so we didn’t venture outside the villages.

mid-mountain lodge dining whistler

5. Order kids meals on-mountain.

After ordering kids meals at Rendezvous Lodge, Blackcomb’s mid-mountain lodge, for my two kids under age 12, a staff member told me anyone can order these, regardless of age. For $8.99, you get an entree (limited to kid-friendly selections), two healthy snacks (such as yogurt or edimeme), and a child sized drink. A kids meal would have been more than enough food for even the adults in our group.

For a splurge, consider one of the many venues in Whistler Blackcomb offering fondue dinners to share with the family!

Whistler Village on Dwellable